Pro Tools is a DAW that offers a lot (if not most) of possibilities when it comes to mixing. Today we’ll talk about how to fix clipping audio in Pro Tools.
To succeed as a producer, you must understand how aural clipping works because clipping too harshly can destroy the audience’s listening experience and the audio quality. However, with some education and practice, you can learn to prevent clipping and even use a gentle form to your advantage.
Even if you take every measure to avoid it, there will be times when you have to work with audio that has been clipped. There are times when having your connection cut off is desirable. Clipping can create well-known audio effects like saturation, amplification, and distortion when used consciously.
An alternative to the rugged peaks of conventional clipping, a gentle clip has been used to enhance the tonal quality of a blend since the 1980s. However, assuming that a clean vocal or instrument file is necessary, we will spend the rest of this article discusses various methods for restoring clipped audio in Pro Tools and elsewhere.
Below, we discuss how to solve this problem.
How to Fix Clipping Audio in Pro Tools
You can solve audio clipping in Pro Tools in two ways, a pre-recording stage where we ensure we send the DAW the correct, clean, and flawless signal, and the stage where we may have failed to record correctly and solve this problem in post-recording.
The term “clipping” describes what happens when a signal’s intensity exceeds the power limit of the device playing it. The transmission will become warped and distorted due to excessive power.
When a system cannot handle an audio signal’s sudden increase or decrease in volume, it will “clip” the signal’s margins. This weakens the mix and results in a decrease in audio quality.
How to Fix Clipping Audio in Pro Tools In Pre Recording Stage?
In the Pre Recording stage, we ensure that the relationship between the environment in which we record audio, the interface, and Pro Tools transmit their audio signals in good and healthy parameters so that these Audio Clipping are as reduced as possible, and, why not, non-existent.
- Check Input Levels
To avoid being clipped, start with the most basic and apparent precautions. You may have the input volume set too high when recording an instrument or voice. The widespread belief that this is the way to get a good signal makes it a prevalent practice.
People have a general guideline of not allowing their dry recording signal below -6 dB. If you use a remedy like compression or overdrive, there will be enough gain before clipping.

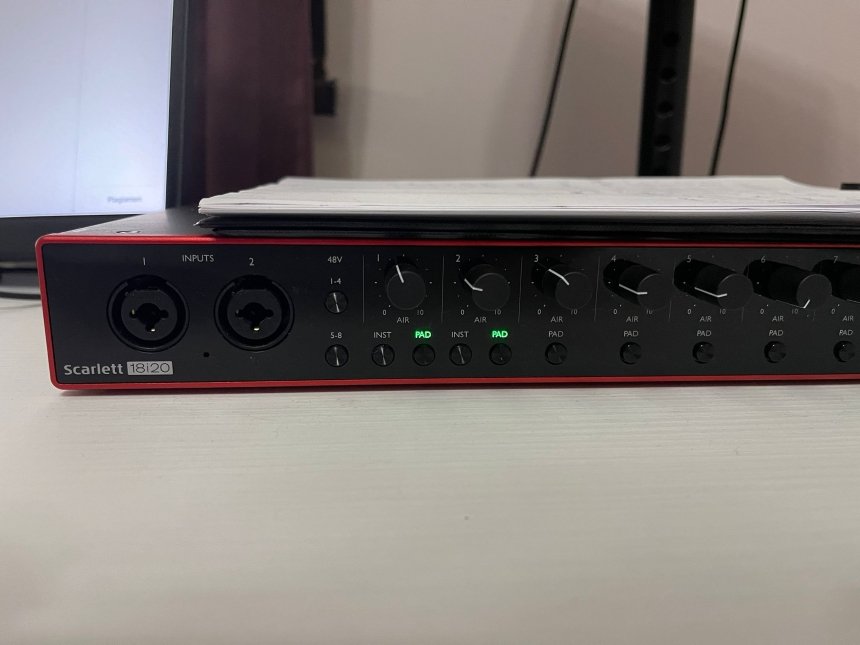
- Pad Button On Interface
If you’re using an input channel on your interface, preamp, or mixing console, you might find that it has a padding feature built right in. Padding serves as a limiter by filtering out excessively loud or jarring levels before they reach the signal’s receiver. Padding is especially helpful when capturing sounds with a microphone that are extremely dynamic, like drums or voices.
- Make Sure To Monitor Correctly
Varying tracking levels are a common cause of clipping in the recording process. To compensate for the poor monitoring volume, some engineers and producers will boost the gain on the source material.
How to Fix Clipping Audio in Pro Tools In Post Recording Stage?
In the Post Recording stage, we assume that we still need to give the preceding stage its due consideration and that we should be able to address the problem within Pro Tools. Here, we can utilize both the built-in and third-party modules designed specifically to address the issue at hand.
Limiter
As its name implies, a limiter reduces the audio’s quantity reaching the recording device. When an audio signal is sent through a limiter, the volume is capped once it rises above a specified level. This will stop an audio clip from occurring if the input signal becomes too powerful.
Limiter plugins are standard fare in the audio recording toolkits of most DAWs. To restrict the maximum volume, a limiter allows you to specify a value in decibels (dB). Depending on the software’s complexity, you can adjust the volume of individual stereo channels or inputs.
This can be very helpful if you’re filming a series of interviews with people who all have their own individual hardware and, thus, volume settings. In addition to preventing audio clipping, setting the limiter for each topic also helps to achieve a more evenly balanced mix.
Setting your limiter to the right setting will ensure that the recorded audio signal sounds good and doesn’t get clipped. The music can become “flat” and clinical when a limiter is used excessively. You have to strike a balance. Since everyone has a slightly different pair of speakers and headphones, there is no universally “correct” limiter setting. To minimize audio clipping, however, only a little effort is needed to play around with the settings.
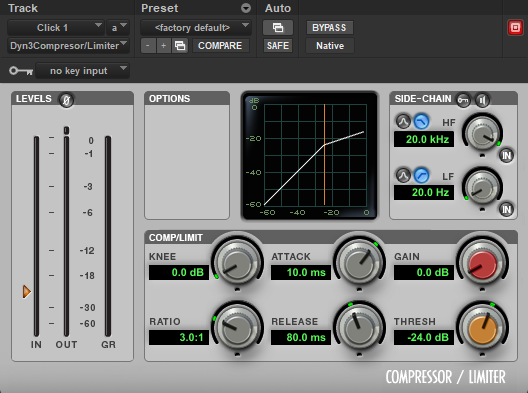
Compressor
One additional method to prevent audio distortion is to use a compressor. By reducing the spread between the loudest and quietest points in the incoming signal, a compressor makes the signal easier to mix. This implies that the relative volumes of all the signal’s constituents are much more aligned. You can reduce the likelihood of audio clipping by reducing the number of peaks and dips in your recording.
Compression reduces the signal’s dynamic range, making it more manageable. The signal’s dynamic range affects not only its volume but also its tone. You can adjust the volume by playing with the compressor’s attack and release times.
The compressor can determine an appropriate compression level by referring to the ratio. Several 8:1 would mean that every 8 decibels above the compression limit would only be tolerated by one decibel. A good range ranges from 1:1 to 25:1, though the exact value you settle on will rely on the recorded audio.
If you turn it up too high, the dynamic range might be distorted, and the volume won’t be loud enough, but if you turn it down too far, it might not change the volume.
In Pro Tools, a compressor is installed, so you can quickly experiment with different levels to discover what works best with your recording and prevents clipping. Compressors and limiters are complementary effects that you can use together.
Applying both to your audio will lessen the likelihood of clipping, and finding a happy medium between the two will help you achieve the most natural and vibrant sound. It’s like adjusting a limiter; there is no ideal level. You’ll need to experiment with different configurations before settling on one that suits your needs.
De-clipper
While limiters are great for avoiding clipping in the first place, what happens if you listen back to your music and notice that it has already clipped? A de-clipper is useful in this situation.
Pro Tools include de-clippers as part of their standard functions for restoring clipped audio. Out of the box, these can make an impact and help clean up the audio. However, there are times when the capabilities of the native features fall short, and plugins are available that do the work more effectively.
You can find a variety of de-clipper plugins that are made to fix audio that you cut during recording. A plugin so sophisticated that it can recreate clipped sections of audio waveforms is unimaginable. It also produces music that sounds more organic than what you’d get from some de-clipping programs. De-clippers are a fantastic tool for rescuing otherwise unusable recordings by restoring audio that has been cut.
EQ
You can use reductive EQ to smooth out the frequency response of a stream with unwanted peaks. You should be able to easily identify problem areas in your equalizer when applied to a clipping recording. Scooping out the upper end of a signal, as in the case of a boomy kick or bass instrument’s low-mid peak, can result in a weaker overall signal.

Test Recording
As with many other forms of audio quality, avoidance is preferable to treatment. It will simplify your life if you can prevent audio from being clipped before it is captured. Doing some practice recordings before diving in is a simple method.
If you believe everything is set up correctly, you can record yourself playing an instrument or singing. The level meters in your digital audio workstation will allow you to monitor your recording levels. Maintaining a number just below the red zone, in the green, is the goal.
This provides a graphic representation of the situation; if your levels stay in the green, everything is fine, but clipping is imminent if they go into the red.
Review your practice video after you’ve finished it. You have located the sweet spot if there is no audible distortion at that volume. If there are unwanted distortions, consider turning down the input levels. It would help if you kept doing this until you had a robust signal but no clipping.
When doing a dry run of a recording session, it’s crucial to project your voice, instrument, etc., as loudly as possible to simulate the final product. There’s no point in practicing with a whispered tape if you’re going to blow everyone away with your booming voice in the real deal. You want your test recording to sound as close as feasible to the real thing before you take it live.
Backup Track
Having a backup is a fantastic idea. If you’ve ever used a computer, you know how easy it is to lose data and other information. A backup is a basic but essential precaution to take against this. In the same way, the same principle holds when documenting sound.
One at a level you believe will work, and another at a lower level, should be recorded whenever you are working with audio. You can use the other video as a backup if the first one needs to come out quite right.
What Exactly Is Audio Clipping, And How To Recognize It?
Clipping occurs when the volume of an audio signal is increased past the point where it still sounds acceptable, and this can happen in both analog and digital systems. Like the instrument effects of the same name, this is also known as “overdrive,” leading to distortion and poor sound quality.
We are limited to a specific set of expected values to record an acoustic signal in digital audio format. Since these are 16-bit WAV files, the highest frequency you can record is 32,767 Hz. This potential damage is when our input reaches 0dBFS on digital measurement.
In the days of analog audio recordings, we used distortion to make the amp’s output exceed its limits, creating an edgy and amazing sound. Blues musicians from the past would crank their amplifiers to such high volumes that the internal circuits could no longer produce the sound.
Despite its impracticality, the high-volume amp-clipping effect has become a staple of contemporary experimental music. Several distortion instruments and adapters exist to simulate this classic tone. However, only some enjoy it or find it helpful for their projects; many see it as a problem they’d like to fix.
Once we pass the maximum sample size, all the extra information about the input signal is gone. We have exhausted the possible combinations of ones and zeros to record the input signal. The waves of clipping amplitude give rise to the word “clipping” because of their appearance.
Clipping eliminates the peaks and valleys of a sinusoidal waveform, leaving only its consistent level in a rectangular shape. Playing this at this height through your speakers creates a synthetic, abrupt moment that sounds terrible and can even harm your speakers.
What Causes Audio Clipping?
Clipping indicates that the recording’s frequency content severely overwhelms the stereo interface or recording equipment. If you did this, you have gone past the headroom, or the safe distance between audio spikes, as well as the 0 dBFS maximum that your recording equipment can handle.
There needs to be more vertical space to accommodate your highest peak volumes. On the other hand, if your input levels are set a tad too high, you may likely cut the vast majority of the audio peaks. This could cause digital artifacts to appear.
Any spot in your audio’s transmission path is vulnerable to clipping. You could use analog clipping to cause spikes in the mics, amplifier, analog-to-digital multilevel converters, digitally in your system, compressor, and loudspeakers. Digital audio clipping can occur during the format conversion, in a plugin, in any program, or at the primary outputs.
Tips for Fixing Audio Clipping
- Microphone Technique
Consistency is often difficult to maintain when recording music or speech. The tone and volume of people’s speech can differ. Because of this, it can be challenging to keep sound from being clipped. However, one rule of thumb to avoid audio clipping is to keep the same spacing between the microphone and the speaker.
Since this is how we normally act, it can be tempting to go back and forth in time when singing or conversing. Keeping the mic at the same distance from the speaker being captured will make it much simpler to maintain a steady volume level. In turn, this greatly reduces the possibility of experiencing aural clipping.
- Check All Your Equipment
Clipping most commonly occurs at the recording device, such as the microphone or instrument, but it can also appear elsewhere. Clipping can be caused by any component in a recording chain, including mics, audio interfaces, amplifiers, software plugins, and more.
Clipping will occur if the amplification is too high on even one of the recorded sources. Most modern electronics include a level or gain meter. Many audio connections, for instance, have LED indicators that light up if the volume is too high.
The majority of programs also include a visual sign of progress. Verify that the numbers are still in the green by going through each. However, this type of indicator may only be standard on some recording devices. Small microphone preamps can readily overload a signal if you aren’t paying attention.
Furthermore, you can easily overdrive an amplifier’s output if its gain is not adjusted appropriately. It’s important to double-check all of the devices in your network to ensure that no one amplifies the signal too much, resulting in clipping.
- Potential Damage
Speakers can be damaged by clipped audio as well. Due to their physical nature, you can damage speakers if you play back music that has been clipped. The speaker will vibrate and move regularly and smoothly as intended by the manufacturer when normal sound waves approach.
However, the jarring nature of truncated audio is the issue’s root. It doesn’t matter if you’re using headphones or an external speaker, tweeters, woofers, or a middle speaker; this issue can arise with any of them. The same thing can happen to guitar amps and bass amps.
- Overheating
Overheating can also be caused by abruptly cutting off an auditory signal. The voltage applied to a speaker determines how much sound it can generate. More power means more heat, so your electronics are more likely to boil. Occasionally clipping won’t cause noticeable bodily harm, but consistently clipping or listening to extremely clipped audio can.
Many speakers will come with a limiter or protection circuit to prevent the kind of harm that can be caused by clipping. However, the safest bet is to keep your audio system away from cutting in the first place.
Conclusion
Clipped audio not only sounds terrible when playing back recordings, but it can also cause permanent harm to your recording gear. Repairing a damaged production line can be lengthy, even for an experienced worker. But if you take your time with the setup, you can minimize clipping to a minimum. In addition, restoring music that you accidentally cut off is a simple process, especially in Pro Tools.

Integraudio is a audio-focused blog that explores everything from VST plugins and studio hardware to practical guides, tips, and tutorials on Spotify, AirPods, podcasting, Discord, and beyond.