
Are you tired of hearing plosives in Pro Tools and need to know how to turn them down? Today, we’ll talk about how to fix plosives in Pro Tools – step by step.
We’ve all encountered this problem, whether editing a podcast or dealing with music production. Whether you use Pro Tools or any other DAW, they will happen regardless, so it is more than necessary to be prepared because these sounds, which we call ”Plosives,” are quite strange. Even if they are not noticeable in real life, a microphone can capture these sounds, which can negatively alter the sound.
The definition of a plosive is a consonant sound produced by briefly occluding the airway before abruptly releasing it. A plosive is a distortion introduced into an audio recording when the microphone’s diaphragm records a strong burst of air from the lips.
Common examples include the characters p (hence the alternative name “p-pops”), b, d, t, and k. Place your hand in front of your mouth and repeat aloud: “Popular podcasts don’t have plosive problems.” You’ll sense little blasts of air on your hand as you do so.
A pop filter can block these gusts of wind from reaching the microphone during a voice recording. Sometimes, however, recording conditions are less than ideal, so knowing how to deal with plosives when they occur is useful.
Let’s see how to fix plosive sounds in Pro Tools.
How to Fix Plosives in Pro Tools?
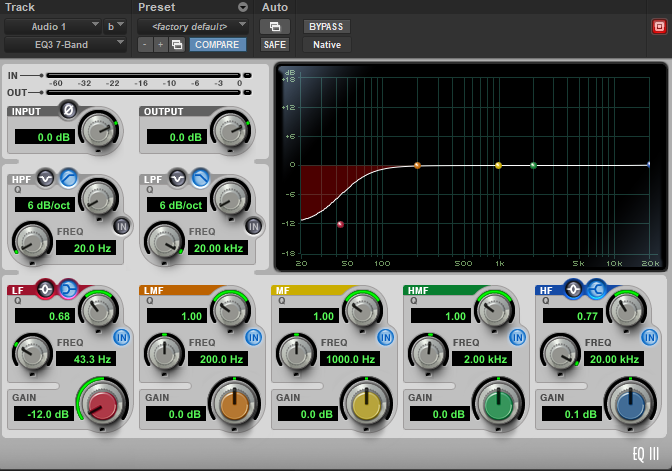
These plosives can be tamed by employing a low cut or high pass filter with a frequency of around 120 Hz, eliminating most of the annoyance because a plosive is usually just a disturbance in the low end of the spectrum because the air was sucked into the microphone at high speed.
However, doing so can adversely affect the quality of the voice, and plosives can produce distortion in addition to an increase in low frequencies. Two different approaches can be taken to get rid of these unwanted noises. To begin, we need to realize that this entire process is a flow from the body’s inside to the waves displayed in Pro Tools.
These two methods cover what we can do to correct the sounds before we record them, as well as what we can do in Pro Tools to get rid of the sounds entirely (if we cannot improve the first portion of the process).
How To Prevent Plosives Before Recording In Pro Tools?
The most important thing to consider before recording in Pro Tools to reduce plosives is to correct our singing style and add a Pop Shield; maybe the Off-Axis technique in terms of microphone placement can be useful, but also the placement of the vocalist.
In these ways, it will significantly reduce the time of plosives in Pro Tools, but it should also be taken into account that these techniques or tools can cause unnatural factors sometimes, but if needed, they are more than useful.
Pop Filters
Using a pop filter is the quickest and easiest method to reduce the number of plosives on your recording. A fabric mesh barrier, known as a “pop filter,” is placed between the singer and the microphone to prevent unwanted noise.
The vocalist’s increased airflow is diverted from the microphone by the pop filter whenever they strike a plosive sound, preventing the plosive from being recorded while the rest of the sound is. Because pop filters are so ubiquitous, they are frequently given away free of charge when you purchase a microphone.
But getting one should be a top priority if you do not possess one. Pop filters come in a variety of styles. Some are basic, coming as a small circle of material with a gooseneck to keep it in position. These are the most typical ones that occur.
On the other hand, wraparound pop filters cover the complete microphone and give it a more high-end and stylish appearance. However, the type of pop filter you employ is the same. Both methods will result in the same reduction of plosives in speech. Those of you who don’t already have one should go out and buy one immediately.

Microphone Off-axis
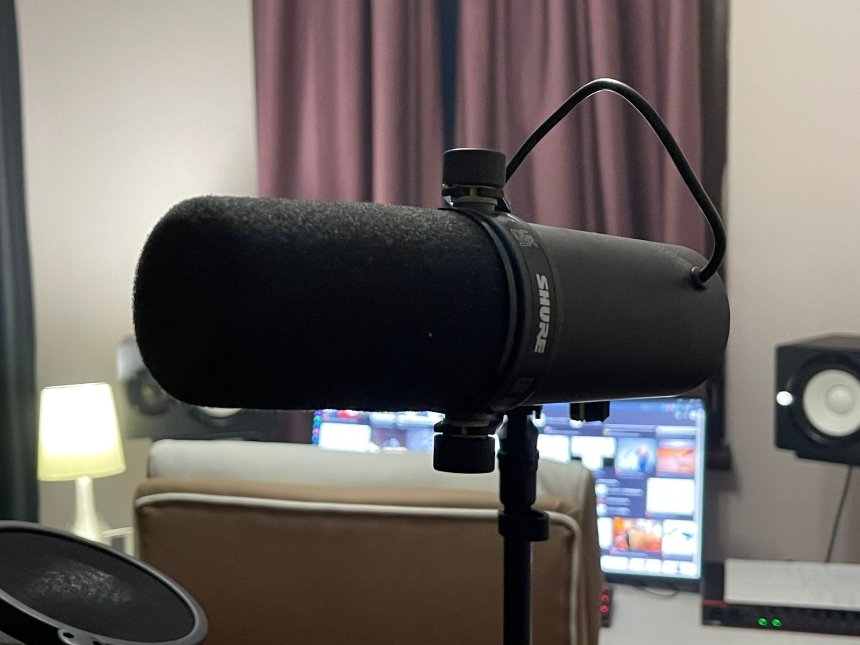
One easy solution to plosive sounds is to capture them with an off-axis microphone. This is yet another method for protecting the microphone diaphragm from overly forceful air blasts produced by plosives. By angling the mic so that air flows around it, we lessen the likelihood that the diaphragm will take up plosive sounds.
Your vocalist can also benefit from a small head tilt. The quantity of air that touches the diaphragm can also be decreased by having the person tilt their head away from the microphone. A wide microphone is an option worth thinking about as well.
Omnidirectional mics are much more difficult to oversample, so they record much less plosive noises. The reason for this is that a microphone’s diaphragm is only partially exposed to sound. Since that is the case, overloading becomes significantly more difficult.
This contrasts directional microphones, which can easily be overwhelmed because their entire diaphragms are subjected to sound. Some mics can be switched between omnidirectional and focused operation. Choose bidirectional whenever possible, and plosives will no longer be an issue.
Placement of Vocalist
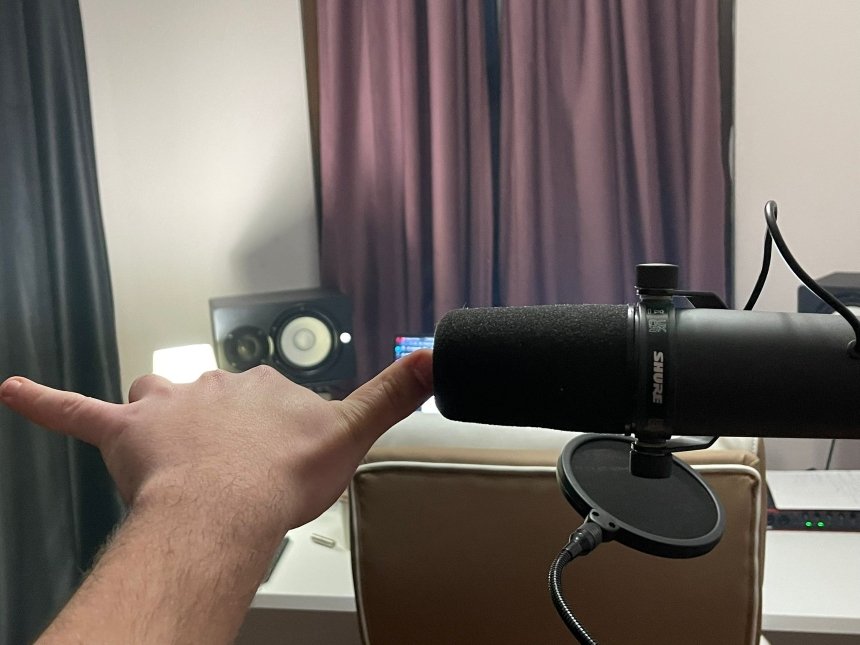
A microphone’s diaphragm produces a plosive sound when it is struck by air. The greater the distance between the singer and the microphone, the less air will reach the diaphragm during a plosive, and the less the plosive will be recorded. The key is to strike a balance.
To avoid picking up any plosives in a singer’s performance, they should be placed at a comfortable distance from the mic but close enough to guarantee a clear audio feed. A few inches can mean the difference between a plosive killing a take and a plosive scarcely being heard, so it’s best to do some vocal test recordings to figure out the best position for your vocalist.
With some experience, you can find the ideal spot for your audio and maintain that location for the duration of your project.
Correct Your Singing Technique
This calls for restraint when singing (ironic, since that’s precisely when you want to be free of all inhibitions and let your emotions flow freely). Still, with enough effort, it’s doable. Let the “p” and “b” noises slide out of your mouth instead of bursting out.
Avoid pursing your lips and letting air build up in your mouth. Singing plosives more subtly is as easy as moving your head to the side. You won’t believe how simple it is to control pops once you master this technique.
How To Fix Plosives After Recording In Pro Tools?
If you got to the point where maybe you didn’t want to add a Pop Filter or fix the singing technique, and the plosive sounds remained, you can use what Pro Tools offers us in terms of tools, but also special plugins designed to correct these problems.
Plugins
Pro Tools include post-production tools, such as effects and processing, to ease the burden of any remaining editing. However, using a third-party plugin like PopRemover can simplify removing plosives, and the effects will be much more impressive than those of the built-in tools.
To use PopRemover, select the section of your vocal containing the offending plosive, mark it in your DAW, and click the “Remove” button. The central knob can be turned to increase or decrease the intensity of the impact.
It’s possible to fine-tune the result by adjusting the low, mid, and high frequencies to suit your vocalist, but in most cases, the factory values will do just fine. There are both paid and open-source add-ons for handling plosives. It’s comforting to know that post-recording solutions are available to fix plosives if you couldn’t stop them during the recording process.
Low Shelf EQ Setting On Mic
A lowpass filter is a feature found on some mics. This is also available on some microphone preamps and audio devices and can greatly reduce the number of plosives captured in the first place. Sometimes, like with mics, audio interfaces, and preamp highpass filters, you only have to flip a switch.
Some providers may allow you to select or modify their frequency range. Choose a frequency and capture some examples to see which works best for you in removing plosives. However, this can change based on the vocalist and the recording setup. With some trial and error, you can narrow your options and settle on the one that works best with your infrastructure.

Ducking
If the plosive is at the start of a word, you can use the Fading Ducking technique, but if it’s in the center, you have two choices. A highpass filter can be applied to just the pop, which is effective if doing so does not alter the voice’s timbre. However, ducking presents two problems.
Firstly, if it were to be cut out of the sequence entirely, a crossfade would have to be added to smooth out the volume difference when entering or leaving the area. Some applications handle this mechanically, with the added convenience of setting a custom crossfade duration.
With automation, you can avoid level-change problems by programming a gradual fade in and fade out. Second, if the low-frequency energy that causes the pop also causes the low-level energy that causes the lower-level irritating low-frequency energy, then you have the same thing.
The issue can be fixed by “doubling down” on the noise, that is, by employing a combination of mild highpass filtering and mild gain reduction. It takes some work to get both settings just right, but in most cases, you won’t need to resort to such drastic repair, and you certainly won’t if you took care to ensure that the music was properly produced from the start!
Dynamic EQ
Dynamic equalization, which can be rapidly adjusted with an analyzer, is also useful for eliminating annoying plosives. The final product keeps the vocal tone constant during passages where plosives aren’t a problem and only reduces them when the dynamic band’s threshold is activated.
Equalization Low Roll-off
These EQ plugins work with your Pro Tools to improve the sound of plosives. Plosives are low-frequency sounds, so you can EQ them out of audio by cutting down on those frequencies. This allows you to tailor the volume reduction to a specific frequency range.
You can apply very targeted equalization to a specific part of the spectrum depending on the volume of the plosive you’re attempting to deal with. After doing so, you can use the outcome on a single plosive or the entire track if the issue persists.
There are plenty of EQs out there, both free and paid, so you don’t have to use the one that comes with your DAW if you don’t want to. This is also true of plugins intended to handle plosives. While external EQs may be necessary for other purposes, the built-in EQs of most DAWs will be adequate for handling plosives.
Fade-In
The worst of the pop happens at the start of a plosive, but the sound lingers after the initial occurrence. Separate the audio file before the plosive. Plosives are easy to spot because of their low frequency and extended waveforms.
By slicing the footage just before the pop and adding a fade-in, you can eliminate the pop and have great control over how much of the clip you want to keep.
With the blur, you can decide how much of the original intensity to retain. Adjusting the fade curve (linear, concave, or convex) and, if necessary, splitting halfway through the plosive to avoid the worst portion completely allows the volume to be finely tuned to meet the speaker’s needs. Even though it’s tedious, this is my go-to method for getting rid of bursts after the fact.

Highpass Filter
This last resort helps with extremely loud bangs when all else fails. Sometimes a highpass filter is necessary to remove significant pops from a recording, but doing so results in an unacceptable loss of low end in the vocal, making a fade impractical. To effectively cut the low frequencies without affecting the remainder of the vocal, apply a steep highpass filter to the pop only.,
The equalizer is handling only the pop, destroying the lows. Pro Tools’ ability to focus on a single occurrence, or “clip,” is highlighted.
Compare the original footage with the pop (bottom) and the clip after all the lows were trimmed, as indicated by the yellow outline. (top). You can also use a fade-in over the processed footage to eliminate any remaining sonic pizazz.
Reduce the Volume of Plosive
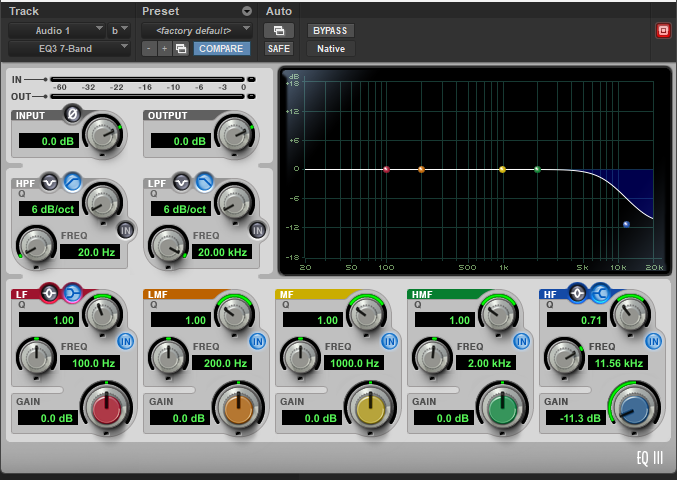
Reducing the plosive’s volume on the vocal recording is another method for dealing with them. While it won’t eliminate the plosive, it will make it blend in better with the rest of the recording and sound more “natural” in the process.
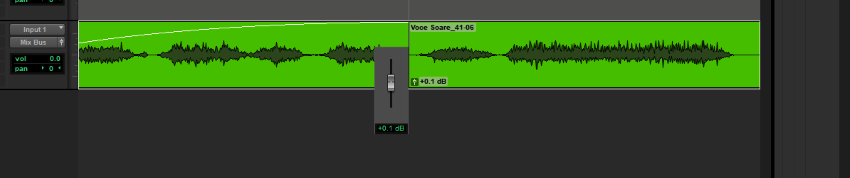
There are two methods for accomplishing this. It can be done either automatically or manually. With the help of automation, the cut can be made instantly and mechanically. Select the level automation tool in your Pro Tools and adjust the volume to drop off sharply just before a plosive.
This method allows for pinpoint accuracy in fine-tuning the plosive’s loudness alone. Automation is a type of non-destructive editing, so if you aren’t satisfied with the results, you can always go back and adjust the volume levels. Changing the level by hand works in the same way. Locate the offending plosive in your audio, select it, and lower its level using your Pro Tools gain or volume tool until you’re satisfied with the result.
If you make a mistake in Pro Tools, you can undo your last action until you’re satisfied with the result, but once you save and move on to other sections of your recording, you can’t go back. Before settling on a method, it’s a good idea to see what kind of modifying options you have in your DAW.
Conclusion
You have finally mastered the plosive, so that’s great. You are aware of how to prevent them by not capturing them at all, and you are also aware of how to eliminate sibilance and plosives through the use of equalization and volume automation if they do occur.
That settles it; there is no longer a need to be concerned about these terrible issues. Your tracks will turn out better, and once they hear the final mixes you’ve provided for them, your customers won’t have anything negative to say about you. Learning additional techniques for mixing voices, in addition to this one, will be of tremendous assistance.

The Integraudio Editorial Team consists of experienced music producers, audio engineers, and plugin enthusiasts dedicated to providing in-depth reviews and guides for music production software.