

If you’re a high-gain player, getting an excellent metal tone is crucial. Guitarists will take great measures to achieve the perfect metal sound and have many tools to do so. You can do much with the instrument and amp to get this sound.
There is a wide variety of metal tones, so pick the one you like best. For metal music, maximizing gain while maintaining precise balance is important. Consequently, a highly compressed and amplified sound may be necessary, but only sometimes.
It would help if you also had the bass midrange and were highly tuned to your preferences. It’s possible that you’d prefer a more subdued high and a more forceful bass—a thicker, meatier tone with more midrange to break through the crowd.
There are my tips for you:
To improve your metal sound, turn up the bass on your amp, switch to the bridge pickup on your instrument, and replace your amp’s gain knob with a distortion pedal. If you want better sustain without more feedback, upgrading to an electric guitar with active strings is a great option.
1. Raw Guitar Signal
For our purposes here, the primary question is whether or not our guitar is active or passive. The signal from an instrument with an active pickup is amplified before it is sent out through the output port. Moreover, the sound from active pickups tends to remain clearer even when the volume is turned up.
Additionally, some passive receivers tend to get muddy when the gain is cranked up. You must adjust your gain stages accordingly to make them function for metal. If you crank up your volume, your tone will sound clear, crisp, and brutal.
2. Finding the Optimal Gain Settings
Establishing an appropriate gain level is the initial stage. Cranking up the gain makes our instrument sound more aggressive, but there is such a thing as “too much.” If the gain is too high, your tone becomes unfocused and lacks impact. It would be best to reduce the gain to zero before you begin to increase it. Eventually, you’ll have enough of a lead to consider it “playable.”
That sweet spot where you’re not missing sounds and the dynamics aren’t too jarring is where compression and sustain from distortion come into play. Our “usable gain range” starts at this point. When you get here, mark your progress and continue onward. Your tone will develop a more aggressive, gritty quality while retaining functional power and clarity.
We have a maximum increase range that we can support up to. When dynamics and low-mid punch are lost, clarity and sharpness follow suit. Instead of getting louder and more aggressive, the music gets fuzzier and less distinct.
Our “usable gain range” lies between these two values, and where exactly in that range your tone resides is entirely up to you. A clear, powerful, and natural tone can be achieved using less gain. Increasing the gain, you can achieve a more aggressive, gritty, and harmonically thick tone. The optimal volume and pitch for each context are unique.
3. EQ
Adjust the equalizer to your liking. Regarding pedal tone, I stick to one golden rule: the lower the tuning, the greater the eq settings on your pedals should be. If you’re going for harsh, leave the lows alone in the EQ and let the bass take care of that.
If your tuning is above drop C, you should play the tone around midday. Alternatively, you could use a rounded metal tone, in which the midrange is rolled off, and the bass and treble are amplified.
While this may be enjoyable in your listening space, it will need more heft to be heard over a loud percussion kit and bass guitar when recording or performing live. Instead, you can start by setting the bass, midrange, and high to 5 and then adjust from there.
Increasing the treble and decreasing the bass can help improve a muted tone. Raise the mids if you raise your guitar’s volume above the other instruments. Turn the bass up if you want it to last longer and feel warmer.
4. Preamp Gain
You should crank it up at this point, this is a more natural way to strengthen communication. That’s because of the idea of gentle and hard clipping. The audio is distorted and saturates in harsh highs and lows when clipped too hard.
The preamp in your signal path is typically where distortion will occur without saturation. Sounds that are crystal clear and massive can be achieved by feeding an appropriately amplified input into the system. If, on the other hand, you want to employ pedal distortion, you should turn down the preamp gain so that the distortion pedal’s gain traits are amplified.
5. Master Volume
If you’ve followed these steps and your amplifier has a separate master volume control, you can set the master volume to zero and the speaker will still sound great. It is no longer necessary to use a chain of 12 Marshalls, as Angus Young does, or to crank up a 5150 to get Eddie Van Halen’s “brown sound,” as Nigel from Spinal Tap did, thanks to the availability of solid-state amplifiers and processors.
Your instrument could be playing at full volume and still positively impact your relationship with the people who live nearby. Finally, don’t go too heavy on the metal. You should only apply gain once, but when you do, it should be in the precise location in your signal chain that will yield the best results for your desired tone.
It would help if you turned up the level on everything to get clean, tight distortion when adding gain. The gain/distortion sound we hear at low volumes often alters significantly as the volume is raised. Maintain the characteristics of your gain tone and the clarity of your pickups by running your signal well.
6. Pickup Selector
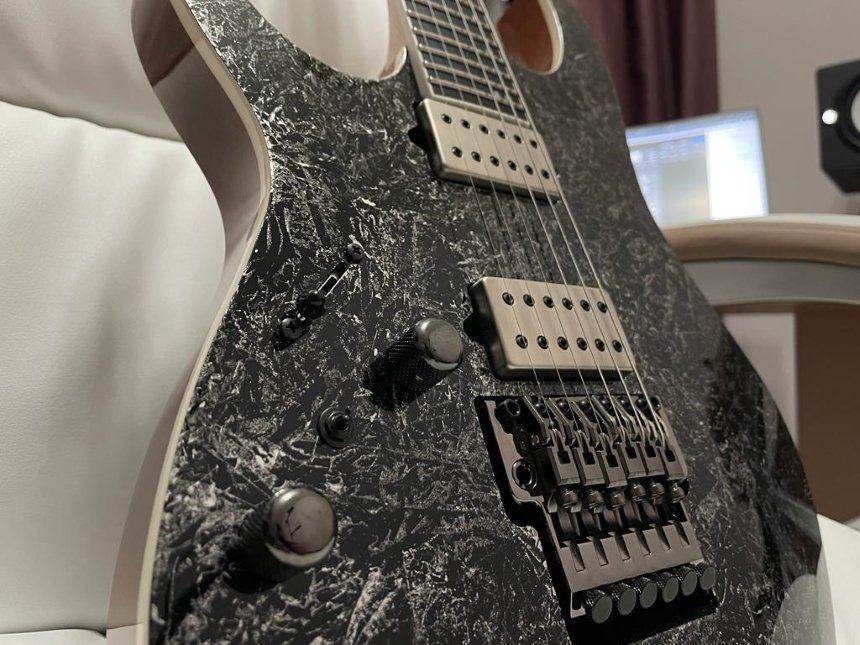
Your amp’s output tone will also be heavily influenced by the microphone you use. Two microphones are standard on electric guitars, one at the bridge and another at the neck. The pickup selection allows you to choose between using each pickup individually or together.
The treble harmonics are more emphasized in a bridge pickup, making for a brighter and more defined sound. Because of its clarity, the lead guitar is typically played at the forefront of a band’s sound. The neck pickup has a smoother, warmer tone because it emphasizes low harmonics.
This is why melody guitar is its primary application. Try alternating between the picks to hear the difference. Lead guitars in metal bands typically use the bridge pickup, while rhythm players favor the neck pickup.
7.Add Some Pedals to Your Rig
Adding pedals to your rig may help you achieve the high-sustain, rich wall-of-sound characteristic of metal instruments if you’re having trouble finding the right amp settings. As a rule, a distortion pedal is a metal guitarist’s best companion.
A distortion pedal typically provides superior boost and sustain than an amp. A “smoother-out” tone is achieved with a compression pedal by amplifying softly selected notes and dampening loudly plucked ones. When hand muted or playing solo, reverb can help make your tone stand out. Use a noise gate to lessen the feedback problems that come with high gain amp levels.
8. Get the Right Amp
You will need significant amplification powering your performance to nail that metal sound truly. It’s easy to get lost in the maze of amps on the market because there are such wide varieties and brands. And so, we will mention a few names to keep an eye out for.
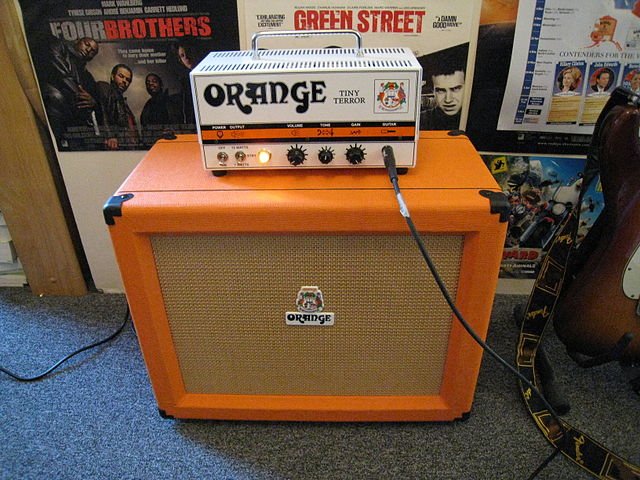
- Orange
Guitarists from all genres, including Tony Iommi of Black Sabbath and Jimmy Page of Led Zeppelin, have recently shown renewed interest in Orange Amps. Their music is robust and full, with a grittier edge. - Blackstar
Among the many amplifier manufacturers, Blackstar is one of the more recent ones to gain widespread recognition. The Blackstar amps’ Infinite Shape Feature (ISF) tone modulation sets them apart. To achieve a more British-sounding midrange, spin the dial counter-clockwise. Turning it clockwise, however, results in a less mid-range, more American tone. - Mesa
Mesa amps are a good choice if you’re in the market for an American amplifier and need a lot of boosts. They create a distorted tone that is tight and forceful, perfect for cutting through a dense soundscape. - Peavey
When played through a Peavey amp, heavy metal music has that thick, chugging, high-gain tone characteristic of American heavy metal. Peavey amplifiers are highly recommended if you want to achieve the signature “wall of sound” for this genre of music.
9. Get the Right Cabinet
Finding a sound cabinet that works with your equipment is essential. Different cabinets are optimized to emphasize different harmonics. The bottom end, midrange, and treble of larger cabs are all enhanced. The bottom end is more percussive, the midrange is more refined, and the highs are more subdued in smaller cabs.
A guitar speaker cabinet is not necessary with a guitar combination, but one is needed with an amp head. It’s just as vital as the speaker itself. A wide variety of choices are available, including the use of a coordinating cabinet or an alternative cabinet.
You can use a 1×12, 2×12, 4×12, or any other size speaker box, but the more speakers you have, the more flexible your setup will be. If you use a 1×12 guitar cabinet, you can only use one speaker. However, if your cabinet has space for numerous speakers, you can experiment with various setups to find the right combination for your needs.
Having extra guitar speakers is a good idea if you plan on capturing your guitar amp. More aural customization options are accessible when using multiple speakers and microphones. The quantity of speakers is not a determining factor in the volume level, but the type of speaker does matter.
It would help if you opted for a high-gain guitar cabinet to achieve a modern metal sound. Some excellent options include Orange, Mesa/Boogie, and Marshall. Of course, if you’re using a Fender guitar case, your sound will be heftier than it would be. You need 2×12 or 4×12 guitar cabinets for high-gain amplifiers to get a decent metal guitar sound.
What Is the Best Way to Use EQ Settings?
The best way is to put all of the sliders to 0 to begin, this will allow us to start from scratch without baggage from the past. Obtaining a balanced tone ensures that neither the high, nor bass is overemphasized. Also, remember to listen at the intensity level you plan to use when playing the song.
The loudness of a sound affects how our brains process it. When we hear something louder, our ears send the message to our minds that there is more bass and treble, and vice versa when the volume is decreased. This is one of the main reasons why we enjoy playing music at such high volumes.
This is also why the “killer tone” you dialed in a while in your chamber sounds like a fizzed-out, muddy mess when you take it to the stage. The same holds in the studio; if you make subtle adjustments to your tone, you will notice the difference once you crank up your mix to a painful level.
Remember that we don’t want to cause permanent hearing loss, but we also need to raise the loudness to an acceptable level. Guitars fall in the middle spectrum of instruments, so that’s where you should focus first. Discover whether your mids should be very forward and almost nasal or very forward and flat. Turn up the mids control gradually until you achieve the desired effect, then work on crafting the remainder of your tone around that.
Start cranking the bass until the sound is complete; it provides a solid foundation without becoming muddy or unresponsive. It would be best to turn up the treble to give the sound more bite, energy, and definition without making it harsh or fizzy.
You should hear the effect of a knob’s adjustment on your tone as you adjust. Try not to let yourself become myopic. It’s tempting to tune out everything else when changing a single knob, but that’s not how music is meant to be heard.
A simple way to achieve a well-rounded tone is to simultaneously play the octave above your low open string. With a standard six-string instrument, you must bend the second string (D) while strumming the low (E). You can achieve perfect level parity by adjusting the middle E’s volume with the treble knob and the low E’s volume with the bass knob.
You can find the presence and reverberation controls on some amplifiers as well. You should set the bass and frequency controls for these. Contrasting the lows with the highs and the bass with the presence. Unlike presence, which can be difficult to set, resonance should be easy to adjust.
Applying the same trick we discussed is a great method to find equilibrium, but this time on the middle E and the high open E string. The highest chord will represent presence, and the treble will continue to be played on the middle E.
How Can You Tell You Have a Good Guitar Tone?
There is no end to what makes a good tone because there’s always one more tweak we need to make. Even if your guitar tone is great while playing solo, you may still need to work when you add the rest of the band. Giving each instrument its own space in a mix or a live is needed to stand out and be heard.
Too much bass and resonance from a guitar drowns out the bass and kick percussion, turning the sound into the mud. Increasing the treble too much will only add a lot of unpleasant fizz to your performance. The time has come to implement tone and complete any necessary contextual adjustments. Here is the place to fine-tune your performance by playing along with your band or recorded recordings.
When playing with other instruments, it’s helpful to consider which elements of your guitar tone will fall within the same frequency range. For instance, the strike and snap of the snare could be silenced because the “bite” from your treble knob was too high.
Your guitar is just one instrument among many, and it must get along well with the rest of the band for the final product to be satisfying to the ear. Let your pride go, and place the group before yourself.
Conclusion
Finding a solid metal tone in the modern era is relatively easy, whether you use actual amps or a guitar amp simulator. You only need a high-quality amp, an instrument cabinet (or just the amp head), and an overdrive effect. We recommend a high-gain amp for a contemporary metal sound, but older amps will still do the job if you’re going for a more traditional metal sound.
But the most important thing to consider is that above anything we’ve presented in this article, that tone is in your fingers, and no matter how much you try to spend on tools, it won’t make up for deep technique and knowledge in what we call music theory.

The Integraudio Editorial Team consists of experienced music producers, audio engineers, and plugin enthusiasts dedicated to providing in-depth reviews and guides for music production software.