You’ve probably seen an audio clip where the waveform appears skewed and wondered what caused it. Let’s find out what DC offset is, why it happens, how to solve it, and if you need to be concerned about it.
The skewed or deformed audio waveform is caused by what’s known as a DC offset. While the term seems hardware-related, and indeed, it tends to plague hardware more often, you can also have this problem in digital audio. In digital audio, it mainly occurs during summing (or numeric calculations of audio bits), so you’ll likely notice them after freezing a track. So, re-rendering the track might solve the problem if it’s a temporary tick in the synthesizer or effect processor.
What Is DC Offset?
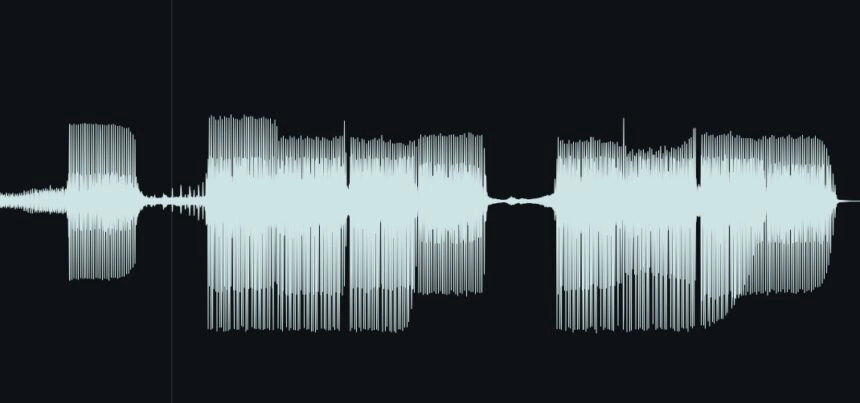
In an audio clip, the horizontal line in the middle is zero, and the audio signal is recorded in positive (up) and negative (down) values. DC Offset is an imbalance between the positive and the negative signals in an audio waveform, where the zero becomes a different value, either positive or negative.
Suppose you have a regular audio clip, and the waveforms are alternating between +5v and –5v. Now, if the waveform started alternating between +6v and –4v, you have a DC offset. And since DC offset essentially makes the waveform lean more towards one kind of signal over the other, we also call it DC bias.
Why Is DC Offset Bad?
The worst problem with DC offset is that your audio will clip before it would as a normal audio waveform. When a waveform is biased towards either the positive or the negative value, the higher value will reach the clipping level quicker. You might also face issues in editing and metering.
The following pictures demonstrate the clipping problem:
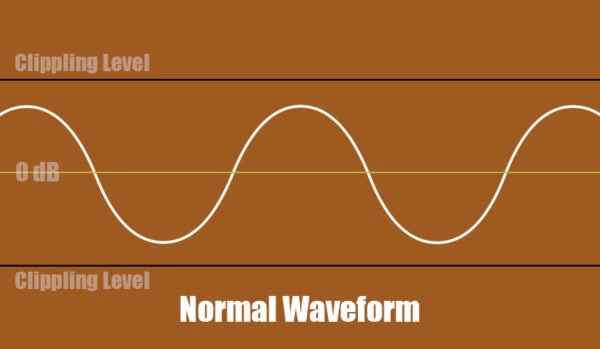
A typical waveform – note the height of the sine wave.

Notice how the height (peak level) is the same, but it’s clipping.
The second issue you will face with DC offset is while editing. Since the “zero” of an audio clip with DC offset has a value, it will create an audible “pop” when you split/splice it. Similarly, you will have the same issue when looping an audio clip as it has no zero-crossing.
DC offset can also cause metering software/hardware to go haywire. For example, if your audio is biased towards either a positive or negative signal, your dB peak meter will read much higher than what you perceive. In fact, in rare cases, DC offset can cause damage to your speakers/amplifiers due to extreme peaks despite a low perceived audio level.
What Causes DC Offset?
There are several causes of DC offset, and you’re more likely to face them in audio recorded with faulty devices and in renders from a complex signal chain. In the digital world, a delay unit, hand-drawn wavetables, certain filter combinations, and so on can cause DC Offset.
Let’s explore the causes a little further:
- Direct Current
This topic is probably the most common cause of DC offset. When one of the hardware in your signal chain adds DC voltage (one that doesn’t alternate) to an AC circuit (one that alternates), the output AC voltage will have a bias towards one kind of value. Soundcards, audio interfaces, microphones, phantom power supply, and mixers are often the culprits here.
- Unison
While most synthesizers are designed to avoid DC offset as much as possible, once in a while, adding detuned unison voices that are in phase with the original signal will cause a DC offset. You can avoid this issue by turning the phase parameter on the oscillator(s) slightly.
- Delays
If you are using multiple delay units linked together, you could be causing feedback loops between them, even if they aren’t audible. Note that you will have to do some rather crazy routings to make it happen, but it’s still a possibility, especially in hardware units. Such setups can cause DC offsets.
- Wavetables
Wavetable synths have grown in popularity thanks to the freedom they offer. However, hand-drawn wavetables or poorly programmed ones might contribute to adding DC offset in your audio output.
- Filters
As with unison, most synths avoid DC offset caused by filters. However, if you stack up multiple complex filters, you might end up creating a DC offset. It happens even more often when you have wavetables that are already offset because resonance from filters adds more to the issue.
- Post-Repair Issues
This issue is relatively rare. When a hardware unit is repaired, the repairperson might replace a faulty transistor with a close substitute instead of a replica. If the components happen to be in a recording circuit, you will get DC offset.
- Grounding
Often, the grounding circuits of different hardware units are at different potentials. When two such hardware equipment is connected, they cause ground loops, which ultimately cause DC offsets. Similarly, a computer’s SMPS (PSU) can also create spikes of AC voltage that enter your audio interface and other hardware to cause such ground loops.
How To Avoid DC Offset?
You can avoid DC offset by ensuring proper grounding and conditioning your hardware equipment before recording. During music production or mixing, stay vigilant when using a highly complex chain of filters or delay units. Similarly, double-check wavetables to see if they are not offset.
Let’s get into these tips in more detail.
- Ensure Grounding
Having a proper grounding/earthing system and ensuring your equipment is connected is one of the best ways to avoid DC offset. If the hardware doesn’t have a grounding compatible plug, connect the chassis to the grounding terminal in your socket. Make sure you read up on which terminal is the live, neutral, and ground in your country. For the USA and many European countries, the ground is a metal ring around the socket.
- Phantom Power
Having multiple hardware gears increase the chance of a DC offset. So, avoid using equipment like phantom power supplies. Instead, opt for an audio interface or a mixer with built-in phantom power. Furthermore, if you own a microphone that requires a battery, make sure the battery is full and seated correctly. And perhaps even consider switching to a regular mic as these are less prone to DC offset.
- Avoid Over-Complication
Some people tend to use overly complicated effect chains despite intending a simple process. For example, avoid using multiple delays routed into each other instead of a multi-tap delay. This tip applies to any time-based plugins like reverb, chorus, flanger, etc.
- Keep An Eye Open
When using complex chains of effects, hand-drawn wavetables, or amateur wavetable packs (often free ones), make sure that you don’t contribute to DC offset. Ensure there is no feedback loop from effect processors and that the wavetable is evenly divided in both positive and negative signals.
How Do I Remove DC Offset?
In almost all cases, a frequency (hum or spike) near 0 Hz causes DC offset. So, using a high-pass filter anywhere from 1 Hz to 20 Hz should get rid of DC offset. I suggest setting the high-pass filter at 10 Hz, which should be low enough not to cause sonic changes and high enough to filter out DC offset.
While the concept mentioned above remains useful, most audio editors nowadays provide a dedicated tool for removing DC offset. They intelligently detect the amount of DC offset and apply an opposite offset to make the waveform balanced. In this section, I will demonstrate the tool in various editors and DAWs.
For the sake of navigation, here is the order of the editors I will be using. Clicking on the link will take you to the download/purchase page.
- Audacity (free)
- ocenaudio (free)
- Cakewalk by BandLab (free)
- REAPER (60-days free trial)
- FL Studio (paid)
How Do I Remove DC Offset In Audacity?
Audacity features a built-in DC offset removal tool in its normalizer. So, all you have to do is load the audio with DC offset, select an area (or the entire audio), add the Normalizer effect, and select the ‘Remove DC offset’ option. If you don’t want normalization, uncheck the option.
Step 1: Load and select the audio with DC Offset.

Step 2: Open the Effect menu, and select Normalize.

Step 3: Make sure the option ‘Remove DC offset’ is checked, and uncheck the rest if you only want DC offset removal. Then, click OK.

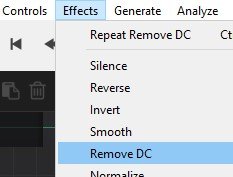
How Do I Remove DC Offset In ocenaudio?
Ocenaudio is probably the easiest editor to use for removing DC offset. To remove DC offset, load your audio file, select the problematic area (or none if you want it to affect the entire audio), go to the Effects menu, and click on Remove DC. That’s it; your audio should be fine now!
Step 1: Load your audio.

Load your audio file in ocenaudio.
Step 2: Open the Effects menu and click on ‘Remove DC.’

How To Remove DC Offset In Cakewalk by BandLab?
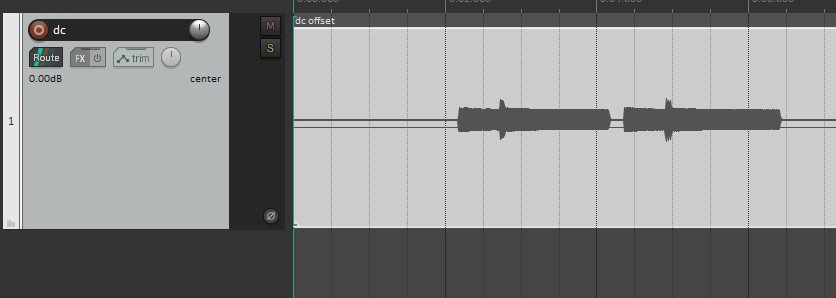
Cakewalk by BandLab has a dedicated tool for removing DC Offset under its Process menu. Select your audio clip, open the Process menu, and find ‘Remove DC Offset’ under Apply Effect. You can use this tool on multiple audio clips at once by using Ctrl + Click to multi-select.
Step 1: Import your audio clip into a track in Cakewalk, then select the clip(s).

Select the clip with DC offset.
Step 2: Under the Process menu, navigate through Apply Effect and click on Remove DC Offset.

How To Remove DC Offset In REAPER?
As with anything in REAPER, it has multiple ways to remove DC offset. However, one of the most straightforward ways is to use the JSFX called DC Filter. Add the JSFX to a take/track and render it. The start and end of the clip can create pops in the render, though, so make sure you have a bit of space.
Step 1: Import your audio clip into a track in REAPER.
Load the audio clip in REAPER.
Step 2: Right-click the clip, go through Take, and click on ‘Show FX chain for active take.’
Step 3: Add the JSFX called DC Filter (note the category I have selected).

Step 4: Right-click the clip and click on ‘Render item as new take.’ This option will create a new take in the same item so that you can compare the two. If you want to delete the old take, select it, right-click it, go through Take, and click on ‘Delete active take.’

How To Remove DC Offset In FL Studio?
FL Studio makes it easy to remove DC offset from an audio clip. All you have to do is load the audio file into an Audio Clip channel in the Channel Rack (F6), then enable ‘Remove DC Offset’ under Precomputed Effects in the channel’s UI. Unfortunately, there’s no way to activate it in multiple clips at once.
Step 1: Load the audio file in an Audio Clip channel in the Channel Rack.

Step 2: Enable Remove DC Offset. And if you want to render the file, right-click the waveform and click on ‘Save as.’

Conclusion
And we’ve come to the end of our detailed guide about DC offset. As you can see, while the issue definitely requires remedying, it’s not something you have to be worried about much. Preventing it is pretty easy, and if you stick with recommended hardware, you’re unlikely to get DC offset from recordings.
However, if you do end up with DC offsets, it’s not a complex problem to solve at all. If I didn’t list the DAW you are using in the guide above, try looking for the tool in similar options or refer to your DAW’s manual. I hope the guide has helped give you an understanding of the DC offset.

The Integraudio Editorial Team consists of experienced music producers, audio engineers, and plugin enthusiasts dedicated to providing in-depth reviews and guides for music production software.