The following article discusses the best, most innovative, inspiring, and creative plugins for sound design in 2025.
We have discussed every tool, from software synthesizers to delay effects to samplers, and created a comprehensive list that will fulfill all your sound design needs. Having considered pricing, creativity, sound quality, interface, and many more factors while researching this post, we are excited to share this list of sound design tools with you.
On top of that, three complementary free-of-cost software are also included in the post. Also, whether you are an expert sound designer or a novice, we have covered you. Whether you want to do sound for films, songs, video games, or a mobile app, I am sure the following list will help you.
Are you after sound design samples for gaming? Check out this ultimate pack, it has some mind blowing sounds – Hybrid Game Sounds. It may seem expensive at first, but value this pack comes with it just huge, check it out!
Also, check out our free Delay plugin with sound design in mind:
Deelay by Integraudio & Sixth Sample – Free Delay VST/AU Plugin
29 Best Sound Design Plugins In 2025 (Creative Tools)
1. FabFilter Creative Bundle (For Creative Sound Design)
More Info & Price (Trial Available)


FabFilter creator bundle is the most versatile set of plugins you’ll find.
FabFilter is known for its high quality, flexibility to different genres & purposes, and immense functionality among music producers and sound designers. Its popularity is due to the consistent innovation FabFilter has done over time, summing up with the most user-friendly designs and precise algorithms.
The bundle contains the following plugins: Twin 2 – now Twin 3 (a soft synth), Volcano 3 (a filter modulation plugin), Saturn (a multi-band saturator plugin), and Timeless 3 (a creative tape delay tool).
Key Features:
- All-in-one bundle
This covers up the entire sound design workflow, from a synthesizer in which oscillators act as the sound source to innovative effect plugins and tone shapers, delivering everything you need to finish the process.
- Intensive tone shaping
Apart from being a multi-band saturator, Saturn also has an inbuilt dynamic processor knob, a 3-band equalizer for each frequency band, and several modulators.
However, the remarkable thing about it is its huge variety of saturation & distortion algorithms, which makes it a reliable harmonic processor for every purpose. In addition, the presets themselves can create innovative sonic scaping and inspire fresh ideas.
- The song-starter twin 2
Twin 2 is the ultimate polyphonic synthesizer with a whopping 1600 presets, an innovative interface, and simple drag-and-drop modulation settings. That acts as a great song starter, combined with Volcano 3, which can add the special juice of movement even on the most ordinary sounds.
Compatibility:
The plugin set is available in AAX, VST, VST 3, and AU formats and requires Intel Core 2 Duo/AMD Athlon 64 X2 or higher and a minimum of 4GB of RAM. In terms of OS, it requires macOS X 10.9 or later or Windows SP or later.
Summary:
The only downside of the FabFilter creative bundle is that all these plugins are CPU-heavy and may be difficult to use together in a chain. However, even individually, each software is a force of nature and has powerful capabilities. After using FabFilter, you can never go back to stock plugins.
2. Arturia Dist COLDFIRE (Dual Distortion)
More Info & Price (Trial Available)


The Arturia Dist Coldfire is a revolutionary dual distortion plugin featuring a powerful modulation engine and a wide variety of distortion types that you can swap in and out.
There are two independent distortion engines in Dist Coldfire, and you can use them in whatever combination you like. A variety of pre-and post-distortion filters are available for each distortion type. Analog-modeled and purely digital distortion types are both available.
With assignable parameter modulation and dynamics processing, Dist Coldfire can dish out virtually any dirt you want.
Key Features:
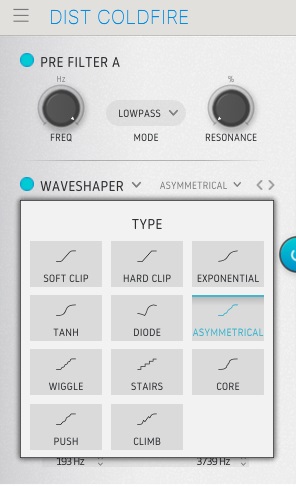
- Distortion Types
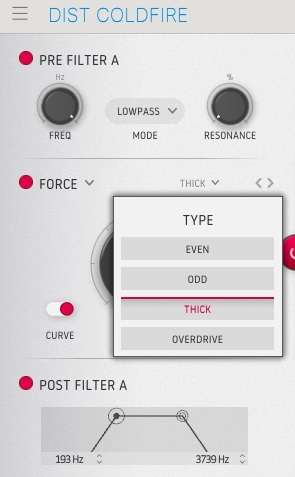
There are 150 factory settings to help you get started, some of which are meant to transform ordinary drum loops into snarling, ripping monsters. A total of eleven distinct kinds of distortion are available in the various distortion menus, with more options available in some categories.
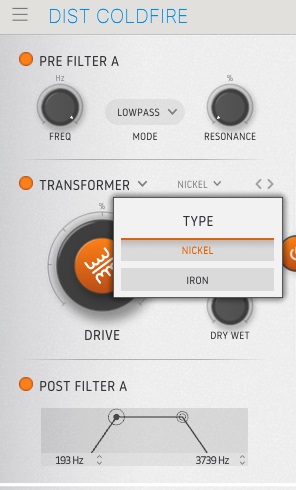
For example, bit inverters and bit crushers are just two of the eleven primary flavors. Other examples include wave folders, wave shapers, rectifiers, tape and analog saturation, driven transformers, and so on. In addition, there is a delay section in the processing, with feedback, filtering, and tempo sync as options.
- User Interface
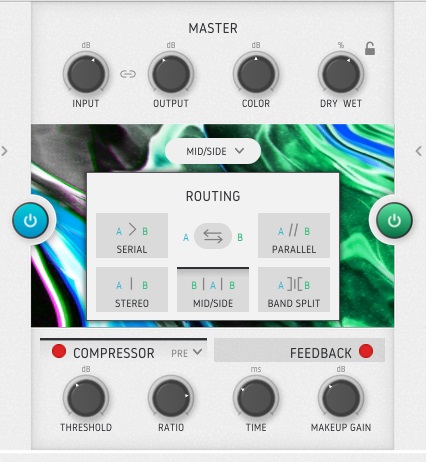
The distortion engines sit opposite sides of the interface, while the master, band split, and dynamics controls sit in the middle. Tooltips explain what each control does and show the current setting. The input and output level controls can be linked to keeping the volume under control when cranking up the distortion.
You can independently adjust the overall output level and wet/dry ratio. A horizontal fader controls the volume of each distortion engine independently.
- Modulators
The pre-and post-distortion filters, multiband/feedback, and extensive modulation section are all accessible via the advanced panel’s tabs, wherein you can choose LFO, Function, Follower, or Sequencer options. Because of its modulation capabilities,
Coldfire is a potent tool for improvising with drum loops, and its modulators can be assigned to virtually any control in Dist Coldfire, including other modulators.
However, the sequencers and function generators can also transform rhythmic elements from sustained instrument parts. The output filters can be set to a high pass or low pass, while the pre-filters can be set to a bandpass, notch, or one of two combs.
- Oversampling
Studio and Render oversampling modes are offered. The latter uses higher resolution but at the expense of increased CPU overhead. Whichever is selected, it will apply to both online and offline renderings despite the different titles.
- Dynamics And Feedback
Arturia includes a dynamics and feedback component to round out the signal chain. Compressors, multiband compressors, and a limiter that can be placed before or after the distortion make up the dynamics section. Instruments that assist you in reining in and smoothing out your distorted audio.
Whether you find these instruments too simplistic or the entire dual distortion doesn’t have enough bang; feedback is always there to help. Dist Coldfire incorporates a feedback processor, which you may access through the panel’s advanced settings. It uses a filter to delay the feedback, and you can change the beat rate.
Compatibility:
The OS requirements for this plugin are Windows 7 or higher for PC and macOS 10.9 or higher for Mac. It comes in VST/RTAS/AU/AAX formats and supports 32 and 64 bit systems.
Summary:
Arturia’s Dist Coldfire is yet another innovative plugin that aims to expand traditional sound design. That goal was met, too. One of the best features they provide is a dual distortion plugin that sets them apart. From traditional saturations and distortions to techniques like wave folding/waveshaping and bit-flipping, you’ll find it all here.
3. Minimal Audio Cluster Delay (Multi-Tap Delay)


Minimal Audio Cluster Delay is a multi-tap plugin that offers up to 8 delay taps, letting delay sequences be shaped and processed with various effects and modulations.
Cluster Delay is a plugin that emulates that vintage hardware (Roland’s Space Echo), but it’s not just about that. It has a very independent yet modern sound. The plugin is an advanced tap delay with many options.
The moment you get into this plugin, you will notice that it is more of a multi-effect than a tap delay, which, thanks to the customization options, you can alter its character a lot. It holds up to 8 delay taps, which can be interconnected in the internal engine in stereo or side configurations.
Key Features:
- Delay Time Options
The plugin offers several options in terms of time options, which makes the plugin offer a large number of resources through which you can manage your sound. It allows you to adjust the delay time in seconds or through tempo-synced time divisions.
The Feedback control lets the delay line be routed back into it, and if you adjust this setting to maximum, it will result in an effect with infinite sustain.
It also has an ”Analog” button that causes the delay line to engage an analog feedback effect, generating tape-like delays when paired with a high feedback setting and low freq filtering.
Also, you can create a subtle stereo-width ping-pong effect by using Spread And Crossfeed controls that offset the delay time for each channel and adjust the cross-channel feedback.
- Effects
A multi-effects section that lets you insert taps in totally new directions like you have a wobble effect that adjusts the time modulation of flutter and wow characteristics.
A chorus for unison effects, a flanger, a diffusion that takes delay lines and turns them into an ambient reverb, and a frequency shifter.
These effects allow very quick adding a much richer color to the loud delays. They have fairly easy-to-alter controls (2 parameters per effect, to be exact), they are very well arranged, and you will enjoy them because you will not lose control of any effect. They are very easy to route either in output, feedback, or input.
- Ducking Feature
Cluster Delay allows you to duck the delay signal into the signal input. This is a good feature as it helps you get much more flexibility in what a clean mix is, but you can also opt for a pumping effect if you wish.
- Presets
This plugin comes with a pretty rich preset section (100 presets). These are very useful and musical, but if you need quick inspiration, it has a preset randomizer button, which helps you find the right sound, and once you have found your favorite sound, you can start tweaking the engine to your liking.
- User Interface
Cluster Delay gives you a very responsive interface to your settings, and the graphs are extremely useful as you can view the taps that give you direct feedback.
It also has two VU meters for output and input, which gives you instant feedback on what is happening with your signals (It would be cool if all plugins came with such an option.) Also, the interface can be scaled very easily; it has a button in the left corner where you can drag it to make it bigger or smaller.
Compatibility:
Minimal Audio Cluster Delay is available in VST, AAX, and AU formats (32-bit and 64-bit) for Windows 10,8,7 and macOS 10.12 – 10.15.
Summary:
It is a plugin that offers playful tap delay possibilities that can go up to the most complex delay sounds. It has a lot of effects on top of what it sets out to do, which gives it a much more complex feel, and the way you can visualize what’s going on inside of it is cool.
4. Knif Audio Knifonium (Tube-Driven Synth For Advanced Design)
More Info & Price (Trial Available)

Knifonium is an emulation of the hardware synth of the same name.
The hardware Knifonium is a monophonic analog synth that employs 26 vacuum tubes, which also drive its two oscillators. It was designed by John Knif and featured meticulous craftsmanship with a musical and inspiring sound.
Brainworx designed plugin Alliance’s Knifonium emulation, and there are a plethora of modern features that make the already impressive hardware more versatile and accessible.
The most important addition would be the eight-voice polyphony. Not only can you enjoy the sound of the Knifonium, but you can create pads that sound uniquely atmospheric and enveloping. And we haven’t even covered the new effects that enhance the sound further yet.
Key Features:
- Effect Processors
Knifonium features some of the most-loved effect plugins by Plugin Alliance built into the synthesizer. They include a digital delay, the Maag exciter plugin, reverb, flanger, chorus, the Metal 666 amp, an EQ, filter, and a phaser.
However, I must mention that since they are designed as outboard plugins to the synth, you cannot modulate the parameters of these effect processors.
- 208 Vacuum-Tubes
That’s right, each voice of the 8-polyphony features 26 carefully modeled vacuum tubes, resulting in a whopping 208 virtual vacuum tubes in total.
Furthermore, Brainworx’s proprietary Tolerance Modelling Technology recreates the natural variations in envelope parameters, pitch, LFO, speed, and other parameters you’ll find in the original hardware.
- Stereo Features
Unlike the hardware synth, Knifonium features a unison mode, mid-side editing, and stereo spreading features. They are essential for creating pad sounds and a larger-than-life lead sound. I love the sound of spacious arpeggios and pads with an analog tang.
- Performance
There are over 300 excellent and usable presets in the synth. And if you want some exciting motions in your sound, you can use the envelope, LFO, aftertouch, and MIDI-CV modulations, as well as the built-in arpeggiator, to create evolving sounds. Furthermore, the synth also has a ring modulator for broader sound design possibilities.
Compatibility:
Knifonium is available for Windows 7 or higher and macOS 10.9 or higher, both 64-bit only. It comes in VST 2/3, AU, AAX, and RTAS formats.
Summary:
Knifonium is an ultra-high-quality synthesizer that emulates the sound of individual vacuum tubes to recreate the fat, classic analog sound. However, doing so does make it quite CPU-heavy.
So, if you intend to use many Knifoniums in a project, you might have to freeze or render the instrument to free up the CPU resource.
Besides the synth itself, the preset manager is also excellent – it lets you filter presets by category and mark favorites for future recall. Overall, I suggest giving this plugin a try if you love the sound of hardware synths.
5. iZotope Neutron 4 (Channel Strip)

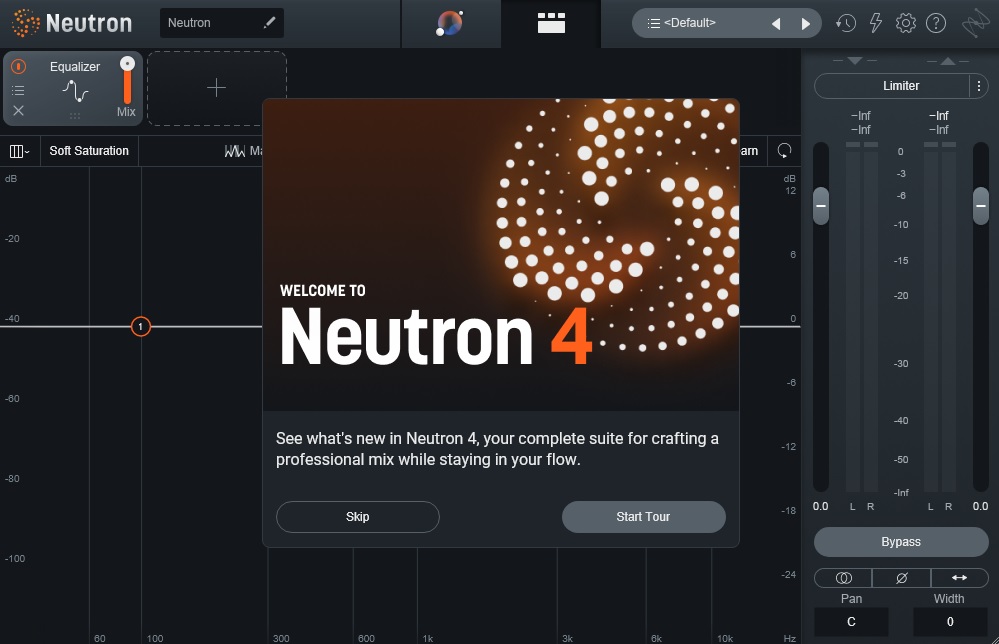


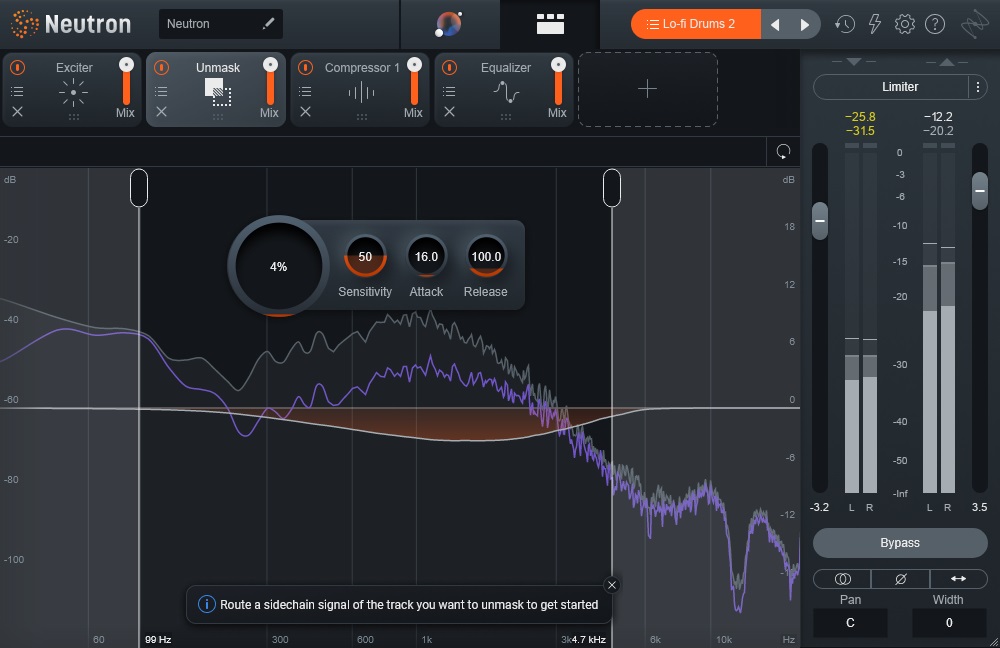


iZotope Neutron 4 is a comprehensive mixing tool suite offering various improvements and additions to previous versions.
The plugin features an Assistant View that provides an easy-to-use and intuitive interface for beginners to change a channel’s sound. Additionally, it includes an Unmask module that allows for easy separation of different sounds and an Exciter module that features new distortion signal mashers.
Key Features:
- Reference with Target Library
This allows you to match the sonic characteristics of your mix to a reference track. It comes with a selection of professionally mixed tracks you can choose from or upload your reference tracks. Once a reference track has been selected, the plugin analyzes its spectral balance, dynamics, and other characteristics and suggests adjusting the mix to match the reference more closely.
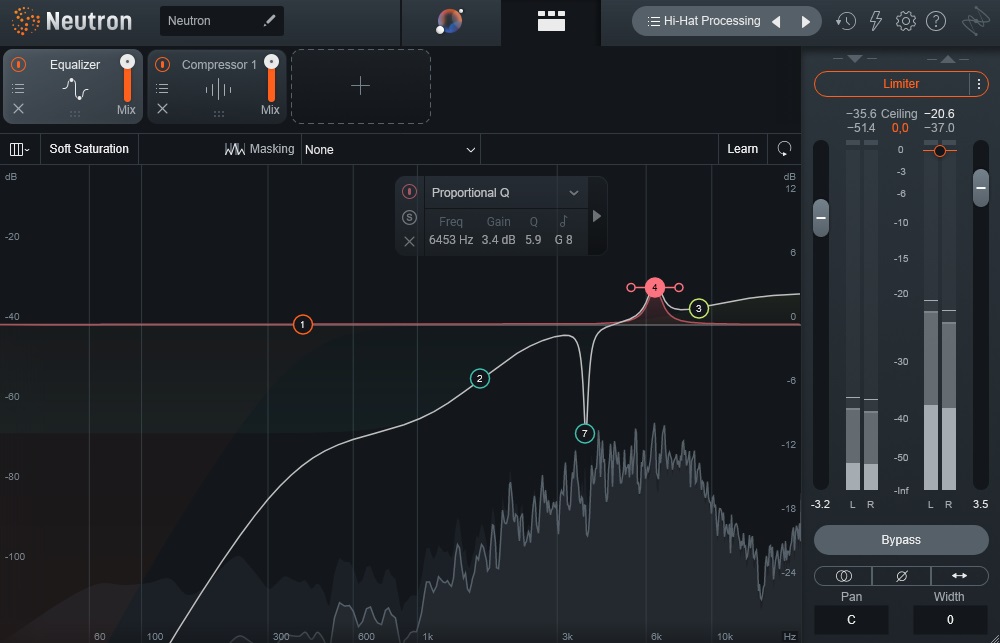
- Clear muddy mixes
The Unmask module in iZotope Neutron 4 is a powerful tool for separating overlapping sounds in a mix, allowing you to identify and adjust frequencies clashing with each other easily. This feature works by analyzing the audio of all tracks in your mix and then creating a “masking” profile of each track.
From there, you can use the Unmask module to adjust the levels of each track, making sure that each sound is heard clearly and without interference from other sounds.
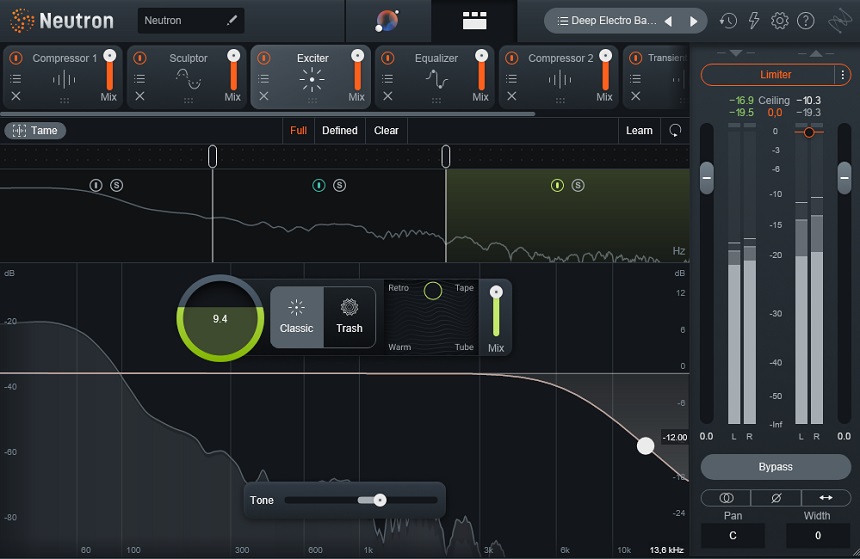
- Clever Harmonic Processing
You can add warmth, grit, and harmonic distortion to your audio by using Trash Mode. It has four different modes, which allow you to customize the type and intensity of distortion applied to your audio. These modes include “Classic,” “Tape,” “Tube,” and “Warm,” each with its distinct character.
You can also adjust the amount of distortion using the Drive and Mix controls.
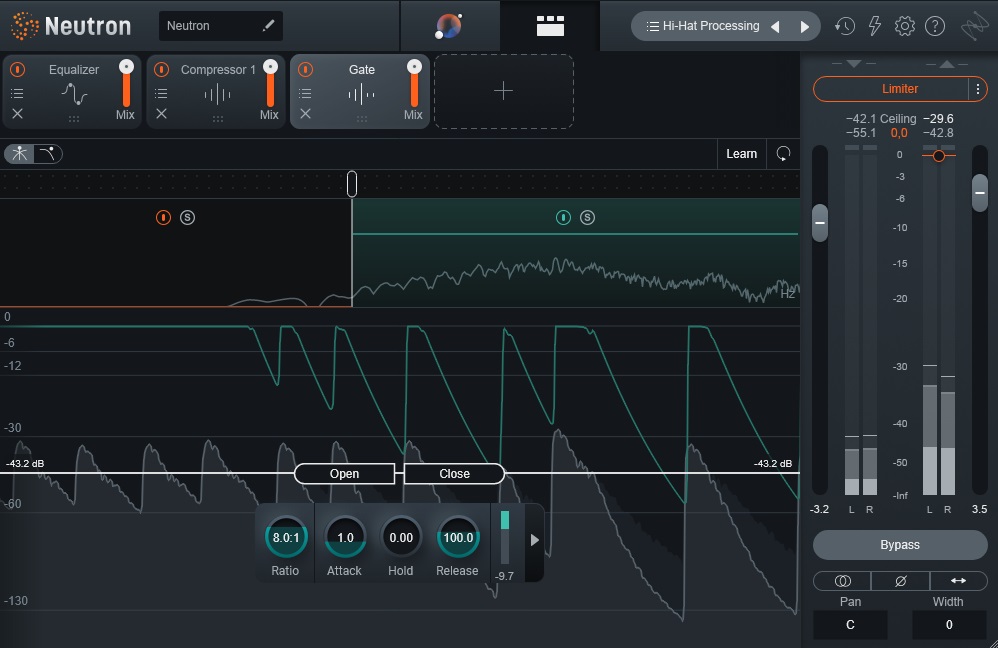
- Punch Mode
You get a Punch Mode in the plugin’s Compressor module, a transient shaping tool that adds impact and clarity to individual tracks and mixes. It works by emphasizing the initial transient of a sound while reducing the sustain or tail.
That can be useful for punching drums, guitars, and other instruments that need to cut through a mix. It has adjustable Attack and Release controls, allowing for fine-tuning of the transient shaping effect. It can also be used with the Compressor’s other settings for more precise control over a track’s dynamics.
- Comprehensive presets
Neutron 4 has various presets to help you start your audio projects. These preset are designed to provide a range of settings for different types of audio sources, such as vocals, drums, guitars, and more. They can save you time and effort by providing a starting point that you can tweak and customize.
While iZotope Neutron 4’s Compressor module has powerful features like Punch Mode and adjustable Attack and Release controls, it also has some cons. Firstly, the plugin can be expensive, making it inaccessible to some of you. Additionally, the interface can be overwhelming for beginners, with many options and controls that may be difficult to understand.
The presets can be a useful starting point, but they may not always provide the desired effect and require further customization. Finally, the plugin can be CPU-intensive, which can be problematic for those with slower computers or limited resources.
6. Sugar Bytes Graindad (Granular FX, Stutter, Glitcher & Automator)
More Info & Price (Trial Available)


Graindad is a granular effect plugin by Sugar Bytes for high-quality and real-time audio manipulation.
The advanced grain engine plugin allows you to adjust the grain size, position, pitch, speed, and jitter settings. You can also adjust the settings for filter and time modulations and add reverb and delay effects to your sounds. In addition, it has an audio editor that allows you to freeze, texturize, reorganize, and slice your audio.
Key Features:
- Granular capabilities
The plugin allows you to chop the audio into 64 grains and has 12 main controllers for manipulating the audio. In addition, the plugin has two modulation structures: harvested for creative, playful, and simplified granular manipulation and the classic system with step sequencers, LFOs, and envelopes.
- Modulation capabilities
You can use MIDI notes and randomizers as the sources to trigger modulations, along with the typical step sequencer, LFOs, and envelopes. The plugin also has Modmix control, allowing you to crossfade between the two granular engines.
- Effects
The plugin allows you to have high quality and a wide variety of effects, like filters, reverbs, delays, etc. For example, the reverb category includes effects like HQ reverb, spring reverb, and shimmer. The delay effects include phasers, flangers, and other time-based effects.
- Harvester
The most advanced feature of Graindad is its Harvester system which allows you to modulate all twelve controls simultaneously, allowing for complex modulations and effects.
Compatibility:
Graindad is available in Audio Unit, VST2, VST3, AAX, and Standalone plugin formats and requires a minimum of macOS 10.12 or Windows 7 operating system.
Summary:
The possibilities with this great granular plugin are infinite. However, due to its unfamiliar workflow, it may be a bit strange at first, but it is fun once you get hold of it. In addition, the creative output you can derive from the plugin is limitless.
It’s just great for randomizing percussions. Resample it, slice it and find the best bits to fit in your composition – great practice for advanced DnB production.
7. Tracktion Novum (Creative Sampling/Granular Synth)
More Info & Price (Trial Available)

Novum is a unique and artistic granular synthesizer that works on an interesting algorithm.
It has huge capabilities for both beginners and experienced sound designers, music producers, and composers because of its out-of-the-box synth engine and attractive interface that allows you to load up a sample – which it breaks down into six different layers.
On each of these layers, different syntheses and processing can be applied. For novice producers, there are more than 300 presets that you can apply to each of these layers, which could dramatically shift the timbre, texture, envelope, and other parameters of the sound to the extent of turning a drum loop into a pad sound.
Instead, it utilizes the beauty of granular synthesis in the best and most creative way possible, opening up the possibilities of a limitless sonic universe.
Key Features:
- Innovative sound design engine
Have you ever wanted to take a guitar sound and play it with the timbre of a horn or have the transient and envelope characteristics of an organ in a flute? Novum makes that possible with its layer decomposition system and by combining granular and spectral synthesis.
The approach is different from regular subtractive synthesis and uses many spectral filtrations and the samples’ re-harmonization.
- CPU Efficient
Even with a lot of functionality, Novum is designed to be light on CPU, and we can load up multiple instances simultaneously.
- Incredible GUI
Visually it gives you great monitoring of the waveform and three-dimensional structure of the audio, including its harmonics, by having colorful graphics, multiple sliders, and even a pitch detector, which could inspire innovation in the sound design process. It also has unique sound-shaping functions like “timbre flower” and “syntify”.
- Grains editing
Under the Timbre section of the plugin, you can manipulate various characteristics of the grains in which the sound is broken down, like size, density, skewness, gain, pan, and more.
Compatibility:
Novum is available as an AU/VST plugin in macOS 10.13 or Later, 64-bit Intel or Apple Silicon, and as a VST in Windows 10 and 11 -64-bit.
Summary:
The only downside of the plugin is that it’s too new and has a workflow that is not conventional; hence it also has functions that may not be familiar at first glance. But a new approach to synthesis is also an upside, as it could inspire new sounds and enhance your sound design process by introducing a new perspective.
8. EVAbeat Melody Sauce 2 (Chord Generator)

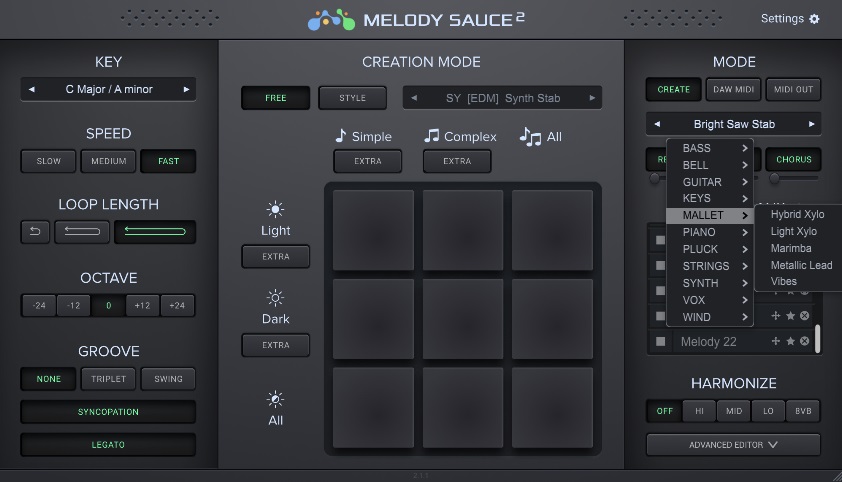


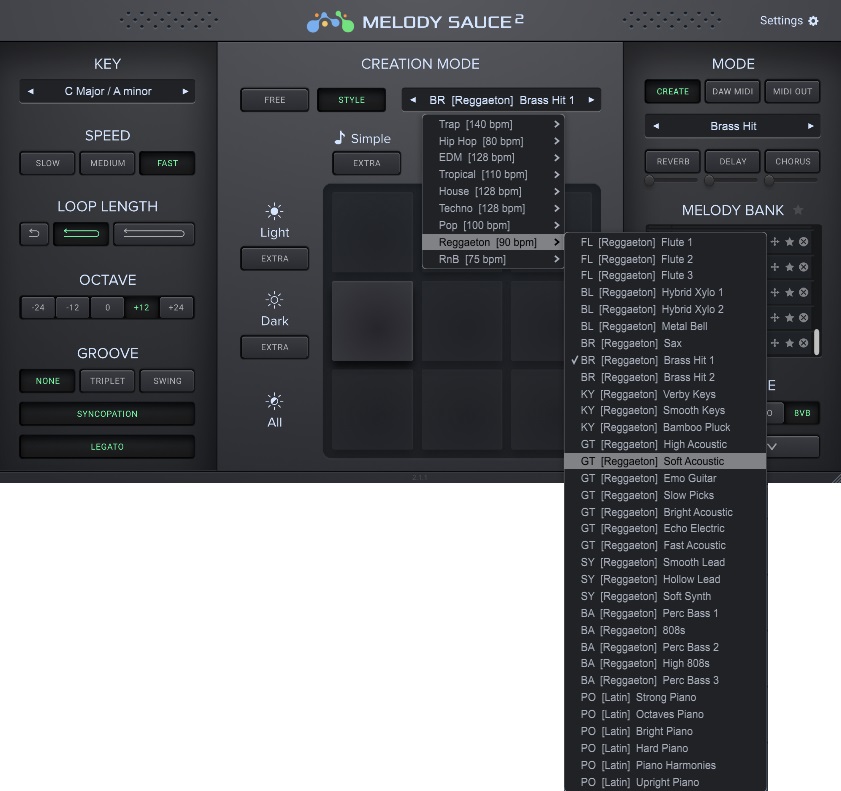


Melody Sauce 2 is a software plugin designed to help music producers create melodies and chord progressions quickly and easily.
The plugin uses advanced algorithms to generate various melodic patterns and chord progressions based on your input and settings. You can choose from various musical scales and modes and adjust parameters such as the rhythm, density, and complexity of the generated melodies.
Key Features:
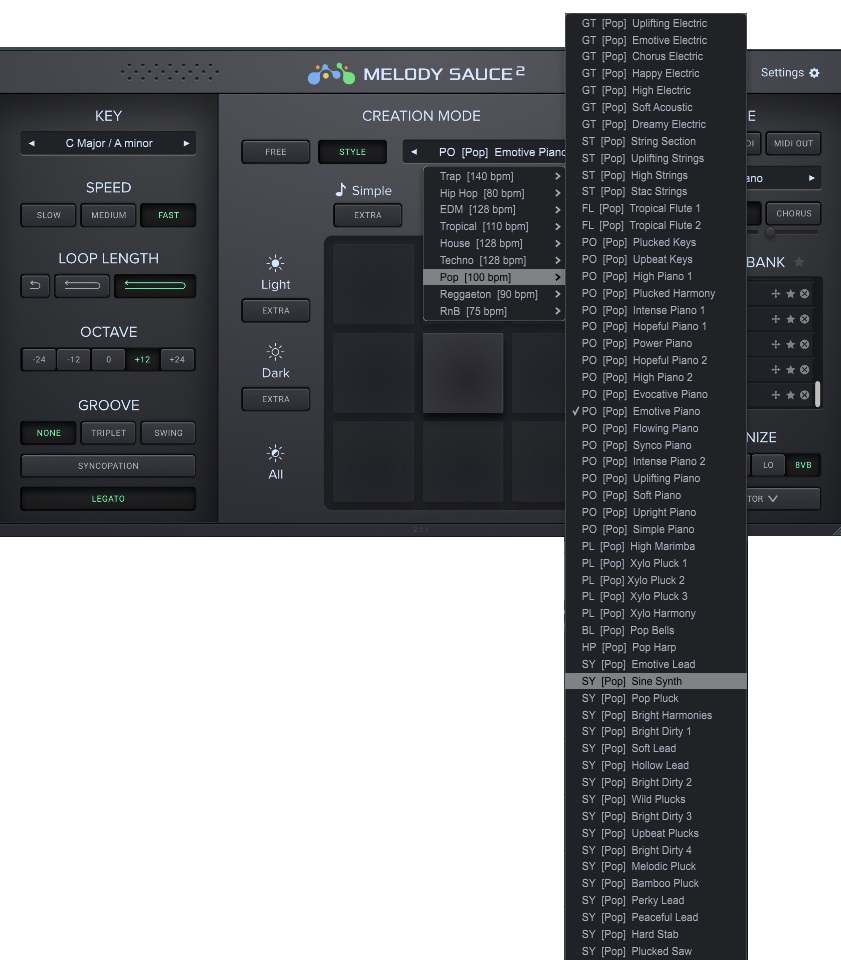
- Customizable melody generation
You can customize various parameters to generate melodies that match their desired musical style and sound. You can choose from various musical scales and modes and adjust parameters such as the rhythm, density, and complexity of the generated melodies.
- Pads-based interface
Melody Sauce 2’s pads-based interface is designed to provide an intuitive and easy-to-use way for music producers to generate and preview melodies and chord progressions. The interface consists of a grid of pads, each representing a chord or note in the selected musical scale.
- Chord progression generator
Melody Sauce 2 includes a chord progression generator to help users create chord progressions that match the melody. You can choose from various chord types and progressions and customize the chord voicings and inversions.
- MIDI output
The plugin generates MIDI output, meaning you can control any instrument or virtual instrument within your DAW. This allows further customization and manipulation of the generated melodies and chord progressions.
- Export to WAV or MIDI
You can export the generated melodies and chord progressions as WAV or MIDI files, which can be further edited and manipulated in other software or used in other projects.
- AI-powered
Melody Sauce 2 uses AI-powered technology to generate melodies and chord progressions that are musically coherent and stylistically appropriate. The plugin’s AI algorithm analyzes the user’s input and creates new musical phrases that match the selected key, scale, and rhythm.
- Flexible workflow
The plugin has buttons like Simple/Complex and Speed controls, so the “Simple” button generates more straightforward melodies. In contrast, the “Complex” button generates more intricate and complex melodies with more ornamentation and variations.
In addition, Melody Sauce 2 includes a “Speed” control that allows the user to adjust the speed of the generated melodies and chord progressions. The “Speed” control offers three different speed settings – “Slow,” “Medium,” and “Fast” – which affect the rhythm and timing of the generated content.
Compatibility:
Melody Sauce 2 is a VST/AU plugin compatible with most major digital audio workstations (DAWs), including Ableton Live, FL Studio, and Logic Pro X. The plugin can be used on both Windows and macOS operating systems and supports a wide range of plugin formats.
Summary:
Melody Sauce 2 is an AI-powered software plugin designed to help producers quickly and easily generate melodies and chord progressions that match their desired musical style and sound. The plugin features a pads-based interface that is intuitive and easy to use and includes various customizable parameters such as rhythm, complexity, and density.
9. Devious Machines Infiltrator 2 (Multi Effect)
More Info & Price (Trial Available)

The Infiltrator 2 is a monstrous multi-effect that can combine, sequence, and adjust a whopping ten separate effects.
Devious Machines calls it a “turbocharged” update, and with 54 effects modules instead of the 28 in version 1, it’s evident the company has been hard at work. The layout is instantly recognizable, and existing customers can upgrade for no additional cost, which is a major plus.
You can utilize many copies of the same modules, and there are ten effect slots, user-editable multi-segment envelopes, and assignable macros, much like in the original Infiltrator. The amount of control you have in real-time truly sets it apart from other multi-effects.
There are now two independent envelopes for each effect, each of which can be synced to a maximum of 128 bars in duration.
Key Features:
- Presets
When it comes to presets, it’s common for effects plugins that pack a punch elsewhere to fall short. This could be because some people view the use of presets as lazy. But we consider it presets to be a crucial demonstration of a plugin’s capabilities. Infiltrators 750 presets already quite a lot, but v2 more than doubles that number.
It’s an insane amount, but at least they’re organized into categories and subcategories. To jumpstart your imagination, check out the Sound Design folder, where you’ll find patches like Faller Robo 4 Bar and Inertia. Presets like Bit Meddler, Future Announcement, and Slick Shifter are just a few examples of the incredible variety of sounds you can create with this plugin.
- Distortion Module
A new “Degrade” setting has been added to the Distort module for all distortion fanatics. The degrading vibe of this loud and destructive processor becomes apparent at around 30%.
Concerning reverb, everything has been rolled into a single module with three different settings (Reverb, LoFi, and the brand-new Void). An ‘infinite’-like effect is achieved at the highest settings, and the sound is textured overall.
- Master Section
An improved Master section with drive and compression is included in Infiltrator 2, and the same type of compressor controlled by a single knob is now available as a standalone module. The Master tab has a bass bypass option (40Hz to 1kHz), effectively disables all processing for frequencies below the specified threshold.
- Time Manipulation Modules
The modules that can alter past events are the most original additions. It’s great because of how simple it is to create tape slow-downs and reversals and how Stretch and Varispeed cover most speed ranges and spectrum.
You now have many options for adjusting how your music is played back in time, with this new effect and others like the stuttering Looper.
Compatibility:
This plugin is available for macOS 10.10 or higher (64-bit only) and Windows 7 or higher (64-bit only). It comes in VST/RTAS/AU/AAX formats and supports 32 and 64 bit systems.
Summary:
Each effect in the plugin now has a second, assignable envelope that can modulate any of its parameters, greatly increasing its modulation capabilities. The additional Formant and Notch filter modes in the Dual filter are welcome additions.
The improvement enhances the original in-depth and polishes it without changing its character. It’s not a cheap plugin, but it’s invaluable if you want a comprehensive set of creative tools.
10. Multipass (Flexible Multi FX)
More Info & Price (Trial Available)
Or Buy Here (Support Integraudio)
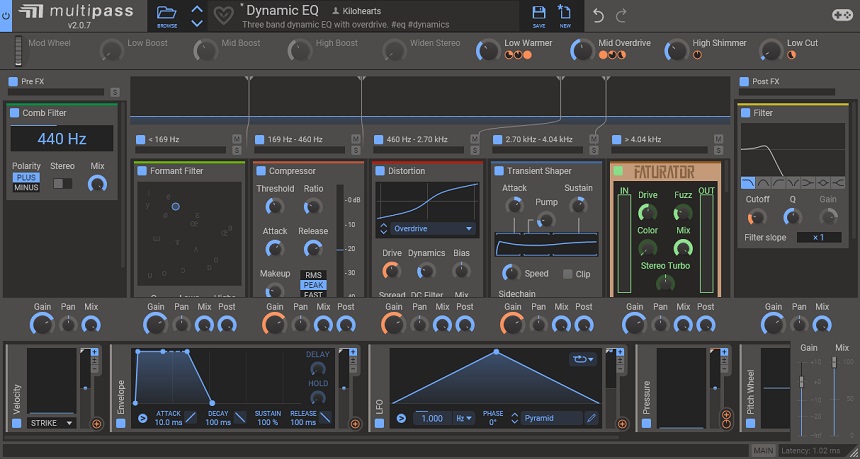

Multipass is a multi-band effects plugin that allows you to process each frequency band separately.
It has a modular workflow where you can add effects, filters, modulations, etc., and adjust their signal flow and routing. For example, you can add 3-5 frequency bands and set each band’s frequency range. In addition, there are global MACRO controls and modulators like LFOs, envelopes, and more.
Key Features:
- Expansive effects
You can add effects like 3-band EQ, Bitcrusher, Comb Filter, Gate, Stereo, Pitch Shifter, and more in any order you like. So, for example, you can separate the low mids by selecting a band between 250 and 500 Hz, and then you can add any effect from a compressor, distortion, eq, etc.
- Modulations
You can modulate any parameter using two LFOs, two envelopes/ADSRs, PITCH, MIDI, and SNAKE. For the envelope, you get three Modes and separate sliders for ADSR. So one can create interesting and fun movements using these modulations.
- Global Effects
You can also add effects to the entire spectrum of sound. The global effects can be pre- or post-the multi-band effects chain. In addition, you can use MACRO controls which allow you to control multiple parameters with a single controller.
Lastly, there’s also a band mixer in which you can adjust the pan, volume, mix, and other characteristics of the output of each band.
Compatibility:
The plugin is available as VST 2, VST 3, AU, and AAX plugin formats in 64-bit only, requires at least 2 GHz of CPU and 1 GB of memory, and works with Mac and Windows.
Summary:
Multipass offers a unique and comprehensive workflow for sound design and music production. You can transform your sounds using the plugin. Just browsing through the presets may inspire you enough. It’s the perfect plugin to throw in when you’re bored by a single loop and want to do something creative with it.
11. Waves Harmony (Harmonizer)
More Info & Price (Trial Available)
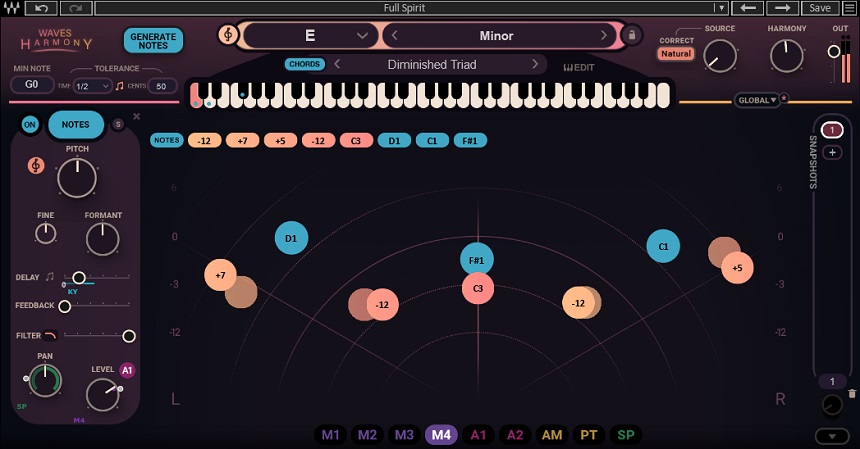


The best vocal harmonies can be naturally created inside this awesome plugin.
Waves is well-known for producing high-quality plugins and audio software, which come in a variety of versions and choices to suit a wide range of applications. However, any plugin that may improve the sound aspects or make the workflow easier is appreciated, and Waves Harmony is just like that.
This useful voice harmony generator has a simple and beautiful UI with clear controls that are entertaining to experiment with in the recording studio or on stage.
Key Features:
- Eight voices
Vocal Harmony is an excellent engine with eight separate voices, allowing for everything from a basic doubled-melody to a complicated and rich vocal arrangement for all these eight voices. This is critical and works flawlessly, with a true sound character like what actual vocalists would deliver.
- Pitch correction
As predicted, this plugin makes pitch adjustments quickly and simply. You may freely change and vary the pitch of every note, either by accident or by personal desire, with relative indicators on the screen. Feel free to correct any lines or simply repair one erroneous note as quickly as possible.
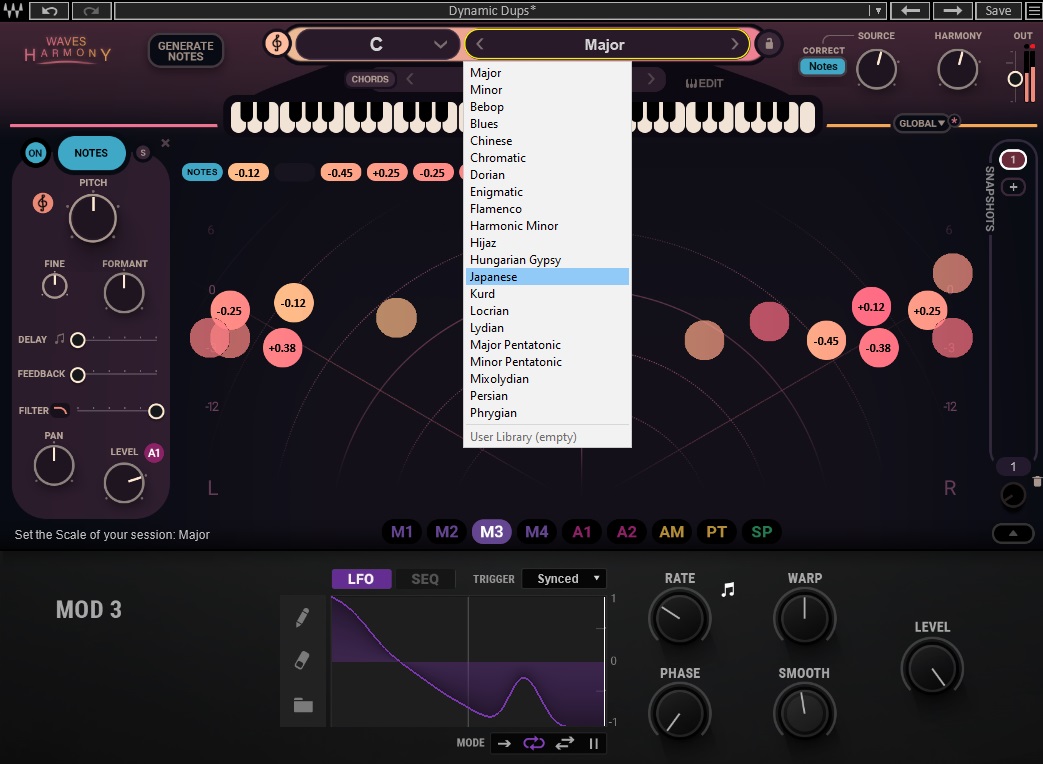
- Harmony Generator
The powerful engine hidden within Vocal Harmony is ideal not just for duplicating a vocal but also for sparking your creativity. The harmony generator may create immediate ideas based on current musical scales, giving your phrases and musical ideas even more authenticity.
- Formant shift
This type of vocal plugin typically includes a “formant” preset, which allows you to mimic the actions a human lip makes when talking or singing. Of course, there are other factors to consider when giving a genuine aural experience, but being able to modify how a singer’s lips react to a given phrase adds realism to this replication.
- Built-in effects
Although you can always add post-effects to anything you make, having the most significant aspects related to vocal harmony provided in this package is really useful. A separate “Delay” fader controls the effect’s feedback, while an extra “Filter” fader allows you to easily sweep over the frequencies in your music.
- MIDI controlled
One of the finest features of virtual instruments or effects such as Vocal Harmony is the ability to connect a MIDI device and play whatever you want. This plugin has complete MIDI compatibility from Waves, which may be quite handy for getting your vocals done correctly with the help of a keyboard, for example.
Compatibility:
This plugin is available for macOS 10.15.7, 11.6.5, and 12.4 (64-bit only) and Windows 10 or higher (64-bit only). It runs in VST, VST3, AAX, and AU plugin formats.
Summary:
Vocal correction software is difficult to use. It’s difficult to create a decent algorithm that sounds nice to the ears, but Waves has achieved it with Vocal Harmony. This fantastic plugin has a wonderful UI design that makes pitch correction and other modifications as simple as possible, with obvious buttons that change your results with the slightest touch.
Unfortunately, due to the high-processing nature of the effect, Vocal Harmony can have a substantial impact on CPU utilization, even when it works flawlessly.
12. FAW SubLab XL (Bass & Sub Bass Modeler)


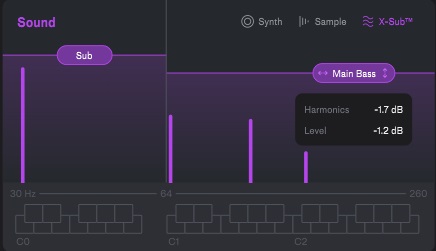

SubLab XL is a bass and 808 instrument by FAW.
The original SubLab was a creative software instrument designed specifically for creating deep bass sounds and 808s. It featured the innovative X-Sub technology by FAW, which guaranteed sub integrity on all sound systems. The XL version includes many more features and fresher sounds.
Key Features:
- Synth engine
The beauty of SubLab lies in its split into three different engines. The synth engine is where you get to design the bulk of the bass sound. You can choose between sinewave, triangle, square, saw, and the new super oscillator.
Once you’ve selected the sound shape of your choice, you can set the pitch and detune your sound. As a result, you can achieve subtle and deep bass sounds or buzzy and supersaws with great ease. The super oscillator is an excellent addition to SubLab, and it’s great for creating buzzy sounds with a deep low end.
- Sample engine
The sample engine is where you can load different samples to handle the sound’s transient. You can load a kick drum or any other punchy sound that will be the transient of your 808. Additionally, you can choose to sidechain the synth engine to the sample engine so that the transient comes through loud and clear.
- X-Sub
The main appeal of SubLab is X-Sub, the psychoacoustic synth engine that guarantees the integrity of your sub bass no matter what playback system it’s heard on. It basically adds a consistent sublayer underneath your bass sound.
Of course, you can adjust how much of it you wish to add, but overall it’s very balanced and can help your bass sound stand out and hit hard anywhere, from earbuds and laptop speakers to club sound systems.
- Effects and modulation
SubLab offers a few different tools for sound design. You get one LFO that can be assigned to two parameters simultaneously. It can be synced to your host’s BPM or run in Hz and has sine, square, saw, triangle, and noise shapes.
Furthermore, there is a filter, perfect for sculpting your high end and boosting your low end with the right amount of resonance. Finally, you get access to new effects, like the waveshaper, which comes with sine fold and linear fold options.
This is perfect for creating interesting harmonics on your bass sound so that it cuts through the mix. There are also tape distortion effects with hiss and wobble controls and a bit crusher with decimation and bit mode controls.
- Macros
Another great new feature of SubLab XL is the macros. You get two macros that you can assign to various parameters. Once done, you can use a single knob to modulate multiple parameters. This is a great way to turn a basic 808 into something unique and original that suits your music. There is also a captivating macro window with excellent graphics that represent the way the macro behaves with the bass sound.
Compatibility:
SubLab XL is available on Windows 7 or higher and macOS 10.12 or higher in VST2, VST3, AU, and AAX formats.
Summary:
SubLab XL is a great upgrade to the original SubLab. The new super engine offers a new range of bass sounds that can feel synth-like than 808s. The new effects are creative and fun to play with, while everything else that made the original so good is still effective.
If you’re a contemporary hip hop and trap producer, SubLab XL could be the one instrument you need to cover your bass duties.
13. BabyAudio Crystalline (Algorithmic Reverb)
More Info & Price (Trial Available)

Crystalline is an algorithmic reverb by BabyAudio.
Crystalline is inspired by iconic reverb units of the past, like the Lexicon hardware units, and packages that top-tier quality in software. There is only one reverb type that you can adjust and modify through the various controls Crystalline offers.
I find it ideal for vocals because it feels like a plate reverb but much brighter, while the controls help add clarity and definition, which will help any vocal stand out.
Key Features:
- Reflections
Crystalline’s interface is slick and divided into five panels. The first one is reflections, a place to tweak the overall character of your reverb. The first parameter is size, which I’m sure you’ve seen in all reverb plugins.
It comes with five different modes which determine the size of your space. The second parameter, sparkle, will add air to your reverb by boosting its high-end. This is one of the features that make Crystalline sound excellent on vocals.
Use it right, and you’ll add a third dimension of clarity to your lead vocals. Finally, the width will determine how narrow or wide the reverb sound is.
- Clean up
The second panel is called clean-up. This is where you can sculpt your reverb tone through various EQ, Gate, and Imager processors. The damping parameter will use an EQ to tame the reverb’s top-end, making it darker and warmer.
The sides parameter lets you set a frequency focal point. The frequencies below this focal point will remain in mono, so you can push the higher frequencies to the sides without compromising your reverb impact.
Finally, Gate works like a Gate. It lets you set a threshold that determines when the reverb comes through.
- Depth
The depth panel is where you can start adding interesting effects and processes to make your reverb tone more unique. First, you have a resolution parameter that controls the level of the algorithm inside Crystalline.
On its higher setting, Pristine, it can be quite CPU intensive; therefore, you can opt for the Basic mode, which will save you some CPU usage. The second parameter here is modulation, a pitch effect that will add a unique character to your reverb.
The final parameter is shimmer, a process that extends the reverb’s decay on the higher frequencies. This is excellent for crafting haunting reverbs that linger and feel angelic.
- Shape
The shape panel includes tones and an EQ for sculpting the overall tone of the reverb. There is also a smoothing parameter that will make your wet signal less impactful for more subtle results. Finally, you get a transients parameter.
This will help you either emphasize the attack of the reverb or the sustain. It’s great for adding punch to your drums by boosting the attack or adding more atmosphere to your vocals by boosting the sustain.
- Utility controls.
The central panel includes a gorgeous visual representation of the reverb. There are the usual wet and dry faders and a sync button to work in note values rather than ms. In addition, you get a start fader that works as a predelay knob ad an end fader that determines the reverb’s decay.
An incredibly useful function is the ducker which will duck the wet signal while the dry signal plays above a certain threshold. This is important in vocal processing because often, the wet signal drowns out the dry signal, resulting in a confusing mess where you can’t identify what the vocalist is singing about.
The ducker will let your singer finish their phrase and then introduce more of the wet signal. Finally, creative parameters like the freeze and reverse buttons are excellent additions for sound designers or those seeking more experimental approaches in their reverbs.
Compatibility:
Crystalline is available on Windows 7 or higher and macOS 10.7 or higher in VST, VST3, AU, and AAX formats.
Summary:
Crystalline is a clean, modern, and beautiful sounding reverb. The sparkle, shimmer, sides, and duck parameters make it excellent for vocal processing, while the interface is slick and easy to understand.
There are also many presets designed by top-tier sound designers who can help you start using Crystalline right away, although I’d suggest you embrace its curious nature by tweaking each parameter yourself and finding out what works best for you.
14. Output PORTAL (Granular FX)
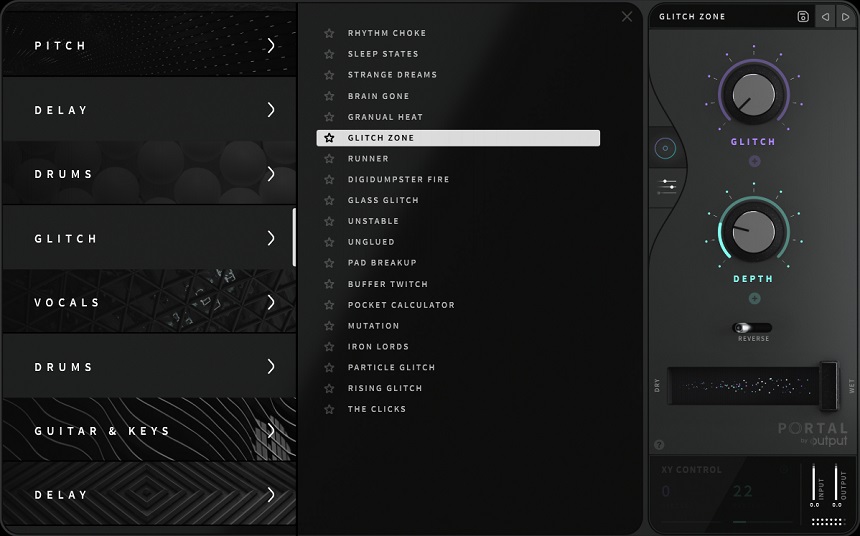

Granular synthesis allows you to push any audio input to its limits.
Granular synthesis is a sound processing technique that divides an audio sample into numerous pieces known as “grains.” These grains let you create unique sounds and rhythmic patterns based on your preferences, and the possibilities are truly limitless.
Output PORTAL provides precisely that, but its biggest feature is its ability to expand its capability to many audio input sources.
Key Features:
- XY Control
The large, circular “XY Control” on the bottom left side of the main screen has a distinct attractive design that provides a clear picture of the granular parameters you may want to modify. A smaller circle displays the current settings, and you can move it about to change the values for “Pitch” (Y) and “Movement” (X).
- Effects
There are seven built-in effects that may be freely utilized. You may choose from “Stereo Delay,” “Distortion,” “Filter,” “Chorus,” “Phaser,” “Reverb,” and “Bit Reducer,” each with its own set of settings such as “Size” and “Width.”
- Presets
Presets not only give quick, terrific sounds, but they are also an excellent method to begin studying a certain effect. Granular synthesis isn’t the most straightforward tool to use; thus, it’s good to have over 250 factory presets that can be tweaked to your liking while still providing quick playability.
- Grain controls
These settings are in charge of the majority of PORTAL’s sound processing modifications. You may change the settings for the “STRETCH,” “PITCH,” “SPEED,” “REVERSE,” “DENSITY,” “GRAIN SIZE,” “TIME,” “SHAPE,” “PAN,” “OFFSET,” and “FEEDBACK” parameters, which all affect how one grain behaves in relation to others.
- Modulation
The “Modulation” part of the “Advanced Page” is made up of two assignable envelopes that are shown in an appealing and simple visual that highlights the waveforms. In the “Sine Wave” section, for example, you’ll discover a perfect sine wave in a brilliant yellow hue, and you may choose a specific node and freely change it.
These types of tweaks will give your modulation a distinct sound that is specific to the input signal you’re changing.
Compatibility:
This plugin is available for macOS 10.9 or higher (64-bit only) and Windows 7 or higher (64-bit only). It runs in VST, AAX, and AU plugin formats.
Summary:
Synthesizers are excellent for creating new textures and soundscapes, regardless of the sort of synthesis used. Granular synthesis, for example, works with tiny divisions of an audio sample, and changing it by these little portions might be beneficial for more nuanced sonority changes.
In PORTAL, you may select the input signal to be adjusted (line, MIDI, other plugins, vocals, you name it!), and the program will handle the rest. All commands are simple to change and read, which may entice producers who are unfamiliar with granular synthesis to experiment with it.
15. Devious Machines Pitch Monster (All-Round Pitch Shifter)
More Info & Price (Trial Available)
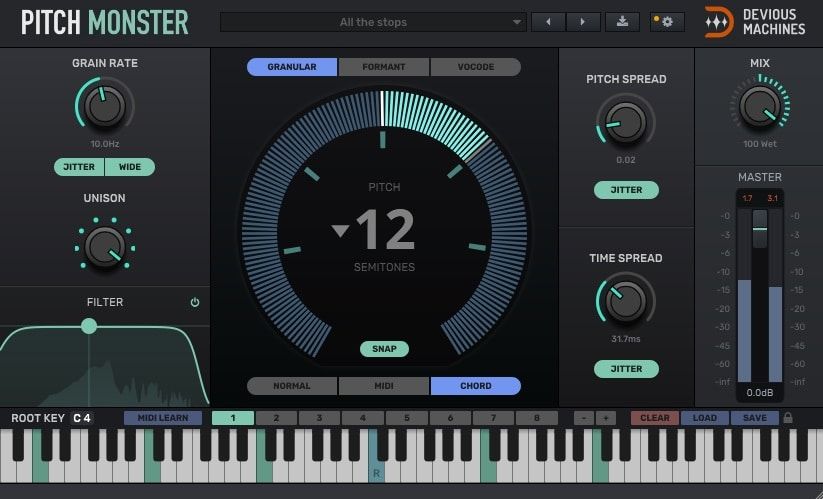

Create stacks of harmonies or pitch-shift beyond recognition with this versatile plugin.
Despite a simplistic interface, Pitch Monster lives up to its name with features beyond what you’d expect from similar plugins. Furthermore, Pitch Monster often sounds better than other pitch-shifting plugins even when comparing the same functions thanks to its granular pitch-shifting engine.
Key Features:
- Highly Capable
The plugin can change pitch up to six octaves from the original key. It makes Pitch Monster an unbeatable tool for sound designing. Similarly, it can create eight-voice harmony, with each voice capable of eight unison voices. That makes sixty-four voices in total.
- Multi-Engine
The plugin features three pitch-shifting engines: Granular, Formant, and Vocode. The Granular Engine is suitable for any kind of audio, and you can even adjust the granule size. Conversely, the latter two engines are better suited for solo vocals.
Formant changes the pitch of the vowel and the consonant separately, whereas Vocode flattens vibrato. I suggest using the Formant mode for general voice editing and creating harmonies.
It sounds the most natural for monophonic vocals. However, if you want to get creative and produce melodies for vocal chops, try the vocode mode.
- Modes
Pitch Monster features three modes of performance: Normal, Midi, and Chord. The normal mode is merely a pitch shifter, whereas the Midi mode allows you to control the pitch using midi input with an optional glide feature. Similarly, Chord mode lets you play multiple notes simultaneously.
Furthermore, a Chord Memory feature lets you save up to eight chords. You can perform the chords using automation. This feature is excellent for creating artificial harmonies during a live performance.
Compatibility:
Devious Machines Pitch Monster is available for Windows 7 or higher 32-bit and 64-bit and macOS 10.9 to higher 64-bit only. It comes in VST 2/3, AU, and AAX formats.
Summary:
If you tend to need a pitch shifter often, you can’t go wrong with this plugin. It even handles vocal pitch correction to an extent via its Midi mode. Furthermore, its harmony engine and chord memory features make the plugin unparalleled in that regard.
16. AudioThing Fog Convolver 2 (Convolution Reverb)
More Info & Price (Trial Available)


A genuinely stereo spatial tool that responds to every nuance dynamically.
Convolution reverbs are new and recent in the history of this effect. The nicest part about this type of effect is that impulse responses are used in the spatial context of your effect, which allows you to recreate more accurately how a reverberation would occur in a given environment.
Key Features:
- IR selection
The top left corner’s “IR 1” and “IR 2” buttons allow you to choose which impulse response is presently being changed, with the option of swiftly skipping any of the two. The little “Link” button (the small chain) connects the settings for both inputs, and the “Lock” button disables all parameters except the IR, which is loaded from a preset.
- Graphic EQ
The inbuilt equalization may be turned on and off at any moment. There are five bands, and the ability to control each one with a mouse click while the mouse wheel adjusts the “Q” factor of that band. Each band may be reset to its default setting by double-clicking it.
- Routing section
The little piece in the far right corner of the screen is in charge of determining the effect’s proper routing. You can select one of five routing modes: “Single,” “Serial,” “Parallel,” “Parallel Mix,” or “True Stereo.” You may also change the “Balance,” “Mix,” and “Output” settings for each IR.
- General parameters
The nine general parameters are controlled by the grey knobs. “Pre Delay,” “Gain,” “Pitch,” “Start,” “End” (sets the start or end point for the IR), “Fade In,” “Fade Out,” “Curve,” “Balance,” “Mix,” and “Output” are among them.
- Parameter lock
If you need to prevent some parameters from changing values, utilize the “Parameter Lock” option to make them unchangeable. If a parameter is locked, it will not be changed by any modifications, which may be specified for all parameters or just one.
Compatibility:
This plugin is available for macOS 10.9 to 12 (64-bit only) and Windows 7 or higher (64-bit only). It runs in VST2, VST3, AAX, CLAP, and AU plugin formats.
Summary:
The wonderful thing about current plugins is that they frequently surpass our expectations. Thinking of anything as a reverb with personalized impulse responses is quite the future, and it’s about time we started using some cutting-edge technologies in our job endeavors.
Fog Convolver 2 masterfully mixes contemporary IR modeling with classic controls and settings, providing an unmatched sound texture to whatever ambient you wish to create in your track..
17. UVI Shade (Comb/Creative Filter)
More Info & Price (Trial Available)
Or Buy Here (Support Integraudio)

From the makers of Falcon 2, one of the best sound designing instruments ever created, comes this versatile equalizer capable of comb filtering and so much more.
While we will be focusing on the comb filter side of this plugin, we must still mention its grandeur when it comes to EQing. Shade is a digital equalizer with unlimited bands, numerous kinds of filters, modulation, side-chain, etc. It also employs a spectrum analyzer on its background to provide visual feedback.
Shade generates the comb filtering effect using a predefined comb shape rather than feedback or feed-forward delay. It’s more accurate and offers you a lot more control than you’d normally receive. You can also utilize the comb shape to amplify the comb frequencies instead of the usual cancellation. Speaking of which, Shade also provides notch-shaped comb filters to make the effect even more apparent.
Other than comb filtering, the plugin features a phaser filter shape that has three preset dips/resonance in the frequencies. You can use the onboard modulators to animate the filters and create a flanger and chorus effect. We’ll get more into these in the next section.
Key Features:
- 35 Filters
There are 35 filters divided into these categories: low-pass, high-pass, notch, band-pass, high shelf, low shelf, peak, phaser, comb, and special. While most of them are relatively ordinary, the last three are unique.
For example, under the Special category, you’ll find tilt EQ and Xpander, of which the latter has 37 modes and three drive/saturation types.
- Modulators
The plugin has a dedicated modulator section where you can add an unlimited number of modulators. The modulator types include an Envelope, Figure, Follower, LFO, Macro, MSEG, Random, Spread, and an XY pad.
You can assign a modulator to a parameter by right-clicking the parameter and selecting the modulator from the list. As an example, you can use the Macro modulator to control several parameters at once.
- Stereo Processing
Every band in this EQ offers several stereo modes: Stereo LR, Stereo MS, Left, Right, Mono/Mid, and Side. So, you could add filters only on the sides to create wide movements. Or, by filtering each side of the stereo channel independently, you could use the comb filter to generate pseudo-stereo effects in mono audio.
- Effective
Shade is full of helpful features that make this EQ user-friendly and practical. For example, you can specify the slope value of the spectrum analyzer. And for most filters, the slope steepness can reach up to an astounding 2,000 dB/oct., which is a blessing for mastering uses.
Compatibility:
UVI Shade is available for Windows 8 or higher and macOS 10.9 or higher, both 64-bit only. It comes in VST 2/3, AU, and AAX formats.
Summary:
The plugin is a comprehensive digital equalizer on steroids capable of detailed editing, mastering, and sound designing. Having a dedicated modulator section makes intricate sound designing quick and easy.
Furthermore, with modulators such as the Follower, you can create rhythmic sounds side-chained to kicks. Overall, the plugin is worth a try without a doubt
18. iZotope VocalSynth 2 (Vocoder Synth)
More Info & Price (Trial Available)
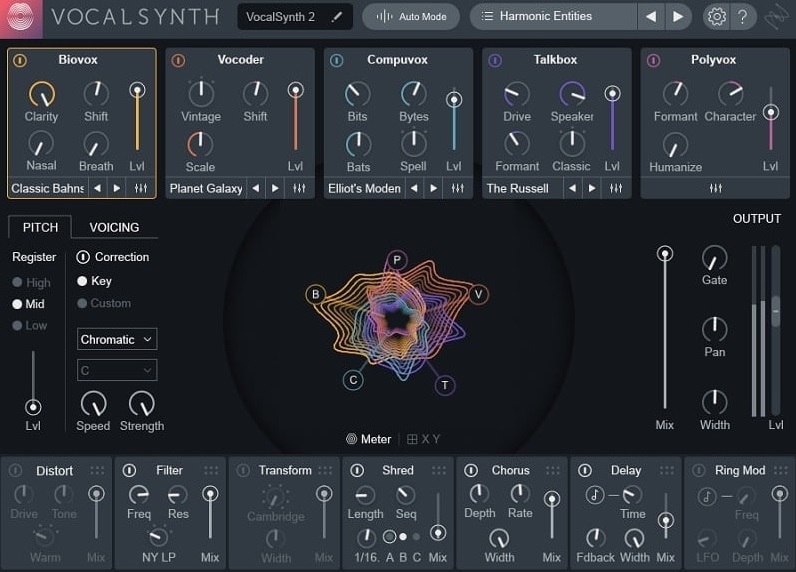
Izotope vocal synth 2 simplifies vocal synthesis with its easy-to-understand & execute sound engine and signal flow.
The main attraction of the plugin is its modules that enable advanced processing and modulation and allows synths and vocals to combine with and modulate each other. CompuVox, Talkbox, vocoder, and some of these modules or vocal engines.
Hence you get almost every type of vocal synthesis, along with an internal pitch corrector on which you could set the scale of the song, so your voices or the synths don’t go out of tune. Apart from the five vocal engines, it has seven stompbox-style vocal effects like filtration, distortion, beat-repeating, speaker convolution modeling, stereo delay, chorus, and ring modulation.
Key Features:
- Polyvox module
Polyvox module produces harmonies for which we can control the pitch. You can add these harmonies to the voices and the synths using MIDI input. You can also play around with vocal nasality, vowel shapes, and formant using it, which could be utilized for creative vocal effects & fat, and interesting layering.
- An immense range of Presets
Even if you don’t know what each knob and tab does, you can easily load up a preset from its huge collection of presets and get plenty of options to create insane vocal effects.
- Modes for maximum functionality
One need not sing notes to use the plugin and its sound design features. VocalSynth 2 has different modes like MIDI, auto, and sidechain, which takes input from MIDI data (MIDI mode), a vocal recording (auto mode), or any audio waveform (sidechain mode).
- Interplugin communication with other ozone plugins
You can access VocalSynth 2 with other plugins of the Ozone universe like Neutron, Ozone, and Tonal Balance Control, which gives you comprehensive control over the editing & processing of your sounds.
- Vocal preservation
The inbuilt auto-tune preserves the organic texture of the vocals, so the output doesn’t sound entirely synthetic and robotic.
- Plenty of effects
One can add many effects on top of the sound like distortion, filter, transform, shred, chorus, and more. There are also some modulation effects available and an XY pad too.
Compatibility:
VocalSynth 2 is available in AU, AAX, VST2, and VST3 versions, and requires macOS High Sierra (10.13.6) – macOS Monterey (12.3.x) for Mac, or Windows 10 and 11.
Summary:
If you are looking for a plugin with comprehensive vocal synthesis and effects, Izotope has created a great solution for you. The plugin has everything one could ask for in the simplest way possible, with its exciting interface and interactive design.
19. Waves CR8 (Creative Sampler)
More Info & Price (Trial Available)

Waves CR8 is a multi-layer sampler with wide functionality and an efficient sample finder.
It allows you to layer up to eight sounds and has a non-complicated interface. It also packs Cosmos – a unique sample finder, as it browses through your samples and uses its algorithm to classify these samples in an organized fashion. On top of it, you can apply a good amount of modulation and filters to each sound.
With over 2500 free samples and 800 presets, CR8 makes sound design easy, accessible, and fun. You can load up a sample up to 30 seconds in length and further manipulate its envelope, pitch, and other parameters.
Key Features:
- Mixer Window
You can change the balance of each of the layers of the sampler by using the mixer window that allows you to change the volume, pan, tune, width, and the mode & scheme of the sample.
- Multiple Stretching algorithms
Under the scheme drop-down menu, you can apply one of five different stretching algorithms: voice, beat, harmonic, melodic, and classic, each for different timbres and textures of sounds.
- Root & BPM Detection
That is an underrated sampler feature that is hard to find in most samplers. However, CR-8 has an inbuilt key and BPM finder that makes sampling easier for music producers.
- Modulations
The plugin offers 4 LFOs/sequencers, 4 ADSR envelopes, and more modulations to be applied to any control with easy drag and drop.
Compatibility:
The software is available as VST, AAX, and AU plugin and requires a macOS 10.14.6 or later or a Windows 10 or later operating system.
Summary:
CR-8 by Waves offers more functionality and scope than an average stock sampler available in any DAW, with easy loop, reverse, freeze, and more options for immediate control and a workflow that makes it easy & fun to work with one-shot samples and loops. As a sound designer, plenty of opportunities open up with this highly-capable sampler.
20. Arturia Modular V3 (Modular/Moog Emulation Synth)
More Info & Price (Trial Available)
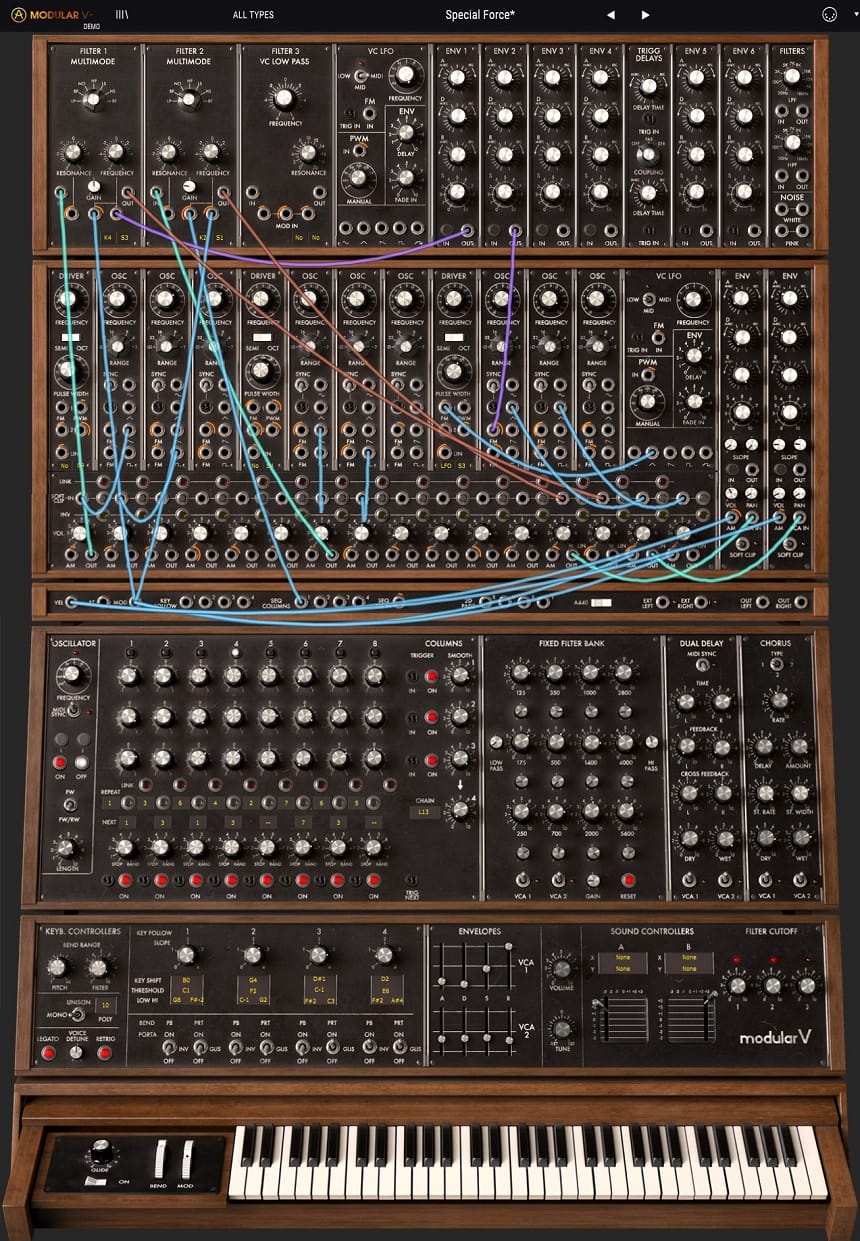
Arturia takes us back to the roots of synthesis with this emulation of a revered classic.
The Arturia Modular V is based on the Moog Model 55 modular synth, which was a two-notes polyphonic synth. This software emulation adds sensible features like formant filtering and 64-voice polyphony to the original design.
The interface, however, remains faithful to the hardware along with the manual patching workflow.
Key Features:
- Powerful Oscillators
Sometimes, more is more in synthesis. Modular V features 9 oscillators in total, and each can generate sine, triangle, saw, and square waves. Furthermore, they also feature frequency and amplitude modulations.
While it may seem unnecessary to have so many oscillators, you’ll probably spend most of them for unison as there isn’t a dedicated feature for that. Also, there’s a noise generator.
- Moog Filters
There are three filter modules in the plugin, and they accurately recreate the sound of the original filters (low-pass). The plugin lets you select one of four types of filters for each module: a low-pass, high-pass, notch, and a band-pass, all of them with 24 dB/octave slope steepness.
Furthermore, you’ll also find a Fixed Filter Bank, where you can equalize the signal coming from the two output amplifiers (VCA) using 14 bands.
- Effect Processors
The plugin features chorus, phaser, and stereo delay processors. There are three chorus types selectable with a toggle switch. And you can sync the stereo delay to the host tempo. You’ll probably want to use the delay as an echo effect rather than as a spatial effect.
- Sequence Generator
This module, better known as a sequencer, is comparable to the original model 960 sequencer but simplifies programming with internal connections. The low-frequency oscillator, the 8-step sequence manager, and the output controller are the three components of this module. The oscillator sets the playback rate, which can also be synced to the host
Compatibility:
The plugin is available for Windows 7 or higher and macOS 10.11 or higher, both 64-bit only. It comes in VST 2/3, AU, and AAX formats.
Summary:
Featuring over 600 presets, Arturia’s Modular V is probably one of the most inspiring synths yet.
However, the interface often feels overly large and clunky, especially if you use a smaller screen like a laptop, although it retains the original hardware’s feel. Sound-wise, the emulation is spot-on, and if you like analog sounds, this synth should be at a high place on your list.
21. FabFilter Timeless 3 (Ultra Flexible Delay)
More Info & Price (Trial Available)

Timeless 3 takes delay effects up a notch with its analog filters and interesting modulations & effects.
Initially, it was created only for warm & vintage tap delay effects, but now it’s become way more than that, and we can create almost any type of effects using the in-built Pro-Q/equalizer, saturn/saturation, LFO modulations, its special cross-feedback functions, and much more.
Fab Filter has constantly innovated to create and recreate the Timeless to produce a perfect product with ” timeless capabilities”. For example, one can set the pan and level of every single voice in the delayed or wet signal.
Key Features:
- Expansive Modulations
You can do a lot with the modulation section, as it can have LFO, slider, XY controls, envelope follower, envelope generator, and MIDI as its source. You can set up to 50 modulators.
- Characters Section
Here you can add effects like Lo-Fi, Diffuse, and Dynamics and control their overall mix using their sliders. This allows you to shape the sounds as per your taste tonally.
- Versatility
Whether it is a simple yet subtle delay effect on pop vocals, high-feedback psychedelic delay on guitar, or a spaced-out synth delay, you can apply Timeless3 to it. You can create & emulate almost every kind of delay effect ranging from slapback echo, flanged delay, looping delay, or analog/tape delay.
- Visual Feedback
The plugin has a great interface, as it offers visual monitoring of almost everything we perform in the plugin. In addition, the GUI is intuitive, playable, simple, and easy to navigate.
Compatibility:
It is available in VST/VST3, AU, and AAX versions and works with Mac (10.12+) and Windows (7 or later).
Summary:
Fab Filter makes plugins that are hard to ignore and tempting, and Timeless is one such tool because of its simple drag and drops modulations, creative effects, warm sonic characteristics, and eye-catchy design.
You will find yourself with expansive functionalities you didn’t know you wanted in a delay plugin. The price could be heavy, and too many possibilities could be overwhelming for some people, but the plugin is still a good investment overall.
KOAN Sound made awesome advanced tutorial on using Timeless 3. You can check their patreon here.
22. XLN Audio RC-20 Retro Color (Audio Modeler)
More Info & Price (Trial Available)
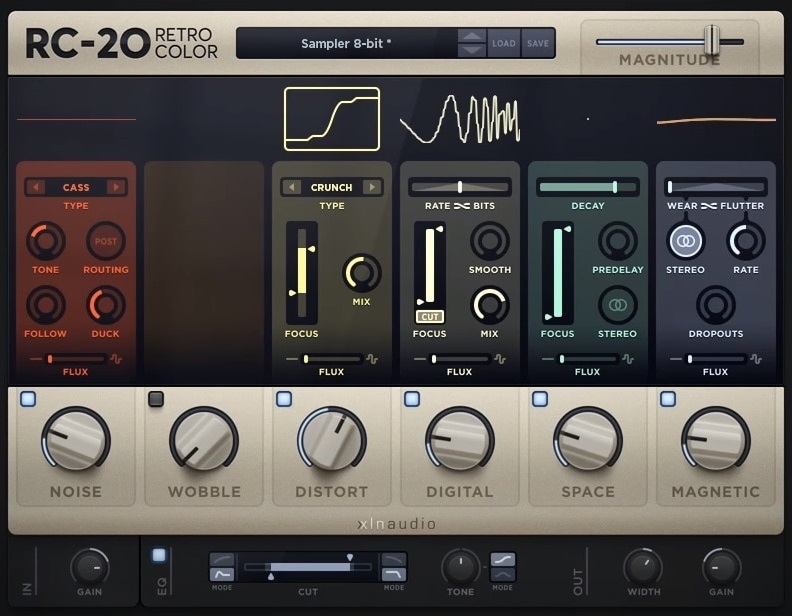
The RC-20 Retro Color from XLN Audio would be a great plugin to give color to instruments or an entire mix bus.
Giving color to the mix bus or individual instruments is always a good idea. The sound becomes more exciting and gets its own “flavor.“ And the next item on our list will give you plenty of opportunities to experiment with this. It is the RC-20 Retro Color from XLN Audio.
You get six different processing modules here, which include various types of effects. In addition, you can either apply all the sections at once or disable individual ones, choosing only what you need. And, of course, there is the section that is responsible for the overall output.
Key Features:
- 6 Sections Of Processing
Overall, the plugin will be divided into six sections: Noise, Wobble, Distort, Digital, Space, and Magnetic. In each of them, you will be able to select different types of effects and apply settings like Flux, Mix, Tone, and more.
- Get Control Over Each Section
If you don’t need any of these sections, you can turn them off by pressing the little blue button. Or use the big knobs to control the amount of a particular effect. For example, use them to add that to your liking.
- Magnitude Control
The big Magnitude slider in the upper right corner will be like a Mix control. Thus, you will get a completely wet signal in the right position. The more you move this to the left, the more the dry signal will be mixed in.
- Master EQ Section
At the bottom of the plugin, you will have a separate section responsible for EQ. Here you can apply Low and High Pass filters and select their slope. In addition, you will get a Tone knob which can be used as a tilt filter or bell.
- In & Out Control
And, of course, you will have separate controls for Input and Output. Notably, you also get a separate Width knob in this section to make the stereo picture a little wider.
Compatibility:
XLN Audio RC-20 Retro Color is available for Windows 7 or higher and macOS 10.10 or higher, both 64-bit only. It comes in VST, AU, and AAX formats.
Summary:
The RC-20 Retro Color from XLN Audio is a wonderful processor, or modern channel strip, that allows you to add color to your sound. It has modules including Noise, Wobble, Distort, Space, and others. Also, it has a pretty powerful Master section, where you can adjust the tone and set the width.
23. UJAM Dynamo (Instant Rhytmic Machine)
More Info & Price (Trial Available)

Dynamo is a creative plugin introducing interesting movements and new rhythm patterns in your sounds.
An example of great use of the plugin is to throw it on a vocal track and then adjust its knobs to create some cool & dynamic vocal chops. Another example is to apply it on the entire beat or the mix bus and change its entire groove.
Dynamo simply creates animated and morphed rhythmic effects on whatever you use it on, but it is not limited to that. You can also create interesting effects on your sounds, as it packs a chain of various effects ranging from EQ, Chorus, Reverb, etc.
Key Features:
- Simplified Interface
You can add new movements & grooves just by rotating four knobs. There are only four controls. However, a lot is going under the hood, which makes the plugin user especially beginner-friendly.
- Rhythm selector
The pattern knob in Dynamo gives you up to 5 different patterns to choose from to add juicy grooves to your sounds.
- Effects section
The plugin packs a huge matrix of step filters, multiband distortion, delays, convolution reverbs, and many more effects.
Compatibility:
Dynamo is available in AU 2, AAX, and VST formats and requires Windows 7+ or Mac OSX 10.14 or later and a minimum of 8 GB RAM and 900 MB of hard disk space.
Summary:
With 50 precisely curated audio effect configurations built from 27 algorithms, it’s a great tool for creating rhythmic transformations, which could inspire fresh ideas in a streamlined fashion.
24. Devious Machines Texture (Multi Effect & Texture Maker)

Devious Machines’ Texture uses a library with over 340 acoustic and electronic samples to synthesize new layers into your track.
The plugin analyzes the transients and dynamics of your sound to add textures from its library. You can modulate the dynamics and EQ to make these textures fit your music. This is an excellent plugin for enhancing your mixes.
You can use it to make programmed drums more natural or generate ambiance and crowd noise, as well as analog noises of different kinds.
Key Features:
- Sample
This area lets you choose the noise that will modulate your sound. There are over 340 options, all adjustable through sample-dependent parameters, like Colour, Octave, and Pitch. Moreover, you get a dual lowpass and highpass filter that lets you shape the source’s tone. The link option connects this filter to the sidechain filter.
- Dynamics
This section is divided into two main parts: the Sidechain Filter and the Envelope. You also get a gate and a limiter, which you can control in the Envelope section. The controls for this section are straightforward.
The plugin offers attack, hold, and decay knobs in linked or dual-mono configurations. Additionally, you can activate Makeup, which will compensate for the gain loss caused by the processing.
- Modulation
The Modulation panel is here to help you add movement to your sound. You can use the envelope from Texture and the output of an LFO to the resulting sound with new depth and character. Five LFO types let you sync to the host tempo, but you can also adjust how synced they are using the Phase knob.
- Two EQs
One for the clean input material and another for the sound generated by Texture. These are 5-band parametric EQs, and you can right-click the filter icons to get extra options beyond shelves and bells.
Character & Sound:
The plugin can add incredible natural or digital-sounding layers that enhance the listening experience. From pitch-modulated effects to a subharmonic synthesizer, you can use Texture to make your music more enjoyable.
The plugin will always analyze your track volume and respond by generating a sound that perfectly matches the source’s dynamics. Whatever extra modulations you add will only make the sound more unique.
From version 1.5 forward, you can also add your own samples as texture sources. Additionally, the plugin also offers two granular synthesis modes that amplify its resourcefulness.
You can not only choose from the vast library or add your own samples; now, you can also use the granular method to select a part of the sample and resynthesize it. Then you need simply to use the Color knob to choose the area where the grains are played.
Compatibility:
This plugin is available for Windows 7 or later and macOS 10.9 or higher in VST, AU, and AAX formats.
Summary:
Texture, by Devious Machines, is a fantastic plugin that saves a lot of time in sound designing. It’s easy to lose yourself to this plugin’s far-reaching sample collection, which makes it an alluring tool for many producers in search of suitable sonic layers.
The user interface is friendly, and the controls are simple, so even inexperienced producers can benefit from its outstanding sound.
25. Audio Damage Replicant 3 (Glitcher/Stutter/Sequencer)
More Info & Price (Trial Available)


Audio Damage’s Replicant 3 is 3 times more powerful and has many new features and effects that will help you generate creative glitches in no time.
Replicant 3 offers a lot of features that will help you manipulate sounds. You can create rhythm parts and set them to reverse, loop, and re-slice in real time while adding creative effects to bring the sound to a complex final version.
Key Features:
- Replicator (Sequencer)
Replicant 3 has a number of steps ranging from 3 to 16 per bar, which means you can make much more complex rhythmic effects.
When engaging the triplets, you can set a random loop amount for more unpredictability or to control the number of repeats, their randomness, and their direction.
- Effects
In Replicant 2, you had a Sutter effect that added more subdivisions for a glitchier sound. But Audio Damage didn’t let themselves down and decided to add more effects modes.
Besides the Sutter Slice effect, you also have Ringmod (ring modulator), Delay, and Redukt (bit crusher). Words are superfluous, and we can say that the plugin is 3 times more powerful.
- Presets
There are many more presets than the previous version, and the preset manager is much better designed. Here you can start getting glitches with a very small preamble. The plugin lets you save them and create new ones, so endless possibilities exist.
- Event FX
This new version has an additional cross-fade envelope in the Event FX and full non-sequential control of the slicing engine through a manual trigger (for touchscreens) and MIDI trigger. A built-in filter, pitch and panning knobs, and randomization parameters allow for generating random, probabilistic patterns.
Compatibility:
Audio Damage Replicant 3 is available in VST, AAX, and AU formats (32-bit and 64-bit) for Windows 10,8,7 and macOS 10.12 – 10.15.
Summary:
This new version is welcome and has brought a lot of good improvements. From IDM to Hip Hop, this tool brings your creations to a new dimension. It’s worth every penny, but that’s not all. If you have the second version of Replicant, they’ll give you a discount, which is very cool of the folks at Audio Damage.
26. Audio Damage Enso (Multi FX / Looper)
More Info & Price (Trial Available)

Enso is a virtual audio looper that lets you record and loop audio with several real-time effects in your DAW.
It allows you to record and playback up to 10 minutes of stereo audio multi-directionally at different speeds. The single-button loop engine is fully automatic and lets you add effects in a very tape-style fashion. Hence, even if it works as a modern looper, its sonic behavior is modeled after vintage tape machines.
Key Features:
- Intuitive Interface
The resizable GUI is stunning and uncomplicated, with the signal chain being straightforward and streamlined, making Enso easy to use and operate with, both in the studio and live settings.
- Tradition signal flow
Like old-school loopers, the plugin can have the input mixed with buffer content, after which it can be sent to effects, or like a tape looper, the feedback path contains the effects and speed changes using the Dub in Place button. One can also have four different start and end points, in which sector crossfades can happen
Compatibility:
It’s available as a VST, VST 3, AU, and AAX for Windows 8.1 or higher (64-bit only) and macOS 10.12 or newer, as VST and VST 3 for Unbutu 18 or later, and AUv3 for iOS or newer.
Summary:
Enso is a fun tool and is great in emulating the warped sonics of vintage tape manipulators, which makes it a great tool, especially for guitarist-producers. In addition, its workflow is creative and can inspire your sound design process. Lastly, the onboard effects sound analog and are of good quality.
27. AIR Music Tech – The Riser (Creative Transition Generator)
More Info & Price (Trial Available)
The Riser is an innovative transition creator tool that you can use to create interesting sweeps, swells, fades, and risers effects.
A lot of times, it’s hard to find transition loops that fit the song tempo, pitch, mood, and other parameters, without introducing artifacts. You can create those sweeps & risers in synthesizers, but that’s too time-consuming. AIR Music Technology has a solution by which you can create these sound effects efficiently and tweak them according to your song and taste.
It works like any synth plugin and has three sound generators: sweep, noise, and chord. You can load up a waveform of your choice in the chord and sweep oscillators. It also has a filter, 2 LFOs, 1 amp LFO, and effects.
Key Features:
- Versatile range of presets
The Riser has 300 uniquely designed, tweakable presets of different genres and styles and a randomizer that produces new patches with a click of a button.
- Immense Utility & Easy Workflow
The plugin has a simple workflow. For example, it has an Invert mode which creates complementary patches by changing the direction of the transition. Similarly, the signal path is uncomplicated and easy to understand.
Compatibility:
The plugin is available in VST and AU (64-bit) only; however, its AAX version is available in the AIR Creative Collection. It requires Mac OS X 10.8 – macOS 10.12 but is not compatible with M1 chips. For Windows users, it demands Windows 7 or newer versions. A minimum of 1 GB RAM and 1 GB of hard disk space is required to run the software.
Summary:
The Riser is great for creating dramatic sound effects and is optimized for EDM, scoring, and creating remixes. The oscillators programmed by AIR are of high resolution, the time-based effects (delay and reverb) add a good ambiance to your transitions, and the plugin overall has an attractive interface, which makes it a decent tool to keep in your arsenal.
28. Polyverse Manipulator (Vocoder/ Pitch Shifter / Sound Design Tool)
More Info & Price (Trial Available)

Polyverse Manipulator has the ability to radically modify the tone and pitch of monophonic audio in previously unseen ways.
Thanks to Infected Mushroom’s sonic madness, the Polyverse Manipulator is guaranteed to make your audiences’ spines shiver. The algorithms in Manipulator revolve around five basic effects: altering pitch, formant, harmonics, as well as oscillating frequency modulation, and grains.
The MIDI capabilities, ideal for real-time performance whether or not you play keyboards, can expand the possibilities to fit your every musical idea. An innovative vocal synthesizer like the Polyverse Manipulator plugin is the next-step tool if you’re a performing vocalist or an electronic music producer, but it’s also great for creating soundscapes and textures as well.
Key Features:
- Supporting effects
Aside from the main effects based on the five algorithms listed above, some additional effects can further expand the sonic madness. Controls for “Glide,” “Smear,” “Stereo,” and “Detune” are there to evolve your sound by the tweak of a knob.
For example, the “Stereo” control can instantly enhance the stereo imaging of your signal so that the final result can sound even bigger and fuller than the original.
- Real-time pitch-shifting
Manipulator allows users to accept MIDI input in real-time and control pitch shifting with a MIDI controller on the go. This plugin can effortlessly transpose pitch and gives incoming audio a unique feel right when you play it.
And if used as a MIDI input, Manipulator can accommodate up to four polyphonic voices, so every chord or harmony can stand out in the mix.
- Made in collaboration
The vocal modification techniques used by Infected Mushroom are a big aspect of their sound. The majority of the vocals on their records have been twisted, manipulated, chopped, and highly processed in order to sound like synthesizers.
Manipulator has changed and evolved into what it is now because of the unique “artistic feedback” approach, in which the artists employ ever-changing prototypes to create their own music and expand this software’s possibilities.
- Detection control
This dedicated control located on the far left side of the screen allows you to set the pitch detection range with “Hi,” “Mid,” and “Low” options. For instance, each of these options is suited for specific instruments, such as implementing the “Low” setting on bass and low voices.
It’s important to remember that this plugin doesn’t track polyphonic signals well, so it’s best to just go for one note at a time.
- Cross-Modulation
The plugin allows you to use a single Modulation Source as an amplitude modulator for another. That helps you create complex sounds that would be unattainable any other way. To use this function, drag the colored controls on the outer edge of any given modulation slot.
You can use an LFO to modulate the Pitch parameters or an ADSR to control the Harmonics. You can also use the MIDI Velocity to make the Alternator respond to how hard you press the keyboard’s keys.
- Modulation Slots
The plugin offers you five modulation sources: Meta Knob, ADSR, MIDI, Follower, and Sequencer. The plugin lets you choose four to use simultaneously, each in one slot. You can, of course, add multiple instances of the same modulation source.
The Meta Knob can control various parameters and be saved with user-generated names in presets. ADSR is triggered by incoming MIDI notes and controls the Attack, Decay, Sustain, and Release of the input signal.
MIDI converts the information into a modulation signal, while Follower converts the amplitude of the source into a modulation signal and lets you control its attack and release. Finally, the Sequencer creates a triggered, or free-running, LFO.
Compatibility:
This plugin runs in macOS 10.6 or higher and Windows 7 SP1 or higher, both in 32 and 64-bit options. It comes in VST, AU, and AAX plugin formats.
Summary:
A complete sonic toolbox that most sound designers and producers will certainly benefit from, Polyverse’s Manipulator excels in shaping your voice or audio signal in the best (and easiest) way possible.
Every knob contains a specific control related to a certain effect, and they’re all displayed nicely along with the user interface. Some features, like stereo imaging and detune controls, are handy when it comes to voice alteration.
The important thing to remember is that this plugin doesn’t fit well with polyphonic audio signals, so chords will probably not sound very good when processed.
29. XferRecords LFO Tool (Sidechain & Modulation Tool)
More Info & Price (Trial Available)
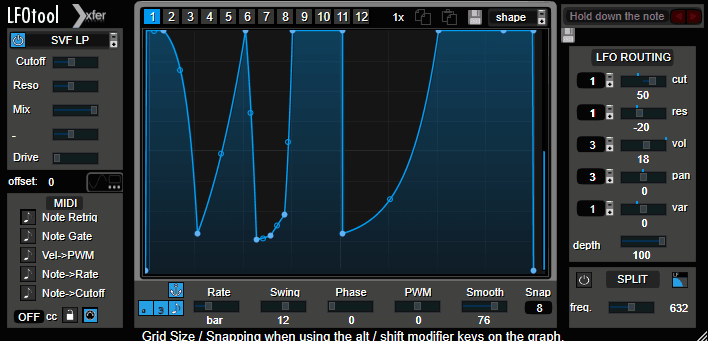
Serum may come to mind when you think of XferRecords.
The team with excellent knowledge of all thing electronic music bring you a nifty LFO tool that is very user-friendly. LFO Tool plugin allows you to mold custom LFO curves and shapes, plus LFO comes equipped with dozens of presets to achieve results instantly.
With LFO Tool, you have the option to process incoming audio and generate a MIDI message sequence for other instruments. With a high level of control over what filter types, filter drive, LFO routing, and the ability to correlate MIDI notes to actions, Xfer has pushed the boat out on this.
Giving you full controllability over the speed of your LFO, you can choose from having a standard time signature with or without swing and Hz mode for precision LFO speeds.
Key Features:
- Simple interface, which makes LFO very easy to use with massive outputs
- An array of filters to choose from to suit your liking, plus a filter window to represent what’s going on
- MIDI patchable settings are allowing you to control parameters with your MIDI controllers
- Offers Mac OSX and Windows versions
- It is coded in C++ to minimize CPU usage
- Sample-accurate sync
When To Use:
- It can be used as a ducker (side-chain emulator)
- Very useful when using multiple instruments to create a chain for MIDI to follow
- The filters alone can be a source of inspiration
11 Best Kontakt Libraries For Sound Design:
1. Native Instruments Playbox (Unique Synth)


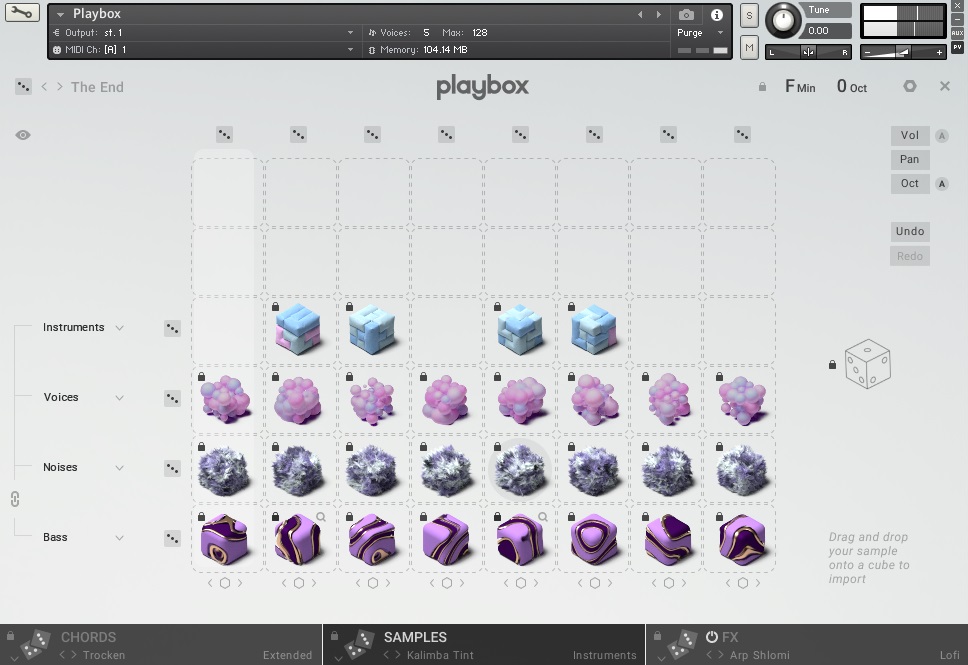
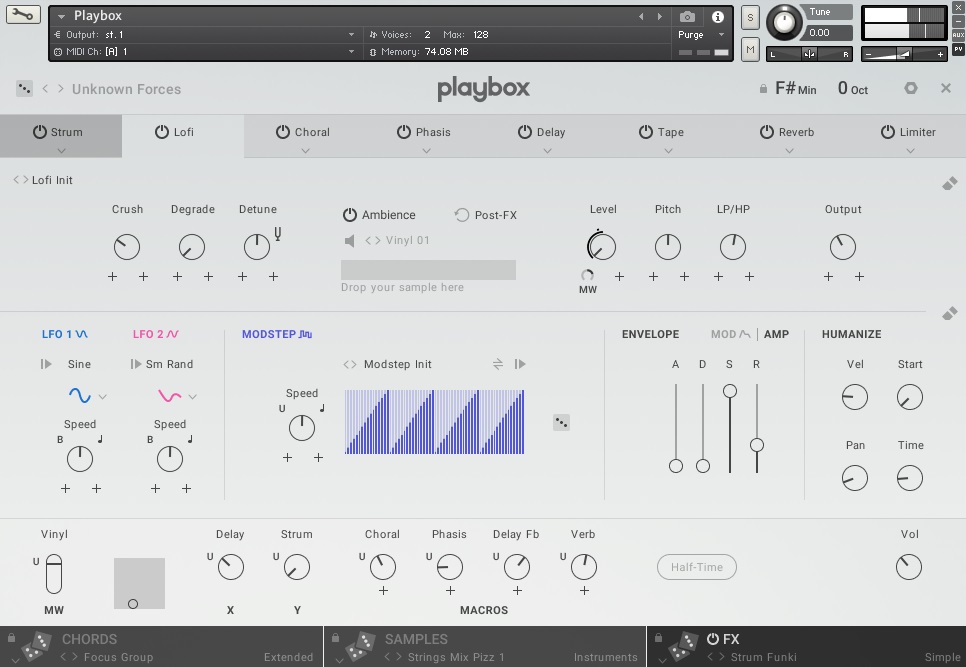


The most innovative Kontakt instrument is Playbox. This unusual piece of equipment will inspire you to compose pop, but also other genres like Trap, LoFi and EDM.
Without a sure, The Playbox is the most innovative and fascinating gadget I’ve seen in a very long time. If you compose music in any genre, this tool will immediately spark your interest in writing songs and creating an album as a whole.
A brand-new kind of musical instrument called a PLAYBOX blends distinct sound design, harmony, and layering. The tool is stuffed with samples, chord settings, effects, and presets, and it has everything you need to be creative.
Key Features:
- Presets
There is also room for 450 user samples, which might be automatically returned to match the tones of a chord. With PLAYBOX, users may manage all sound kinds, from synthetic sounds to acoustic instruments and noise into chords and sound stacks, thanks to a variety of configurable preset sounds.
- Samples
Using PLAYBOX, composers may create never-before-heard multi-stacked sound combinations by layering various samples of synthesizers, instruments, bass, voices, and noise onto each note in a chord.
You may import up to 450 of your samples, which are automatically returned to the notes of the chords. This allows you to resurrect unused sample libraries clogging up your hard disk.
- Effects
Arp, Strum, and Grain effects, together with more than 50 ambient samples, including nature noises, busy stations, and vinyl scratches, may be used to provide depth and texture while delivering rhythms and ambiance.
For stunning results, pick from up to 14 top-notch effects and alter their placement in your processing chain. Then, dial deeper with various assignable modulation sources, humanized velocity and sync settings, and dance-inducing noises.
- Chord Progressions
Playbox was developed to assist musicians experiencing writer’s block. This library can be exactly what you need if you’re a musician experiencing writer’s block. Playbox helps rekindle your creative spark whether you’re an experienced composer or are just getting started.
Compatibility:
The full version of Kontakt 5.8.1 or higher is needed. It runs on macOS 10.9 or higher (64-bit only) and Windows 7 or higher (64-bit only).
Summary:
To summarize, Playbox is a unique and versatile tool that may help you add unusual modern elements to your music. It comes pre-loaded with over 900 entertaining sounds and can be customized with your chords and noises.
2. Native Instruments Schema: Dark (Sequencer/ Great For Trailer Scoring)

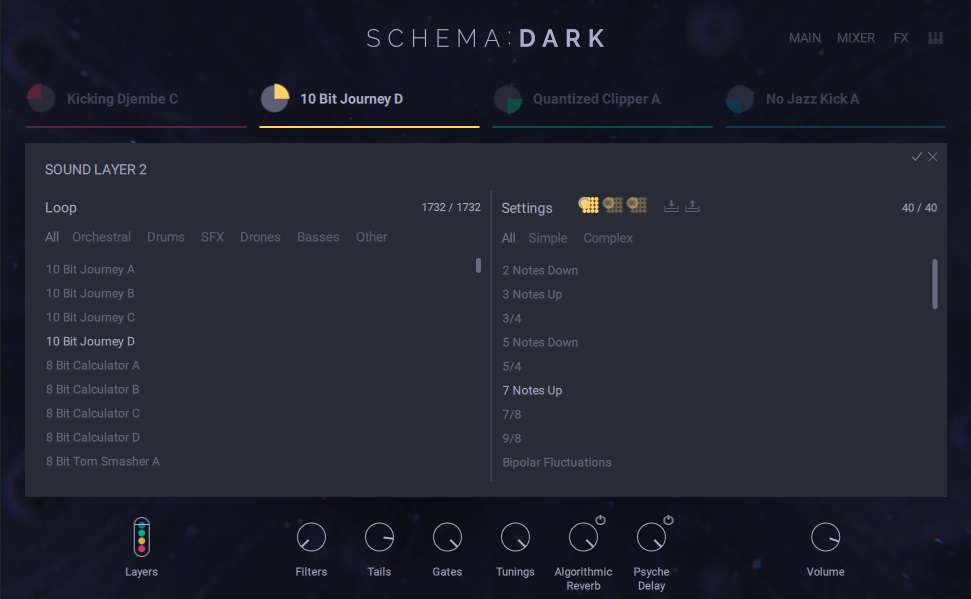


Schema Dark is a Native Instruments library that offers dark cinematic loop content for music creation.
Its four-layered Kontakt interface allows for layer mixing and pan, loop playback speed, direction, and sample reverse modes. The plugin has a dark tonality ranging from field-recorded sounds to orchestral recordings. Each layer can be edited using intuitive macro knobs, mix controls, and studio-grade effects.
Key Features:
- Multi-layer loop player
One of the plugin’s key features is its multi-layer loop player, which enables you to chop loops into 16 slices and play them back in any order according to the chosen pattern. You can fine-tune each step in the pattern, giving them precise control over the timing and rhythm of their music.
- Easy GUI
Plugin’s main page provides access to specialized editing pages and controls, allowing you to tweak their sound and create unique and intricate patterns. Macros and performance controls are always visible at the bottom of the instrument, providing a user-friendly interface for playing and tweaking key parameters.
- Presets
NI SCHEMA: DARK has 343 professionally designed presets that can be easily tweaked and swapped to suit individual preferences. The plugin also includes a built-in way to generate sounds with a knob and the option to roll a virtual dice in each of the four loops, giving you even more creative possibilities.
- Random knob
DARK has a built-in way to generate sounds using the “Random” knob. This allows you to roll a virtual die in the four loops, creating unpredictable and unique sequences. This feature can be used as a starting point for further tweaking and customization, adding experimentation and randomness to the creative process.
Additionally, the ability to slice and rearrange loops in any order according to the chosen pattern allows for endless possibilities and variations in the sound, making it a versatile and adaptable instrument for various musical styles.
Compatibility:
The NI SCHEMA: DARK plugin has specific system requirements for macOS and Windows, including the latest updates, Intel Macs (i5 or higher), or Apple Silicon Macs via Rosetta 2. It also requires graphics hardware support for Direct 3D 11.1 (Feature Level 11_0) or higher and at least 4 GB RAM (6 GB recommended for large KONTAKT Instruments).
Further, the Kontakt plugin is available as a standalone or in VST3, AU, and AAX formats for macOS and standalone, VST3, and AAX formats for Windows, with support for 64-bit only.
Summary:
The instrument offers editable patterns for each layer, filters, decay, volume, and pitch controls. It is created in collaboration with pro sound and instrument designer Tobias Menguser. All these features make it a great library for trailers SFX and arpeggiators.
3. Heavyocity Symphonic Destruction (Orchestral/Scoring Instrument)
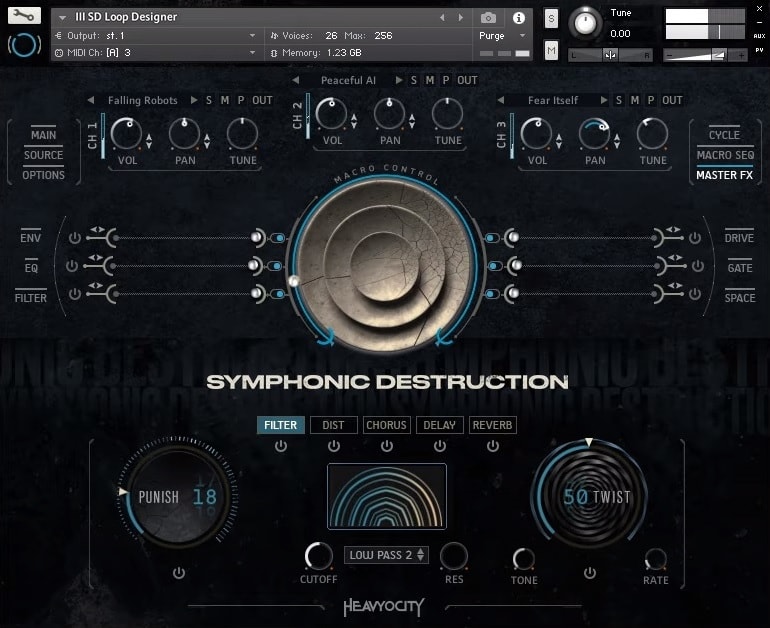
The epic film score and trailer composers receive a treat in the form of this Kontakt instrument.
Heavyocity’s Symphonic Destruction combines traditional and hybrid orchestral sounds with synths, heavy guitars, and impact sounds to deliver a highly usable toolkit for modern film and trailer scoring.
Many of the samples are from Heavyocity’s Novo strings, Forzo brass, and Vento woodwinds libraries, and the distinctive processing from Damage 2 percussions makes them as bombastic as possible.
The library features two classifications of instrument engines: Designers and Performers. Each folder contains engines and instruments dedicated to specific purposes in trailer/film scoring.
From mysterious and malicious quips of staccato passages to action-packed horns and impacts, you’ll find them all. However, there’s more to Symphonic Destruction than merely a collection of samples and loops.
Each engine in the library provides different features that allow you to manipulate and customize the samples or loops to your liking. Furthermore, macros let you control multiple parameters with the turn of a knob or your modulation wheel. This feature makes it a breeze to perform with the library.
Key Features:
- Designer Engine
The Designer Engine allows you to design many kinds of sound palettes, from pad-like hybrid strings to intricate horror drones. Of course, there are numerous factory presets and samples you can use to make new patches. Each patch features three channels where you can load a sample.
You can preview, load, and distribute samples across the keyboard in the Source menu at the top left of the interface. Similarly, you’ll find three menus on the top right of the interface: Cycle, Macro Sequencer, and Master FX.
The Cycle page lets you modulate each channel and its start position, velocity, and panning with a sequencer. Similarly, the Macro Sequencer modulates the Macro knob in the middle of the interface that controls six parameters: Envelope, EQ, Filter, Drive, Gate, and Space.
Note that you can click on each parameter to find the envelope, filters, and effects editors.
- Braam and Loop Designer Engines
These Designer Engines are similar to the main Designer Engine. However, the difference is that you’ll find the menu Designer instead of Cycle at the top right of the interface. And the Designer menu is better suited for braams and loops. Instead of sequencing, you can change the volume, pan, tune, and start position of each channel.
Furthermore, like in the previous Engine, each patch contains three channels. However, the Engine distributes each source/sample you’ll find in this Engine per octave across the keyboard. And the bottom octave plays all three channels simultaneously to give you an epic braam or a complicated loop with a single key.
- Performer Engine
The Performer Engine allows you to choose various instrument types like Traditional, Hybrid, Damaged, Soundscapes, Hybrid Pedals, Damaged Guitars, etc. Each of these comes with different sounds and articulations that you can switch using key switches.
Also, you can control the dynamics using your modulation wheel or the velocity, depending on what you choose. In the Engine itself, you’ll find buttons on the left side of the user interface to open an amp envelope, a three-band EQ, and a filter. And on the right side, you’ll find a mixer, a performance editor, and space.
In the Mixer, you will find three channels: Main (Dry), Hall, and Reverse FX. And the performance editor lets you add a gate or dynamics sequencer. While the gate sequencer controls the instrument’s volume, the dynamics sequencer modulates the dynamics (velocity) of the sample. And finally, the space page lets you add a delay and a reverb.
Repeater
When you select short sounds like staccatos, colegno, and pizzicato, a module called Repeater appears. You’ll probably use it for ostinatos most often. However, every good ostinato requires accented notes to enhance the rhythm, and this library’s Repeater lets you do just that.
It lets you play ostinatos with 3rd or 4th note accented, crescendos, diminuendos, etc., without writing each note in your DAW. Similarly, you can adjust the round-robin from none to six.
Compatibility:
This library is available for Kontakt 6.6.1 or Kontakt Player 6.6.1. Kontakt requires Windows 7 or higher and macOS 10.13 or higher, both 64-bit only. It comes in VST 2/3, AU, and AAX formats.
Summary:
The more you attempt to explore this library, the more you realize how vast the sonic possibilities are. I would describe this library as a comprehensive sound module for trailer or film music. You will find almost everything you’d need to compose epic hybrid cinematic scores.
Similarly, although the workflow isn’t very obvious at a glance, using each sound engine and experimenting with the buttons and knobs gets you up to speed. Also, when you’re producing, try turning up the proprietary Punisher knob if you need to hype things up a little.
4. Native Instruments Piano Colors (Unique Piano Vibes)


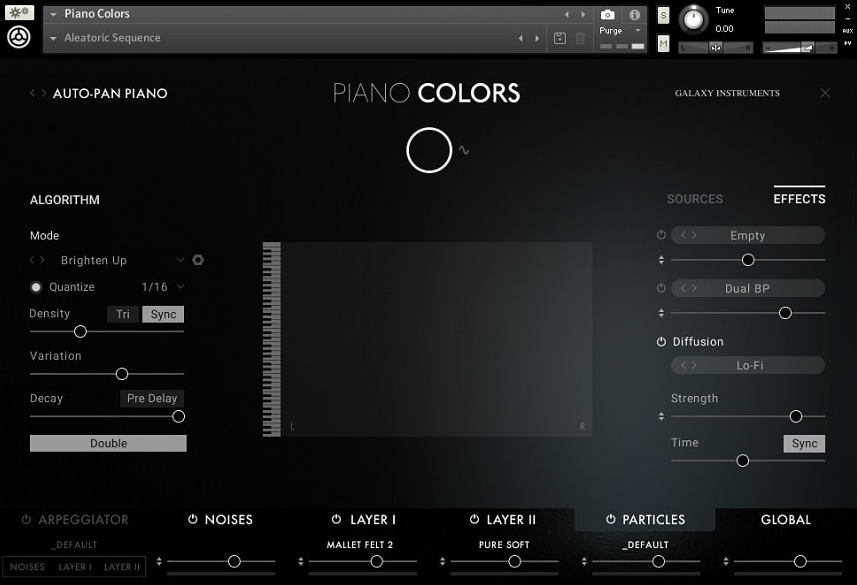
If you’re tired of the same old piano sounds in your collections, this inspiring library might spark your creativity back to life.
Native Instruments and Galaxy Instruments have come up with Piano Colors, a library of prepared piano sounds with unconventional playing and recording techniques.
From overtones generated with plastic pins and hand-plucked strings to strings beaten with mallets/brushes and bowed with electronic devices, you’ll come across a vast library of sounds you never thought possible from a grand piano.
On top of having a strange and exciting sample library, the library features various sound modules on its user interface that help you bring vibrant colors to your sonic palette. These modules include multiple layers of sounds, an arpeggiator, effect processors, and more.
Furthermore, the user interface features colorful light columns behind the piano. These light columns represent the sound layers, and their width represents the volume of each layer.
Key Features:
- Noises
Among the layers in this library, one of the most important is the Noise module. When you click on Noises on the main page, you’ll open a new page with five modules. These are the various kinds of noises in the library, including pedal, mechanical, key attack, pianist, and electronic devices’ noises.
You can control the volume of each, and some have more parameters and controls for customization.
- Two Layers
Two of the layers are dedicated to sample playback, and you can load one of the many sampled instruments in this library in each layer. You can see more of their controls when you click on the Layer 1 and Layer 2 buttons on the main interface and open the Tone Page.
This new page lets you change the brightness, pan, tone, dynamics, sub-harmonics, overtones, resonance, envelope, etc. Similarly, you can add four modulation effects, a dynamics effect, EQ, a reverb/delay, and LFO modulation per layer on this very page.
The reverb/delay effect features a variety of effects, from convolution and analog reverb to the proprietary Replika delay.
- Particles
You can adjust the behavior of the Particles engine on the Particles page. When you play notes on your keyboard, the Particles engine triggers and processes additional samples called particles. It creates a series of notes and tones to create a cloud-like effect.
You can customize the engine so that they behave a specific way. For instance, you can change the generated particles’ density, variation, sync, decay, pre-delay, stereo doubling, etc.
- Arpeggiator
On the Arpeggiator page, you will find a 32-step sequencer that lets you adjust each note’s rhythm, velocity, and length. You can also change the arpeggiator’s order, rate, octave, length, humanization, velocity range, etc. Using the arpeggiator alongside the Particles module rewards you with a fabulous scape of sounds.
Compatibility:
This library is available for Kontakt 6.6.0 or Kontakt Player 6.6.0. Kontakt requires Windows 7 or higher and macOS 10.13 or higher, both 64-bit only. It comes in VST 2/3, AU, and AAX formats.
Summary:
Piano Colors is a genuinely unique sample library. It features a prepared piano with many kinds of treatments, mallets, bows, etc. And it can sound anything from soft and soothing to harrowing and piercing.
You could use it to generate a bed of evolving soundscapes in a film’s underscore or as a rhythmic arpeggio instrument in a pop song. Overall, for what it does and the quality of the sounds, I have no complaint about this library.
5. Native Instruments Pharlight (Voice-Based Synth For Vocal Soundscapes)
More Info & Price (Trial Available)
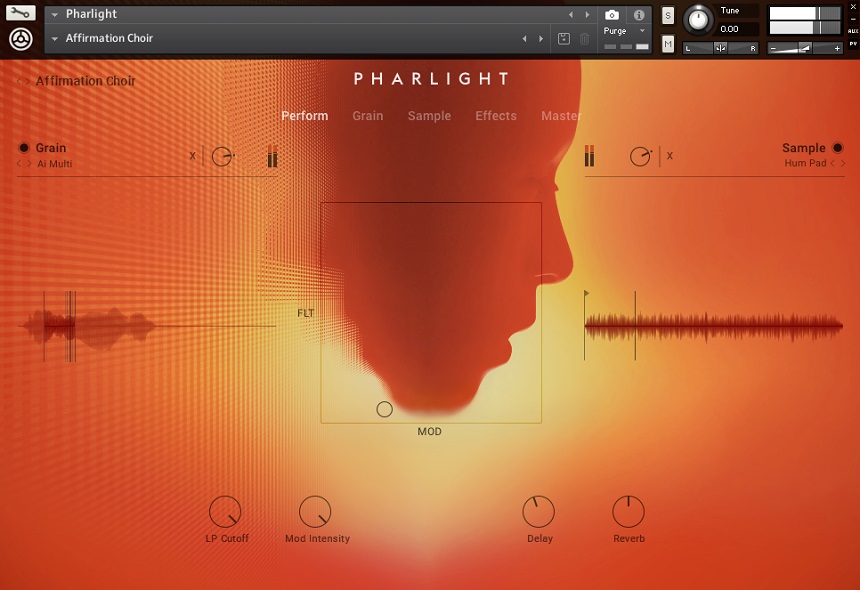


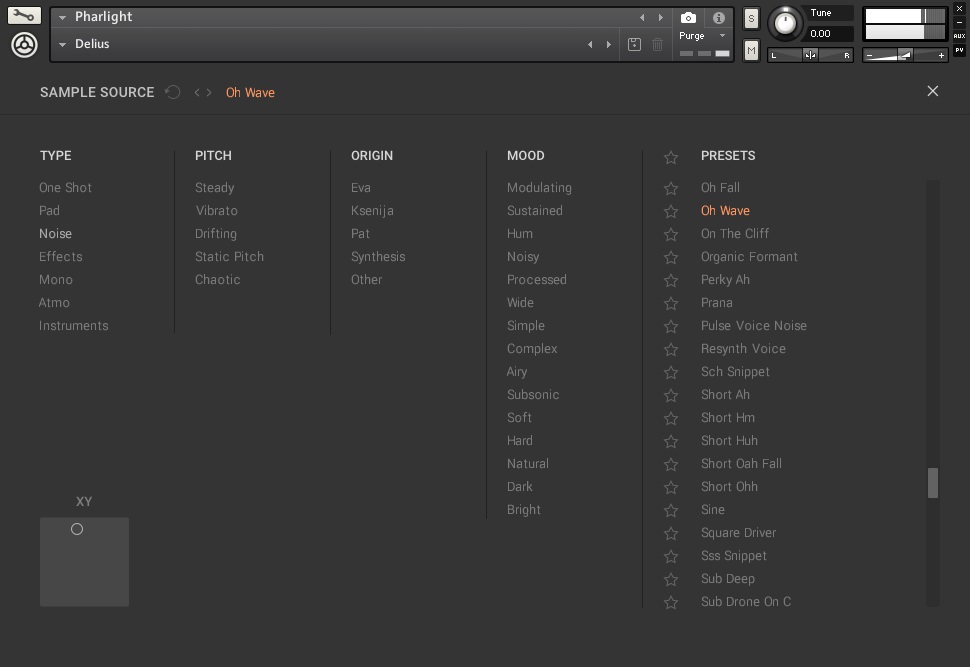
Pharlight is an innovative pad sound generator from the makers of Kontakt and is frequently utilized by cinematic composers.
Pharlight has a granular engine built from the ground up and a variety of audio sources. The granulated sounds are routed via several effect processors and modulators to produce dynamic and immersive soundscapes.
It also has a sample layer that you can use to add background noises, envelope attacks, tonal centering (for atonal soundscapes), and pads to the mix.
Most of the sound sources in this library are vocal sounds choreographed to perform well with granular synths. These include invented phrases, noise samples, beatboxing, and choirs.
The main focus is on ensuring that the sources have spectral variations. It provides a variety of sounds for the granular synth to utilize.
Key Features:
- More Than A Library
Besides its built-in sample library, you can import wav, aif, and ncw audio files into Pharlight to use them as sound sources. Of course, you can use the custom sample as either a sample waveform or in the granular synth. Furthermore, Pharlight finds the audio sample’s root key automatically, making manipulation easier than ever. Note that sounds with a large range of frequency content tend to sound best.
- Grain Page
On this page, you’ll find the Grain Layer. It is essentially a granular synth that cuts the sound source into tiny “grains” and plays them back, altering the order, stretching them, etc. Pharlight lets you adjust the grain size, interval, playing position, range and tuning to customize the generated sound. It also has an amp envelope.
- Sample Page
As you probably guessed already, the Sample page features the sample layer. It functions like a typical sampler, allowing you to load lengthy sounds such as vinyl noise or even a single-cycle waveform. Pitch adjustments, start offset, filters, filter envelope, and amp envelope allow you to manipulate the sample playback.
- Effects Page
Each of the two layers has its own effect section on the Effects page. Additionally, effects that apply globally are in the Master section. You’ll find reverb, delay, drive, tape saturation, guitar amps, tube distortion, and compressors for mixing your sounds. And finally, it also features an XY modulator that’s great for live performance.
Compatibility:
This library is available for Kontakt 6.2.0 or Kontakt Player 6.2.0. Kontakt requires Windows 7 or higher and macOS 10.13 or higher, both 64-bit only. It comes in VST 2/3, AU, and AAX formats.
Summary:
Pharlight is best suited for creating atmospheric sounds like pads, textures, sound effects, and sometimes even leads. It uses granular synthesis alongside sample playback to generate its sound. Furthermore, most of the presets utilize the XY modulator so that you can perform live playing them.
The built-in samples are mostly vocal sounds, although they pretty much don’t sound anything like the choirs we’re used to. Still, the voices help add a somewhat organic vibe to the synth-like sound of the library. And I also like how it allows you to use custom samples.
Related Reading:
Top 6 Choir VST Plugins & Sample Libraries (+ Freebies)
6. Artistry Audio Scorpio (Motion Synth/Sequencer)

Scorpio is a synth library featuring sounds ranging from delicate bell-like tones and daunting basslines.
Scorpio combines synths with traditional instruments using granular synthesis to attain its powerful library of sounds ideal for modern scoring, dance music, electronica, New Age, etc. It features a comprehensive browser that lets you effortlessly find the sound you need.
Furthermore, you can customize the sounds easily in real-time using the XY-pad and macros on the main page of the user interface. Of course, you can also dive into the instrument by exploring its various pages and options to get a deeper level of control.
Based on the sounds in this library, I suggest the library for scoring sci-fi/action films, games, and trailers. Similarly, electronic music like EDM, New Age electronica, etc., will benefit from its evolving pads, arpeggios, and pulsating textures.
Key Features:
- Sources
The library has two layers or “sources” labeled A and B. You can click on the source name to open the source browser, where you’ll find the sounds in the library. The sounds have five categories: keys & mallets, plucks, bass & strings, brass, and synths & pads.
You’ll find processed acoustic sounds like marimba, celesta, vibraphones, strings, etc., and pure synth sounds in the list. You can combine the two sources to produce exciting and intricate textures by changing their volumes.
- Edit
You can edit each source by going to the Edit page. Here, you will see the waveform of the sample you have selected. And you can change stereo width, panning, volume, tuning, amp envelope, etc., using various modules. Next, you can choose the engine type of the source: Play or Grains.
Selecting Grains enables the granular synthesizer that subdivides the sample into small parts called grains. Similarly, you can add a filter and modulate it with an envelope.
Below the source editing modules, you’ll find three sub-panels. Let’s check them out:
- Layer FX
Each layer has four effect slots. In these slots, you can load a variety of effects, including a filter, super GT, S-compressor, limiter, transient processor, EQ, tape saturation, dirt, drive, cat, delay, cabinet, cry-wah, Lo-Fi, several reverbs, chorus, phaser, and flanger. Each of these effect processors has various parameters that you can customize to change the sound.
- Motion
This panel lets you add further motion to the sound using two kinds of modulation: an LFO and a step-sequencer. The modulation targets include each source’s volume, pan, filter cutoff, pitch, and the FX send for each of the four slots. Each target has a slider next to its label that lets you add modulation positively or negatively.
- Master FX
The Master FX page works very similarly to the Layer FX page. The difference is that the Master FX applies to both sources. Like in Layer FX, you can choose up to four effects. And these effects are an excellent way to polish your sound and make them better suited for mixing with your music.
- Arpeggiator
After the Edit page, you’ll find the Arp page. You can enable the main arpeggiator on this page, change its speed, playback order, swing, etc. And you can adjust each note’s velocity, octave, gate, probability, stutter, and transpose using a step sequencer. These parameters help make your arpeggio patterns sound dynamic and exciting.
Compatibility:
This library is available for Kontakt 6.6.1 (NOT free Kontakt Player). Kontakt requires Windows 7 or higher and macOS 10.13 or higher, both 64-bit only. It comes in VST 2/3, AU, and AAX formats.
Summary:
Scorpio offers a range of inspiring sounds out of the box with a distinct style and character. The sounds vary from clean acoustic patches to aggressive synth samples ideal for EDM and trailers. Although the sounds are never really mellow – this instrument is best suited for vigorous styles of music.
Furthermore, if you are into sound designing, the ample number of source samples is sure to delight you. And the library is straightforward to use, but it can also go in-depth in detail when you need it.
7. Native Instruments Mysteria (Vocal Based Synth 2)
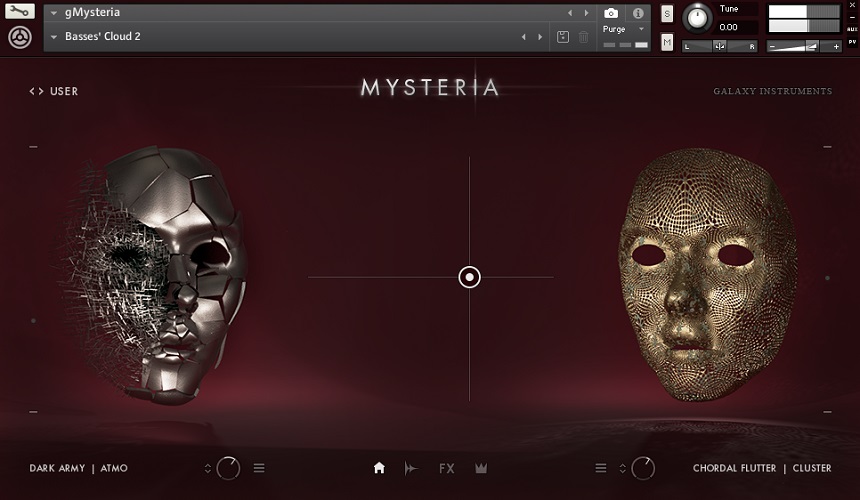

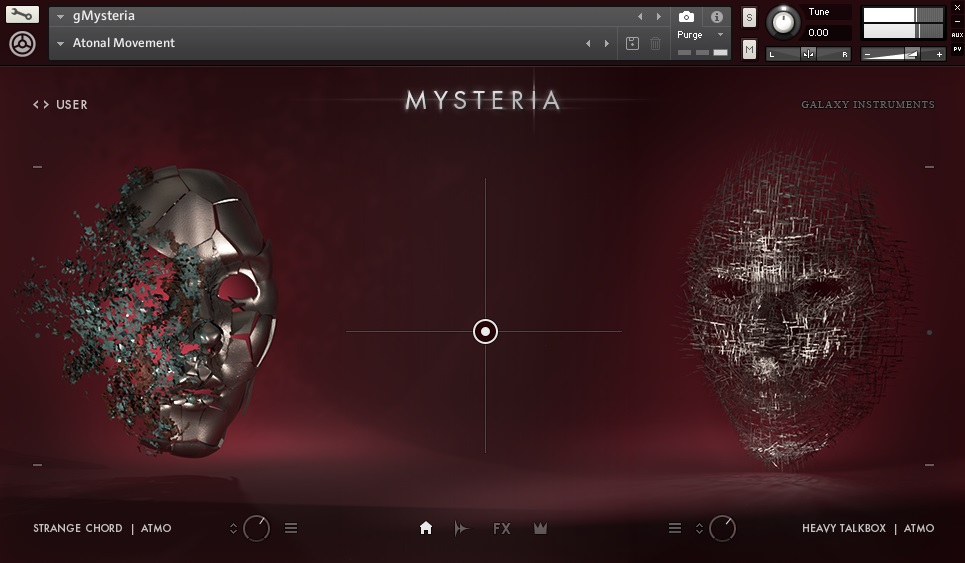


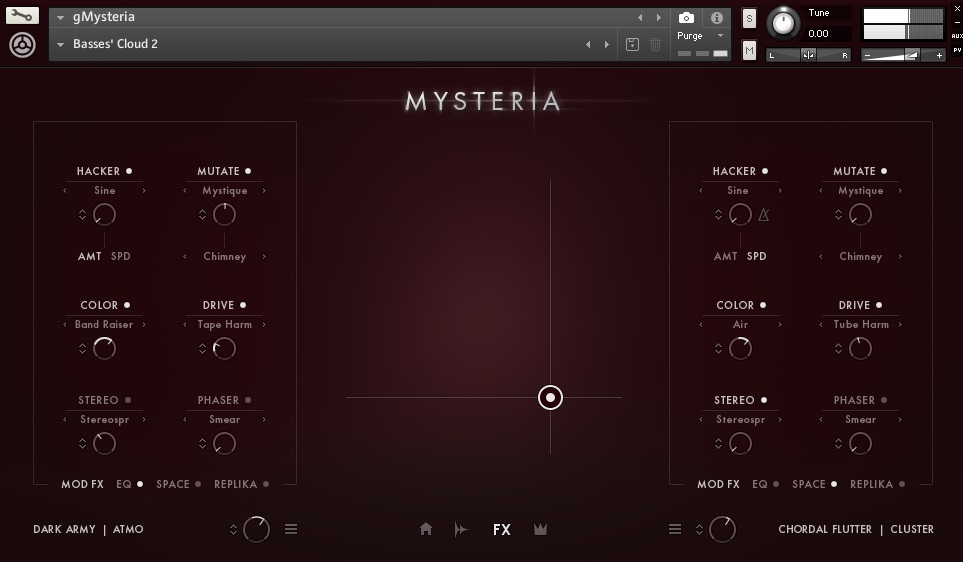


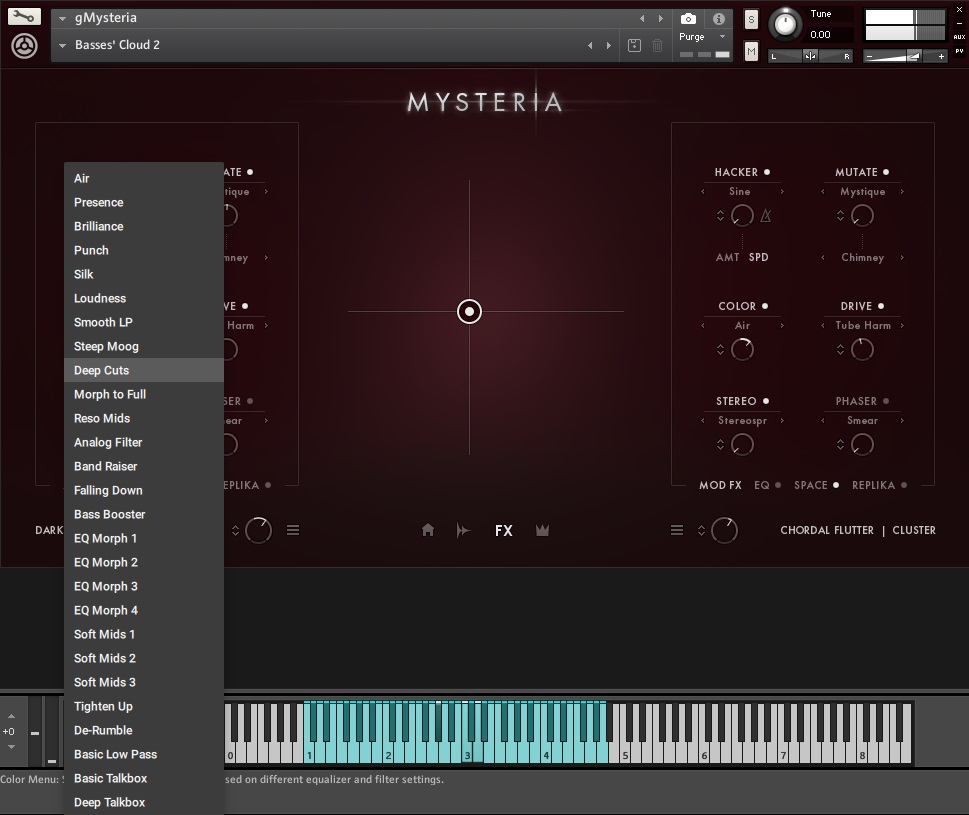


Mysteria is a distinct and immersive vocal/choir library excellent for scoring films and trailers.
Native Instruments and Galaxy Instruments have crafted something genuinely unique and incredible with Mysteria. It has you covered whether you want to evoke a sense of terror, wonder, dread, or ethereal beauty.
It uses a variety of choir “clusters” that you can mix and manipulate to produce highly expressive sounds. Depending on the needs, the clusters include recordings of elegant harmonies or chaotic discord.
Thanks to its unique and inviting interface design, you can start with calm and beautiful sounds while smoothly transitioning into the unsettling chaos of dissonant voices.
Furthermore, quick automation results in stark changes that act like impact percussions.Similarly, processed, hybrid sounds add an even more distinct quality to Mysteria’s abundant sound palette.
Key Features:
- Layers
Mysteria features two layers, each capable of loading a sound. You can then morph between them using an XY-pad on the interface. Horizontal movement on the pad morphs between the two layers, whereas vertical movements add modulation and intensity changes in most presets.
However, when making custom patches, you can control what changes occur with the pad movements in the Effects Page.
- Incredible Recordings
Mysteria employs four choirs in its recordings. These include an epic 48-singer choir, a 24-female singers alto/soprano choir, a 24-male singers tenor/bass choir, and a modern quartet choir.
On top of contemporary recordings of the choir, it also features strange vocal techniques, melodic lines, whispers, body noises, feet stomps, breathings, etc. These provide a large variety of sounds to use in your scores.
- Source Page
A small waveform icon at the bottom of the user interface opens the Source Page. Here, you can change the fundamental parameters like amp envelope, pan, tuning, mic variations, etc. The settings vary depending on the preset types loaded in each instrument layer. Speaking of which, there are two kinds of presets: Atmosphere and Cluster.
The prior features atonal sounds like whispering and stomping, whereas the latter uses tonal sounds like melodic lines. Furthermore, this page allows you to split the two layers across your keyboard, letting you play a layer at a time.
- Effects Page
On this page, you can add effect processors on each layer. These effects include an EQ, Space reverb, Replika delay, and a “Mod FX.” Under Mod FX, you’ll find six effects, and, as I mentioned earlier, you can modulate these using the XY-pad.
The six Mod FX include Hacker, Mutate, Color, Drive, Stereo, and Phaser. Here, Hacker is an LFO-based processor, Mutate features unusual convolution effects, and Color changes the tone of your sound. The rest are self-explanatory.
Compatibility:
This library is available for Kontakt 6.2.0 or Kontakt Player 6.2.0. Kontakt requires Windows 7 or higher and macOS 10.12 or higher, both 64-bit only. It comes in VST 2/3, AU, and AAX formats.
Summary:
If you often compose film scores or enjoy making cinematic music, Mysteria is a truly useful instrument. It evokes emotions harnessing the human voice and hybrid synths as sound sources. There are over 800 sound sources, 600 layer-presets, and 350 presets. Most of the presets and samples are best suited for horror, fantasy, drama, and mystery themes.
8. Native Instruments Kinetic Toys

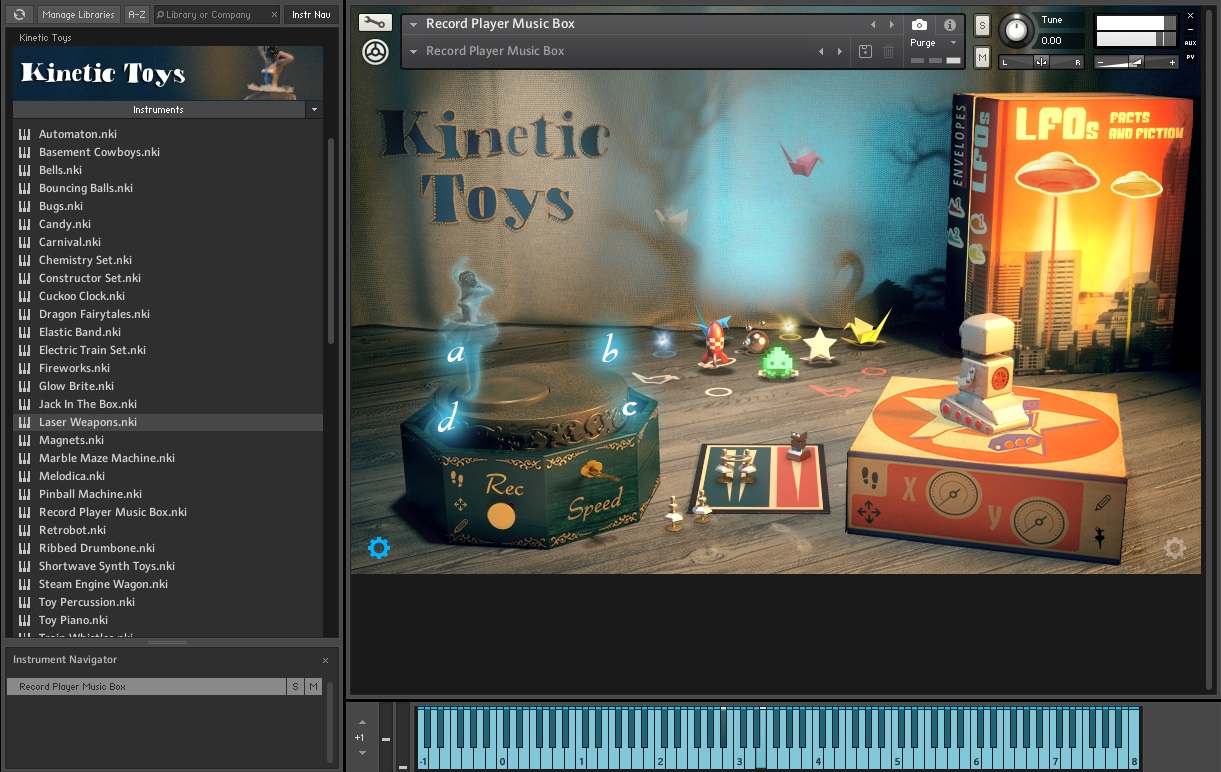
Toys – the innocent playthings of children, comforting and a source of wonder… or are they?
Kinetic Toys presents the world of toys in a whole new way, exaggerating their sounds to create realms of fantasy, awe, and sometimes even horror. There are thirty-five instrument presets in the library, and each preset has four sounds. The blended sounds pass through an effect chain and create the final result.
The sounds were derived from old toys, some over a hundred years old. So, all of the sounds come from springs, music boxes, and bells inside such toys. Such kinetic sounds set vintage toys apart from the modern ones with chips and speakers. Furthermore, the library features a peculiar user interface, emphasizing the nature of its instruments.
Key Features:
- Layers
Each preset features four layers of sound. You can morph between the sounds using the ballerina on the left. It acts as a four-point XY-pad. Furthermore, you can customize each of the four sounds by clicking on the cogwheel at the bottom left of the interface.
The origami crane and “wisp” lights at the center of the UI represent the toy samples and synthetic sounds. Move them vertically to change their volumes and horizontally to morph between two complementary sounds. Similarly, clicking on each origami or wisp’s “landing spot” will turn them off.
- FX
The robot on the right represents the effects section. It also acts as a four-point XY-pad. And you can click on the cogwheel icon at the bottom right of the interface to edit the effects in detail. When you do so, the center of the UI will update to represent the point on the robot XY-pad you have selected.
There are four kinds of effect icons: a star for EQ/filter, a rocket for reverb/delays, a UFO for distortion/bit-crusher, and a metal planet for modulation. Move the icons vertically to control the effect’s intensity and horizontally to change its character.
- Automation
Besides using manual automation in your DAW, Kinetic Toys features three built-in modulation modes: step motion, 2D motion, and record motion.
Click on the footprint icon on the ballerina/robot’s box to activate the step motion, set the rate, and define the path of the movement.
Click on the four-arrow icon to active 2D motion and change the speed of the individual X and Y axes.
Click on the pencil icon to record a custom path movement, and use the ballerina icon on the robot’s box to link the two.
- Modulation
There are two books at the upper right of the interface featuring two envelopes and two LFOs. You can assign these to either the global mixer or the ballerina/robot.
You’ll find the global mixer at the middle of the interface, represented by two ballerinas (toy sounds) and a robot token (effects send). Furthermore, clicking on the ballerina tokens below the mixer card links and unlinks (ballerinas holding hands/not holding hands) the toys volumes.
Compatibility:
The library is available for Kontakt Player 6.2 and Kontakt 6.2 or higher.
Summary:
Kinetic Toys features an extensive library of sounds. They range from animatronics, dolls, music boxes, xylophones, and cowboys to bells, ping pong balls, candy wrappers, fireworks, and even bugs. You’ll find virtually any kind of toys in this library, and many of them are useful as sound effects as well as scoring.
Many of the sounds start as genuinely innocent and appropriate for kids, but the moment you experiment with the effects and modulations, you’ll soon realize how unsettling toys can sound.
9. Sonuscore ELYSION 2 By BestService


ELYSION 2 is a scoring tool by Sonuscore. It’s the follow-up to ELYSION, a mainly ambient and inspirational synth.
ELYSION 2 is much darker than its predecessor, with many new instruments and themes that push it to more aggressive territories. There are five instrument layers inside ELYSION 2, and each one of them has an envelope and an arpeggiator.
These are mapped to the mod wheel to help you create evocative patterns and rich underscores while performing.
Key Features:
- Five instrument layers
ELYSION 2 has five instrument layers that can be performed together to create rich ensembles. The instruments can be selected from a fantastic menu that’s organized beautifully. In addition, the instruments can be organized by their character, which will help you pick the perfect sound for your composition.
The character choices vary from aggressive and dramatic to soft and intimate.
- Envelopes and arps
The most fun aspect of ELYSION is the arp and envelope functions. Once you load a sound in an instrument layer, you can click on a drop-down menu to set an arp or envelope. The envelope can be edited by clicking on its interface.
This is where you can edit its steps, modulation amount, number of steps, and time signature. You can create stutters with the envelopes with half-time and full-time options available and draw shapes over a long sequence with your cursor. You can similarly edit the arp, the difference being that it affects the instrument’s pitch.
- Precise control
You can create sequences that last up to 32 steps in ELYSION 2. You can also select the rhythm of the steps from quarter notes, 16th, 32nd notes, or triplets. Even more exciting is the ability to set up two arps or envelopes per instrument layer.
You can then scroll between them with your mod wheel and create performative sequences. Another thing you can do is create complex panning by attaching the pan of an instrument to the envelope, therefore constantly modulating the pan for stereo effects.
- Effects
You get a compressor, a delay, and a reverb as master effects. They affect the sound as a whole and sound incredible. Furthermore, each instrument has its own effects that can be turned on or off. You get saturation for adding harmonic context to each instrument, a filter, a modulation effect, and an EQ.
The best thing about these effects is that they can be mapped on the mod wheel in combination with the sequencer patterns. This allows for a complex configuration system that ensures that your patterns and sequences will constantly evolve and increase intensity.
Compatibility:
Sequis is available on the free Kontakt Player 6.6.0 and higher, or Kontakt 6.6.0 and higher, on Windows 7 or higher, and macOS 10.13 or higher.
Summary:
ELYSION 2 is a very complex and versatile composition tool. The sounds and instruments included are fantastic and cover a wide range of sounds and styles. Including multiple envelopes and arps per instrument is genius and rewards experimentation and performance.
I’d recommend this to anyone looking for an instrument with a tremendous built-in arpeggiator.
10. Output Substance (Bass Engine)
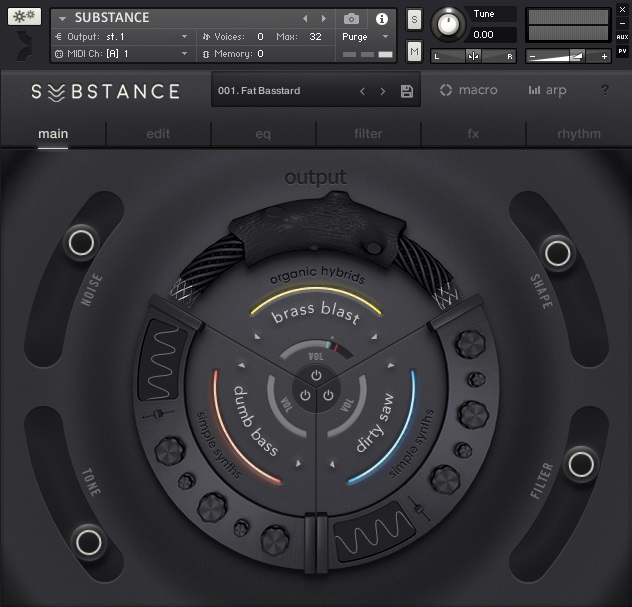


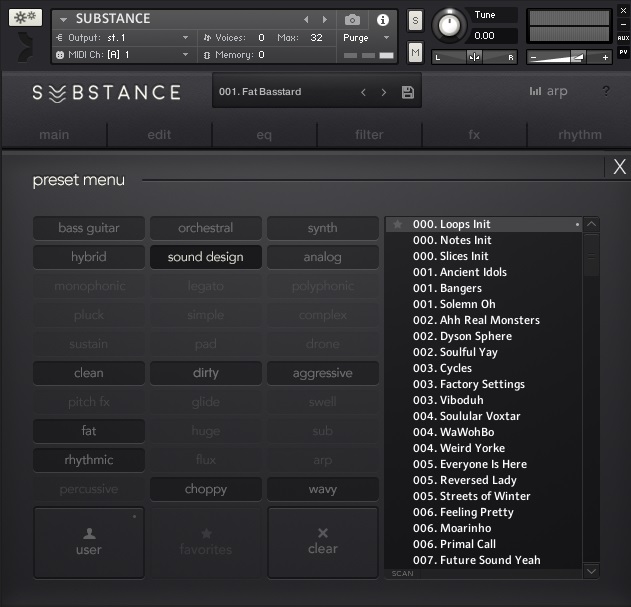
With Substance, gone are the days of layering multiple samples and synths to achieve your perfect low-end rumble.
Substance is a complete bass sound designing instrument featuring built-in samples of real-life acoustic instruments and dirty analog synth sounds. On the main page of the user interface, you will find a peculiar layout of three instrument layers, their controls, and macro faders that let you customize the sound quickly.
And you can also assign the macros to a MIDI CC to control them with your MIDI controller. You’ll find the power buttons to mute/enable the layers at the center of the layout. Moving out a step will lead you to the volume of each of the layers. Next, you can select various sound sources by clicking on the source name.
Outside of this section, you’ll see the category of the sound source you’ve chosen, and the logo represents the same. On the outer edge of the circular layout, you’ll find four macro faders, which differ based on the preset or your assignments.
Key Features:
- Edit Page
You’ll find the three layers and their various controls on the Edit page. Each layer has a volume envelope, pan knob, stereo width control, tune/transpose, and sample start offset. Similarly, you can also enable monophonic/polyphonic mode and legato.
For further customization, you’ll find the key range, legato glide time, and velocity sensitivity in the Advanced tab at the bottom of the Edit page. These features are essential for creating 808-style gliding bass in electronic music, hip-hop, trap, etc.
- Mixing
There are three pages dedicated to mixing in this library: EQ, Filter, and FX. The EQ page features a 3-band EQ per layer and one more for the global output. You can choose either shelf or peak mode for the low and high bands.
Similarly, the Filter page contains a multi-mode filter for each layer and a high-pass and low-pass filter for the global output. Furthermore, it also has a filter envelope.
Next, you will find six effect processors per layer on the FX page. These effects include distortion, motion (chorus/phaser/flanger), pitch, compressor, delay, and reverb. Similarly, the global FX section has distortion, compressor, delay, and reverb.
- Rhythm Page
The Rhythm page contains a single LFO or a step-sequencer. When one of them is activated, you can start “sending” various parameters into the LFO/sequencer to modulate them. You can do so by using the upper half of the Rhythm page. Here, you’ll find volume, bite, cutoff, and resonance under each layer.
And you’ll also find high-pass cut and resonance, drive, tone, and low-pass cut and resonance under the Global Sends section. If you wish to modulate one of them, turn up or down the respective fader to make it modulate positively or negatively.
- Arpeggiator
Substance has a built-in arpeggiator with twelve types of playback styles. These include pedal tone, up, down, up-down, down-up, random, chord (polyphonic), four zigzags, and as played. You can also use a step sequencer to control the velocity of each note in the arpeggio. Similarly, other controls include octave selection, gate, swing, rate, etc.
Compatibility:
This library is available for Kontakt 5.8.1 (NOT free Kontakt Player). Kontakt requires Windows 7 or higher and macOS 10.12 or higher, both 64-bit only. It comes in VST 2/3, AU, and AAX formats.
Summary:
Substance is a handy tool if you often make music with bass at the forefront like trap, hip-hop, and even house. Similarly, it features interesting acoustic basses, including low brass sections, contrabass pizzicato, bass guitars, etc.
When mixing these sounds with the electronic counterparts, I found the results excellent for sci-fi/action trailer music and film SFX design too. Furthermore, there are plenty of controls for customizing the presets.
That said, I would have loved to see a sample import feature that let me use custom sounds for mixing with the library’s samples. In a way, the lack of this feature defeats the library’s purpose, which is to help people avoid tedious sound layering.
However, the built-in sounds are perfectly adequate in most cases. Hence, I recommend you give it a try.
11. Output Exhale (Vocal Engine)
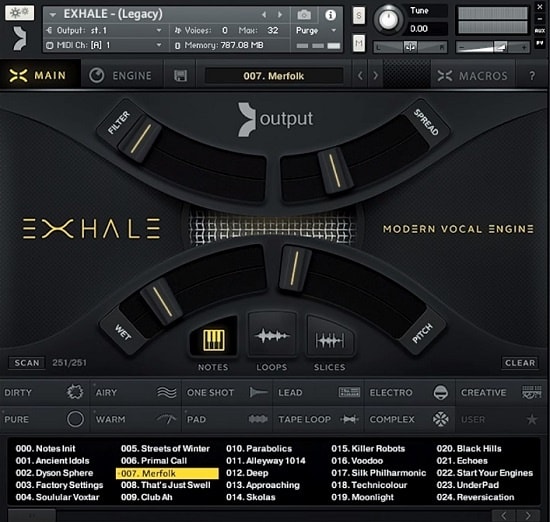
Exhale is a modern instrument that uses vocal recordings to create unique instruments and soundscapes.
The first step to sound designing in Exhale is to choose one out of three modes: notes, loops, and slices. Under each mode, you’ll find a large number of presets, totaling five hundred. Furthermore, the main page also features buttons to select the character of the preset you want, which makes finding a sound quicker and easier.
Before talking more about Exhale, I’d like to mention that Output Substance is also an excellent library for trap music. It’s a bass engine that makes creating powerful sub and rich basslines effortless.
Key Features:
- Modes
As I’ve mentioned, we have three modes in the library. Notes mode takes a sample and maps it across the keyboard chromatically. Similarly, Loops mode brings 13 loops, each mapped across an octave, per preset. And similar to the previous mode, the Slices mode features 13 sliced samples per preset, with each slice mapped across an octave. The latter lets you create creative, glitchy sounds.
- Main Page
All of the preset selections happen on the Main Page, but it also features some automatable parameters. You’ll find four macro sliders, each with a different function depending on your selected preset.
- Keys
You will also find the key signature of the preset you’ve selected at the top of the Main page. Clicking on it allows you to transpose the preset to another key. Furthermore, you can change the key from minor to major and vice versa.
- Engine Page
The Engine page is divided into three panels: sources, rhythm, and effects. You can select the audio sample you’re using from the two Sources: A and B. Next, the rhythm panel lets you create rhythmic modulations using patterns, an LFO, or a step sequencer over “mod effects.” Let’s talk about that next.
- Effects
First, “mod effects” include volume, pan, filter, phaser, talk, and saturate. You can modulate the parameters of these effects using the Rhythm panel on the Engine page. The other effects are the insert effects: pitch, dirt, motion, comp, tone, delay, and reverb.
Compatibility:
The library is available for Kontakt Player or Kontakt 5.8.1+, which works on Windows 7 and macOS 10.12 or higher, both 64-bit only. Kontakt comes in VST 2/3, AU, and AAX formats.
Summary:
A large number of presets makes Exhale enticing for sure. And its engine is quite versatile too. The sounds generated using this library are mostly either pad-like sounds or vocal loops and chops, both of which add life to any form of modern music.
Best Free Sound Design VST Plugins
1. Inear Display REGRESSIF (Sound Degrader)

REFRESSIF is a sound degradation plugin that uses bit crusher and sample rate reduction effects to smash the sound.
Essentially, it’s a low-fidelity plugin with a collection of digital distortion effects that transforms even basic sounds into digital noise. It has a filter section, two LFO modules (with seven waveforms), an LFO mix module, and a LOFI section with adjustable signal flow.
Key Features:
- Clean Interface
The resizeable GUI is simplistic and easy to use, with different color codes assigned to each module, which allows easy patch creation and tweaking of the built-in patches or presets. It uses an intuitive modulation routing paradigm using patch chords.
- Sound Engine
It has four analog-style filters, pre- and post-filter digital distortion, dry/wet control, 40 factory presets, and a randomizer option. The LoFi section can be connected in series or parallel and be assigned a ring modulation effect.
Compatibility:
REGRESSIF is available as a VST and AU plugin and has a minimum requirement of Mac OS 10.11 or higher and Windows 7 or higher.
Summary:
The plugin is great for creating heavy distortion and lofi effects on any sound to make it more destructive and chaotic, and can also be slightly mixed into any sound to give it more weight and to make it stand out.
2. Glitchmachines HYSTERESIS (Creative Glitch Delay)

Hysteria is a glitch delay plugin for creating artistic yet inhuman artifacts and stutters to any sound.
Different sections in the plugin are delay, stutter, filter, modulation effects, presets, and output. With this, we can create anything from a basic delay to robotic musical malfunctioning. It also has a RANDOM button to randomize the knobs in the plugin and create a new preset every time you click this button.
Key Features:
- Analog modeled lowpass filter
The filter section includes a lowpass filter with the floor knob to set the frequency, a mod knob to control the modulation going into the filter, a rate knob to adjust the modulation speed, and a resonance knob to set the resonance of the low pass filter.
- Delay
The delay can be synced and used as a ping pong (oscillating in left and right channels) delay, with a separate feedback knob to accentuate the effect further.
Compatibility:
Hysteresis is available as a VST3 and AU plugin with a minimum operating system requirement of Mac OS 10.14 and Windows 10.
Summary:
The plugin is great for creating glitch-hop music, hyper pop, punk, and other new-age grunge and electronic genres and for soundtrack scoring and game sound design of similar genres. It’s a straightforward and easy-to-use plugin with 60 presets to start with.
3. UJAM Finisher MICRO (Multi FX)
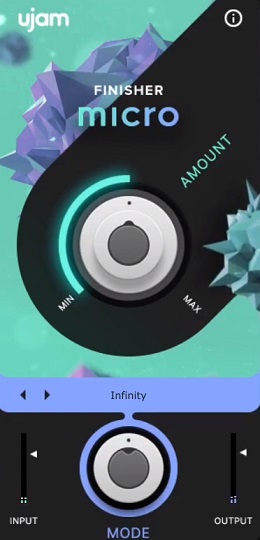
Micro is a multi-effects single knob sound design plugin for immediate inspiration.
It has 25 complex automated multi-effect chain modes linked to one knob for which we can change the amount. You can also adjust the modes. It could transform your sounds or stems into something different that you may not have predicted. Surprise is the ultimate selling point for this plugin.
Key Features:
- Quick Inspiration
The plugin allows you to readily audition different effects on your track, which is especially useful when you’re not sure what is it exactly your sound is missing. In that case, this plugin can give you some quick suggestions and act as the secret sauce in your mixing and production workflow.
- Cool effects
It also has some interesting effects: Big Hair, Cab & Room, SpaceGrinder, Old Radio, and more.
- Pretty interface
The GUI of the plugin cannot be any simpler, given it has just one knob to work with. On top of that, the plugin design is aesthetically pleasing and offers good eye candy.
Compatibility:
Available as a VST, AU 2, and AAX, the plugin requires a minimum of 4 GB RAM, 200 MB of hard disk space, and Windows (8 or 8+) or macOS 10.12 (or later versions).
Summary:
Micro can be good for changing the vibe when you’re bored or uninspired and given it is free and supplies boundless sonic variety; there’s no harm in adding it to your sound design toolkit.

The Integraudio Editorial Team consists of experienced music producers, audio engineers, and plugin enthusiasts dedicated to providing in-depth reviews and guides for music production software.