Ableton Live has become one of the most recognizable DAWs available. Though, there is not much about if it suits rock and metal bands.
Despite mostly being associated with electronic music, Ableton Live is a DAW with simple controls for recording and mixing all genres. It has an intuitive interface and plenty of fantastic stock plugins for achieving a heavier sound that is perfect for rock, metal, and everything in between.
If you have the necessary gear, you can easily record any band into Ableton and get a good result. And once you start mixing, you’ll have creative options that surpass similar tools in other digital audio workstations.
Why Is Ableton Live Great for Rock and Metal Bands?
Before diving into how you can use Ableton Live for recording and mixing rock and metal bands, let’s see some of the main reasons this is a great DAW for these artists.
Quick Workflow
The capacity to start working quickly is an important aspect of recording rock bands. So many ideas appear through improvisation and jamming, and a producer or engineer needs to capture the vibe without difficult routing set-ups. Ableton Live is really simple to configure and allows you to start recording in no time at all.
Amp Simulation
One of the best plugins on Ableton Live is the amp simulator. You can change the preset depending on whether you’re looking for a clean, bluesy, or heavy sound, with plenty of tones available in between. You can quickly pull up a distorted amp and let the riffs flow.

Plugin Groups
Creating groups of plugins on Ableton is so easy. For example, you can find the perfect guitar tone using the amp simulator, then add a few effects like delay, tremolo, or chorus. Or maybe you’ve created the perfect vocal chain with EQ, compression, and reverb. These All Postscan be grouped together so that you can swiftly add them to a new track or song without finding the individual parts again.

Take Lanes
One of the latest updates to Ableton Live is the chance to create take lanes. This fantastic addition allows you to record individual takes without creating or duplicating new tracks. You can lay down as many takes as you need, then comp them together quickly and easily.
How Do I Set Up Ableton Live for Recording?
We’ll look into the different ways you might want to use Ableton Live if you’re working with rock and metal bands. It can be used for recording, mixing, and as a live performance tool. Let’s start with recording.
Set Up Your Inputs and Outputs
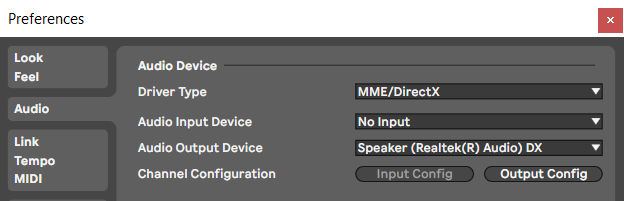
The first thing you’ll need to do to record using Ableton Live is to set up the inputs and outputs. This way, you can make sure your mics are picked up and recorded into their individual tracks, and you can listen back to what you’re recording with your speakers or headphones.
When you open the Preferences window, you will need to choose your driver type. The options here depend on whether you’re using your computer’s drivers or an external driver, like your audio interface. After making this selection, you can pick your inputs and outputs.
The last option in this section is the channel configuration, where you can enable or disable available channels. You get the option to choose between mono or stereo ins and outs. You can choose whichever suits your workflow best.
Set Up Your Sample Rate and Latency

Choosing a sample rate can depend on what your audio is going to be used for. For example, 44,100Hz is the standard rate for music that will be played via CDs, streaming, etc.; 48,000Hz works better for soundtracks that will be synced to film. Keep in mind that the higher the sample rate, the higher the pressure on your CPU.
Next up is the latency section. These controls will influence how short or long the delay is between your inputs and outputs. When a sound is recorded using a microphone, it isn’t played back instantaneously. It takes time to get through the cable into the interface, then through another cable to your speakers. The higher the latency, the more time it takes for you to listen back to the recorded sound.
For recording, you’re going to want a low latency level. This way, you and the musicians can hear what they are playing without any delays. However, when you get to mixing, you can set a higher latency level because you won’t be hearing two sounds simultaneously (live instrument and reproduced instrument through a mic).
Just like with the sample rate, latency affects your CPU. The lower the latency, the higher the processing.
Understand the Arrangement and Session Views

Ableton Live has two views: arrangement and session. The arrangement view gives you a visual representation of the sound waves, which is why it’s the best option for editing. The session view is more like a mixing desk. Here you can visualize the gain levels.
Both views allow you to change inputs, edit volume levels, panning, sends, and plenty more. They will both be useful throughout your process, so it’s important to understand them both as well as possible.
Start Recording
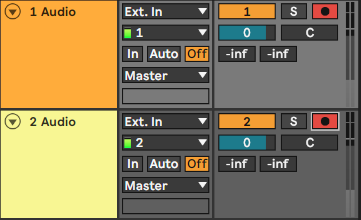
Once you’ve set up the inputs for each track, you can start recording. You just need to arm the track by clicking the arm recording button (⬤) on each one. You can choose to only have one armed track at a time or to arm multiple, so check the settings if you want this option enabled.
When the correct tracks are armed, you can start the recording with the record button at the top of the interface. The waveforms will start appearing on the arrangement view, and you can keep an eye on the gain levels using the meters on the session view.
Don’t forget that these are just the steps for using Ableton Live. You’ll need to set your gain levels, enable phantom power, set your output volume, etc., using your interface.
How Do I Use Ableton Live for Mixing?
Once you’ve recorded your tracks into Ableton, you can start editing, adding effects, and mixing the whole song.
Editing

As previously mentioned, the best window for editing is the arrangement view. Here, you can visualize the waveforms and cut them wherever needed. Two handy tools for editing large sections are the Insert Time and Delete Time options. These allow you to introduce or remove a certain number of measures, giving you space to add a new section or remove a whole section that you don’t want to include in the track.
At the bottom of the window, you will see another representation of the waveform. By opening this view, you can edit the sound itself. There are tools to modify the gain, pitch, and more. You can also quantize or warp the transient points for more precise timing or more creative results.
Adding Effects
On the left-hand side of the window, you have different instruments, samples, and effects for adding to your tracks. They are divided into categories for easier access. For example, check out the Drums category if you’re working with a band that wants to add drum loops. Maybe you’d like to add a synth to give the bass some more texture. You can do this from the Sounds or Instruments categories.
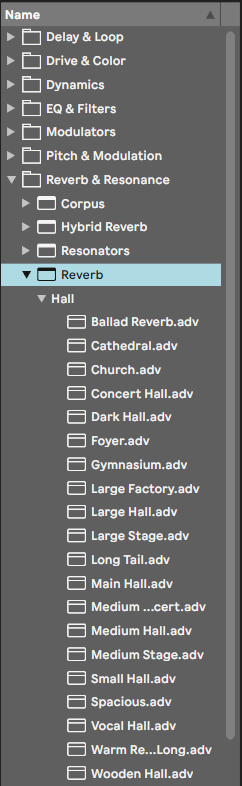
You also have access to a large number of audio effects. These are going to be important for achieving the sound you want. For example, if you’re recording guitars and bass using direct inputs instead of amplifiers, you can use the amp simulators included in Ableton. And if you’re using programmed drums, they’re going to need some grit and space. Using the stock saturators and reverbs can make them sound like they were recorded in a live room.
Mixing
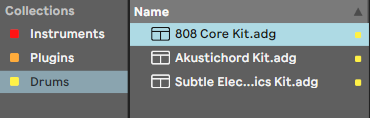
When you’re ready to start mixing, the audio effects category will have lots of useful tools. You have plenty of EQs, compressors, space processors, and more. You can save your favorite effects in the Collections area, as well as create presets for each plugin and save them. This will make your workflow more efficient, so you can focus on creative choices rather than searching for the tools you need.
You can install external plugins, for which you have a separate category. They can also be included in the Collections for more structured mixing. So, if you have a group of plugins you regularly use and enjoy, set them up inside Ableton. On the other hand, if you prefer to stick to stock plugins, you get a great variety that will give you the results you’re looking for.
How Do I Use Ableton Live for Live Performance?
Using computers for live performances has become very common, even for rock and metal bands. Using MIDI functions, you can program loops, samples, and even light shows. Ableton Live excels in this area, so here are some suggestions for using it as a live tool.
Create Scenes

The best way to use Ableton Live for performing is with the session view. Each track has a group of slots that you can fill with clips. A scene is a collection of clips placed in the same spots on each track.
For example: Track Alpha has Clip A and Clip B in slots 1 and 2; Track Beta has Clip X and Clip Y in slots 1 and 2. Scene 1 will play Clips A and X at the same time. Once you activate Scene 2, it will start playing Clips B and Y at the same time.
This way, you can lay out your scenes so they can be easily played in the order you prefer. Using scenes allows you to start playing clips that will boost your performance. For example, you can start a song with some atmospheric textures, then move on to a drum loop, and then all the players in the band can start their parts.
Use MIDI Controllers

MIDI controllers are the best way to use Ableton at its full potential. There are so many to choose from, including keyboards and drum pads. You can map all of the buttons within your DAW to the keys on your controller.
Nowadays, it’s very common for rock drummers to have an electronic pad set up with their drums so they can enable loops that run through Ableton. These loops or samples can heighten the overall experience of the concert.
In the top right-hand corner of Ableton, you’ll see a button that says MIDI. Click here to start mapping your controls. Choose a control that you want to link to your MIDI controller. For example, the Play Scene 1 button. Select this button, then press down on the key that you want to use to activate it. The information regarding the link will appear on the left side of the screen. You can see the note, path, and name of the function, as well as set minimum and maximum values for each control.
Create a Backing Band
With the advances in audio software, some bands don’t even need a “full” lineup on stage. And that includes rock and metal bands. Some groups might choose to only have drums, guitar, and vocals. Using Ableton, they can record backing tracks for bass, keys, or anything they want and then launch these recordings using their DAW.
Conclusion
Ableton Live is an incredible DAW that can be used for recording, mixing, and live performance. Of course, every digital audio workstation has its advantages and disadvantages, and there isn’t one that is perfect for every task. What’s important to know is that, despite being focused on electronic music, Ableton Live is a great choice for anyone who wants to record music. It’s intuitive, easy to use, and has a vast collection of creative tools.
Rock and metal musicians can use Ableton Live for making records, as well as for augmenting their concerts. There are plenty of effects for achieving a heavier sound and fantastic tools for launching samples or even backing tracks that can make a small band have the sound of a huge ensemble.

The Integraudio Editorial Team consists of experienced music producers, audio engineers, and plugin enthusiasts dedicated to providing in-depth reviews and guides for music production software.