

You can encounter unforeseen events such as signal noise, cracks during playback, or incompatibility problems with your interface. When these situations arise, remember that there is always a possible solution and that each difficulty can begin a new lesson to help you better interpret the devices with which you work.
The most common cause for an audio interface to buzz is due to the USB connection. While crackling problems most of the time are because the interface is working with a higher sample rate than your computer can process, giving rise to annoying interruptions.
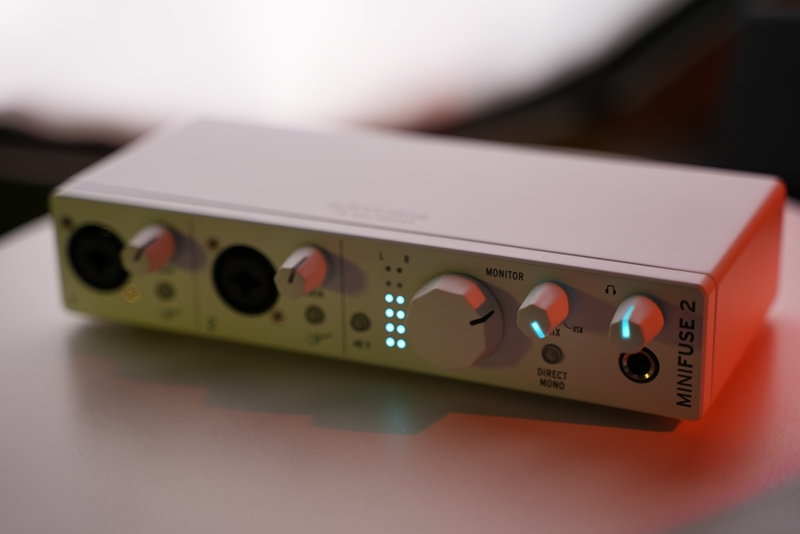
The most common way an audio interface transmits information to a computer is through a USB (universal serial bus) cable. In addition to being the link to exchange information, USB cable also acts as a power source for the interface.
This way, energy travels from the computer to the interface, making it work. At the same time, it returns to the computer as noise along with the information since exchange occurs within the same cable. This generates a constant buzzing, and although it is not perceived at low volume, it becomes more evident as you raise the gain of the interface.
On the other hand, cracklings often occur when your interface demands more information flow than your computer can process and deliver. Each interface has configuration options that allow you to adjust the sample rate and buffer size.
The higher the Sample rate, the lower the latency, which is beneficial for recording. At the same time, it will demand more capacity from your computer, generating interruptions and cracklings. So if you are using too many applications or have many plugins activated simultaneously, it is necessary to lower the sample rate so that the computer works without overload.
Another reason that can generate noise in the signal is the cables’ state or proximity to other electrical devices. A broken or bad cable is more likely to generate noise than one in perfect condition. In the same way, some electrical devices, when in operation, generate a magnetic field that the cables can pick up if they do not have the necessary insulation, generating noise in the signal.
Sometimes, USB hubs can also bring some complications by adding noise to the signal because not all hubs work perfectly with all DAWs. This is easy to check because if the buzzing disappears when removing the hub, it means this was the problem’s reason.
Depending on the model, some interfaces have better connectivity with USB 2.0 than USB 3.0 or 4.0. If you review the specifications of your interface and your computer, you will have a better overview of the connectivity of your devices.
Last but not least, updating your interface drivers will make it interact better with your computer’s operating system. Operating systems usually include optimization guides available on the manufacturer’s website that you can consult in case of compatibility errors or signal interference that you cannot correct.
How to Correct Interface Buzzing & Crackling?
A solution for this problem is to use a USB cable with two outputs, one for power to make the interface work and another to transmit the information to the computer without interference. While to solve cracklings, you can adjust the sample rate values that allow the computer to work optimally.
Some users have stated that this type of USB cable with two outputs is not easy to find on the market, so they choose to manufacture it manually, isolating the information cables from the power cables, achieving excellent results. You can find tutorials and more detailed information about this online.
It is important you know your computer’s capacity to determine the best sample rate and buffer size. The ideal point is where you can get the best performance from your interface and computer, without crackling problems and with reasonable latency. The greater the computer’s processing capacity, the easier it is to manage the desired parameters.
Varying the parameters depending on whether your session will be recording or mixing and mastering, can improve the performance of your computer. As a general rule, you will need low latency and moderate processing capacity for a recording session. While mixing and mastering, it will be key that your computer can handle high levels of processing, regardless of the level of latency. So, in that case, it is indicated to lower your interface’s sample rate temporarily.
Replace cables that are bad or have signs of picking up noise. The thickness and quality of the cables also determine what insulation treatment that cable has. If possible, avoid the cables passing directly near other devices that can generate an electric field that can cause interference in the signal of your interface.
If you’re experiencing incompatibility issues, optimizing your operating system by installing available updates may fix such issues. The same happens with the drivers of your interface. The more updated they are, the better your devices will interact with each other.
Improving your computer’s microprocessor, adding more RAM, and upgrading its components, in general, will always be beneficial when looking for a performance improvement. The same will happen concerning the quality of your interface. Sound processing requires high performance, so sometimes the best option is to replace devices that cannot handle this task.
How Can I Remove The Buzzing From my Tracks?
When you notice some unwanted noise or buzzing after recording your tracks, you can use a noise reduction plugin, change the equalization to remove presence, or even edit the track manually by removing the parts that only have noise and unwanted sounds.
There are many types of plugins intended to suppress background noise or hum, and while some may have additional options, most have the same parameters and act similarly. First, it is necessary to select a section of the track where there is only noise so that the software can identify it and later remove it from the track. You can adjust the reduction rate, attack, and release through the parameters.
Using a band EQ to identify the frequencies the buzzing is occupying can also be a good option in some situations. This way, you can dim the values that make it obvious and highlight the ones you want to keep on the track. Although this type of procedure can improve the quality of the track, it is not recommended to completely erase the noise in this way since you run the risk of affecting the original sounds of the recording as well.
Cleaning up the track by eliminating all the frequencies in the parts where there is silence will help even more so that buzzing or any other background noise is not perceived in the mix. This is done by selecting the empty areas and erasing them completely, carefully taking off only the spaces with no recorded sounds.
Another option to attenuate buzzing and to get good tracks, in general, is to record your instruments or vocals with a high gain level since this type of noise can only be heard when the track is at low volume or when it is quiet. In this way, you will make buzzing less noticeable and even imperceptible when the recorded sounds take their place in the mix.

Can The Daw I Use do More Cracklings Than Other Daws?
Some Daws, like Pro Tools or Cubase, use more resources than others because they have so many features. But although Reaper and FL Studio are among the DAWs that use the least resources on your computer, this can vary with the project size you are working on.
Most of the professional quality Daws available have the same processing tools. Although some are more used than others or indicated for certain situations, there are no great differences between the final results you can achieve through them.
Together with the interface and the computer, the DAW is another of the most important pieces in music production, so it must fulfill all the functions required to work with sounds comfortably. Cubase, Ableton, Audacity, Pro Tools, FL Studio, and Reaper are some of the most popular DAWs. Although they share general characteristics, some of them are more used in specific situations.
Audacity / Garage Band
Audacity is one of the most recommended for those starting in music production since it has the basic functions that any DAW needs without being too complex, and it is also completely free. Although it is not considered a professional DAW, if you do not have any experience, it will help you to introduce yourself and begin to understand the world of recording and music production.
On the other hand, Garage Band is a DAW created by Apple, and it is free for all Mac users. Although it includes a few more functions than Audacity, it is also a great option for users that are making their first steps in music production. Through it, you can achieve results that are very close to a professional level.
Fruity Loops Studio
FL Studio, developed by Image-Line, is a DAW with all the functions that a professional workstation needs but undoubtedly puts its greatest emphasis on the comfort of creating beats. It has a very intuitive and easy-to-configure sequencer. It has an expansive library of samples that include instruments, voices, and sounds of all kinds and a wide collection of plugins, which makes it the first choice for beatmakers, hip-hop productions, and DJs when making music. Visually it is one of the most successful DAWs.
Ableton Live
As its name indicates, this DAW is specially designed for live performances. Regarding the quality of tools, it has nothing to envy any other professional DAW, which is why it is also used in studio recordings and music production. But without a doubt, its interface’s layout and facilities make its best performance appreciated live through sequencers or midi controllers.
Pro Tools / Cubase / Logic Pro / Reaper
This series of DAWs encompasses the most traditional options designed for both home studios and more professional studios. Pro Tools is one of the standard options in recording studios and is most used by the music industry. It takes a little longer to master than other DAWs due to its complexity, but the quality of its work is remarkable. It includes a free version with some reduced functions concerning the original called Pro Tools First.
Cubase Pro is one of the first DAWs to hit the market. At first, it only had a MIDI editor function, but over time it incorporated all the necessary functions to be one of the most used options in recording studios today.
Logic Pro is a DAW released by Apple, and it is, in a way, the advanced version of Garage Band. It offers great versatility, is intuitive, and has extensive sample library and plugin options. Regarding MIDI and audio editing, it offers the facilities of any professional DAW.
Reaper is another excellent DAW option for traditional recording studios, offering many editing and mixing possibilities. It is easy to start operating at a beginner level, and at the same time, it has all the tools that a home studio or a professional recording studio may need. Unlike other DAWs, its free license does not expire, so you can use the trial period for as long as you consider necessary.
Which Audio Interface is Better For a Home Studio?
A two-channel interface is enough if you intend to record one or two instruments simultaneously, record podcasts, or mix and master sound. If, instead, you intend to record a whole band, drums, or many instruments at once, you will need an interface with more channels.
Another thing that you should take into account is the budget you have. An interface with four or eight channels will always be more expensive than one with only one or two. The important thing is not to have as many recording channels as possible but rather that the interface be functional to your needs.
Regarding sound quality, an interface with many channels will not necessarily offer better quality than one with few channels. The difference in quality will be reflected in the components with which the interface was manufactured, so it will be more important to consider the brand. Focusrite, Pre Sonus, Apogee, Universal Audio, Behringer, M-Audio, and Audient, are some manufacturers that offer home studio interfaces with professional audio quality and affordable price options.
On the other hand, your computer must have the necessary capacity to work with a wide flow of information. Suppose you have an interface with many channels and intend to use them simultaneously, but your computer cannot process all the information that this requires. In that case, you will have difficulties that can be reflected in losing information from the tracks you are trying to record.

Conclusion
There are many reasons why your interface may be generating buzzing and crackling, and in fact, it frequently happens, so you shouldn’t be concerned. Most technical difficulties are solvable, and the solution is often simple and quick.
The better you know your equipment, its functions, and its physical parts, the easier it will be for you to find the solution to any inconvenience. Keeping in mind that your computer plays a fundamental role in the recording and music production process will help you understand that even if you have the best and most expensive audio interface possible, it can’t work on its own. It will always need the computer to work efficiently.
Always consciously choose both the software and the hardware you will work with, considering your specific needs and the results you want to achieve. This way, it will be much easier for you to make the right choices and make everything work properly. I hope this article is very helpful to you. Thanks for your time!

I am a composer, session musician and producer based in Argentina, with more than 20 years of experience in music. I play guitar, bass, keyboards and sax, I was part of different projects and I am familiar with musical genres like rock, pop, soul, reggae, funk, r&b, cumbia and others. Read more..